


6
CHARGING PROCEDURE
THE BATTERIES IN YOUR TOOL
ARE NOT FULLY CHARGED AT THE
FACTORY. BEFORE ATTEMPTING TO
CHARGE THEM, THOROUGHLY READ
ALL OF THE SAFETY INSTRUCTIONS.
To charge your tool, follow the steps below.
1. Plug the charger (7) into any standard
120 Volt, 60 Hz electrical outlet.
NOTE: This tool is equipped with a micro
USB port. It can be charged by other USB
compliant products. This will require a
cable not supplied by
BLACK+DECKER
.
WARNING: Fire Hazard. Ensure the
cable (Micro USB) and power source are
USB compliant.
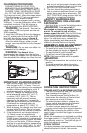
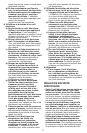
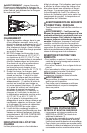
2. Insert the USB plug (8) into the charging
port (6), making sure to line up the USB
plug with the port as shown in figure B.
3. Let the tool charge initially for 4 hours.
After the initial charge, under normal
usage, your tool should be fully charged
in 4 hours.
WARNING: Do not use tool while it is
connected to the charger.
WARNING: Fire Hazard. When
disconnecting the charger from the tool, be
sure to unplug the charger from the outlet first,
then disconnect the charger cord from the tool.
IMPORTANT CHARGING NOTES
1. After normal usage, your tool should be
fully charged in
2.5 - 3 hours
. Your tool
was sent from the factory in an uncharged
condition. Before attempting to use it, it
must be charged for at least 9 hours.
2. DO NOT charge the batteries in an
air temperature below 40°F (4,5° C)
or above 105°F (40,5 °C). This is
important and will prevent serious
damage to the batteries. Longest life
and best performance can be obtained
if batteries are charged when air
temperature is about 75°F (23,8° C).
3. While charging, the charger may hum and
become warm to touch. This is a normal
condition and does not indicate a problem.
4. If the batteries do not charge properly—
(1) Check current at receptacle by
plugging in a lamp or other appliance. (2)
Check to see if receptacle is connected to
a light switch which turns power off when
you turn out the lights. (3) Move charger
and tool to a surrounding air temperature
of 40°F (4,5° C) to 105°F (40,5° C). (4) If
the receptacle and temperature are OK,
and you do not get proper charging, take
or send the tool and charger to your local
BLACK+DECKER
service center.
5. The tool should be recharged when it
fails to produce sufficient power on jobs
which were easily done previously. DO
NOT CONTINUE using product with its
batteries in a depleted condition.
SAFETY WARNINGS AND
INSTRUCTIONS: DRILLING AND
FASTENING
• Hold tool firmly to control its twisting action.
WARNING: Tool may stall (if
overloaded or improperly used) causing
a twist. To reduce the risk of injury
always expect the stall. Grip the tool firmly
to control the twisting action and prevent
loss of control which could cause personal
injury. If a stall does occur, release the
trigger immediately and determine the
reason for the stall before re-starting.
ASSEMBLY AND ADJUSTMENT
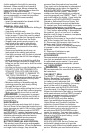
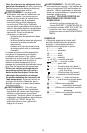
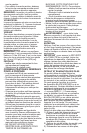
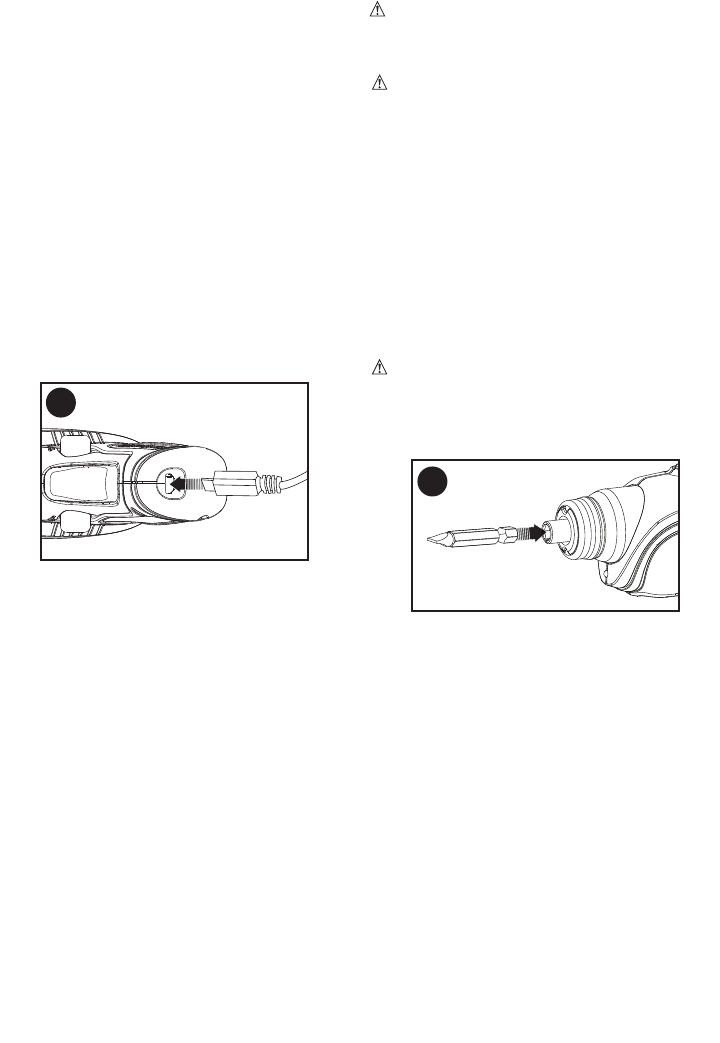
INSERTING AND REMOVING BITS
• To install a bit, insert it into the cavity in
the hex spindle as shown in figure C.
• To remove the bit, pull it straight out.
• For bit tips, use a bit tip extender.
NOTE: Only hex end bits will fit in spindle
WARNING:
• Do not use screwdriver as a pry bar in any
position.
• To avoid screwdriver being turned on
accidentally, do not cary in your pocket.
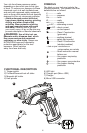
OPERATING INSTRUCTIONS
TRIGGER SWITCH & REVERSING BUTTON
• The drill is turned ON and OFF by pulling
and releasing the trigger (1).
• The forward/reverse control button (2)
determines the direction of the tool and
also serves as a lock off button.
• To select forward rotation, release the
trigger switch and depress the forward/
reverse control button to the left.
• To select reverse, depress the forward/
reverse control button the opposite direction.
NOTE: When changing the position of the
control button, be sure the trigger is released.
LED LIGHT
When the screwdriver is activated by pulling
the trigger switch (1), the LED light (5) will
automatically come on. The light will go off
when the trigger is released.
SCREW DRIVING
For driving fasteners, the foward/reverse button
should be pushed to the left. Use reverse
C
B