


1
8
9
FIG. 16
2
FIG. 17
FIG. 18
34
.
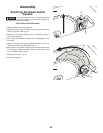
Adjustments
Adjusting 0 and 45
Degree Positive Stops
Your saw is equipped with positive stops for fast and accurate
p
ositioning of the saw blade at 90 and 45 degrees to the table.
To prevent personal injury, always disconnect
plug from power source when making
a
djustments.
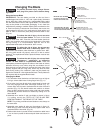
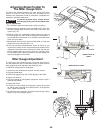
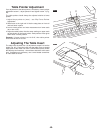
1. Turn elevation wheel 2 clockwise and raise blade to maximum
height (Fig. 16).
Adjusting 0 Degree Positive Stop:
2. Loosen the blade tilt lock handle 1 and push the elevation
wheel
2 to the left as far as possible and tighten the blade tilt
lock handle
1 (Fig. 16).
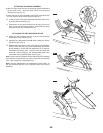
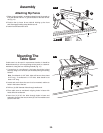
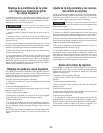
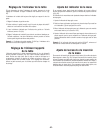
3. Place a combination square on the table with one end of square
against the blade as shown (Fig. 17), and check to see if the
blade is 90 degrees to the table. If the blade is not 90 degrees to
the table, loosen the blade tilt lock handle
1, loosen 90 degree
adjustment screw
4, loosen 90 degree bevel stop cam 5 and
push the elevation wheel until the blade is 90 degrees to the
table.
4. Tighten blade tilt lock handle
1, rotate the bevel stop cam 5 until
it touches the bevel stop housing
7, then tighten 90 degree
adjustment screw
3 .
5. Loosen adjustment screw
6 and adjust pointer 3 to indicate 0
degrees on the bevel scale.
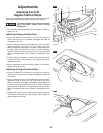
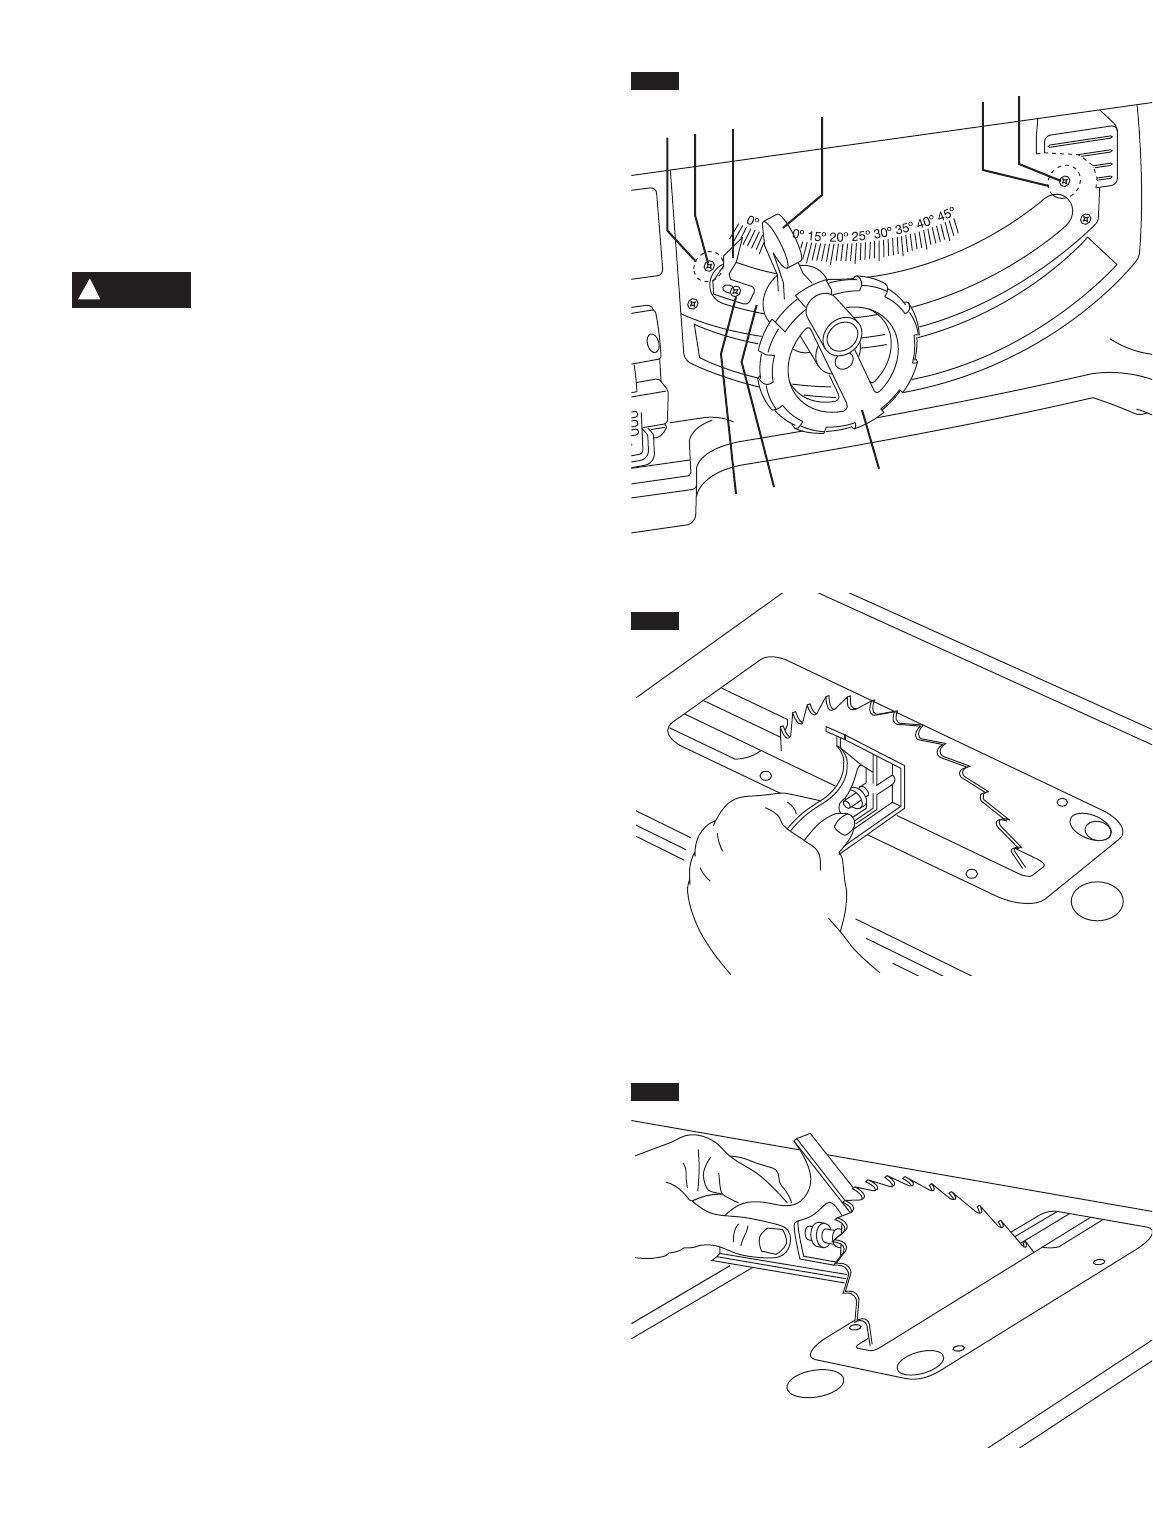
Adjusting 45 Degree Positive Stop:
6. Loosen the blade tilt lock handle 1 and push the elevation
wheel
2 to the right as far as possible and tighten the blade tilt
lock handle
1.
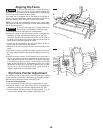
7. Place a combination square on the table with one end of square
against the blade as shown (Fig. 18), and check to see if the
blade is 45 degrees to the table. If the blade is not 45 degrees to
the table, loosen the blade tilt lock handle
1, loosen 45 degree
adjustment screw
8, loosen 45 degree bevel stop cam 9 and
push the elevation wheel until the blade is 45 degrees to the
table.
8. Tighten blade tilt lock handle 1, rotate the 45 degree bevel stop
cam
9 until it touches the bevel stop housing 7, then tighten 45
degree adjustment screw
8.
4
3
6
5
7
W
ARNING
!