


48.
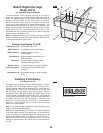
Bosch Digital Carriage
Model DC010
(
On Table Saw Model 4100DG-09)
T
he Bosch Model DC010 Digital Carriage is a precision
measuring accessory that is used with the 4100 table saw’s rip
fence. The digital carriage will accurately display the distance
b
etween the saw’s blade and the working side of the fence
before the operator makes a rip cut. The display can be set to
show inch (3 mode variations) or metric measurements. The
d
igital information displayed on the carriage is in addition to the
analog measurements seen where the fence pointer or table
pointer refers to the inch scale on the table saw’s front rail. The
4
100 table saw can be preset to make rip cuts without using the
digital carriage – see pages 50-55
Note: This digital carriage is only used when making rip cuts and
should be placed in the left most “parking position” when the saw
is used for making other types of cuts.
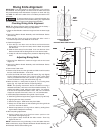
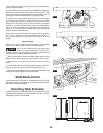
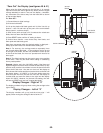
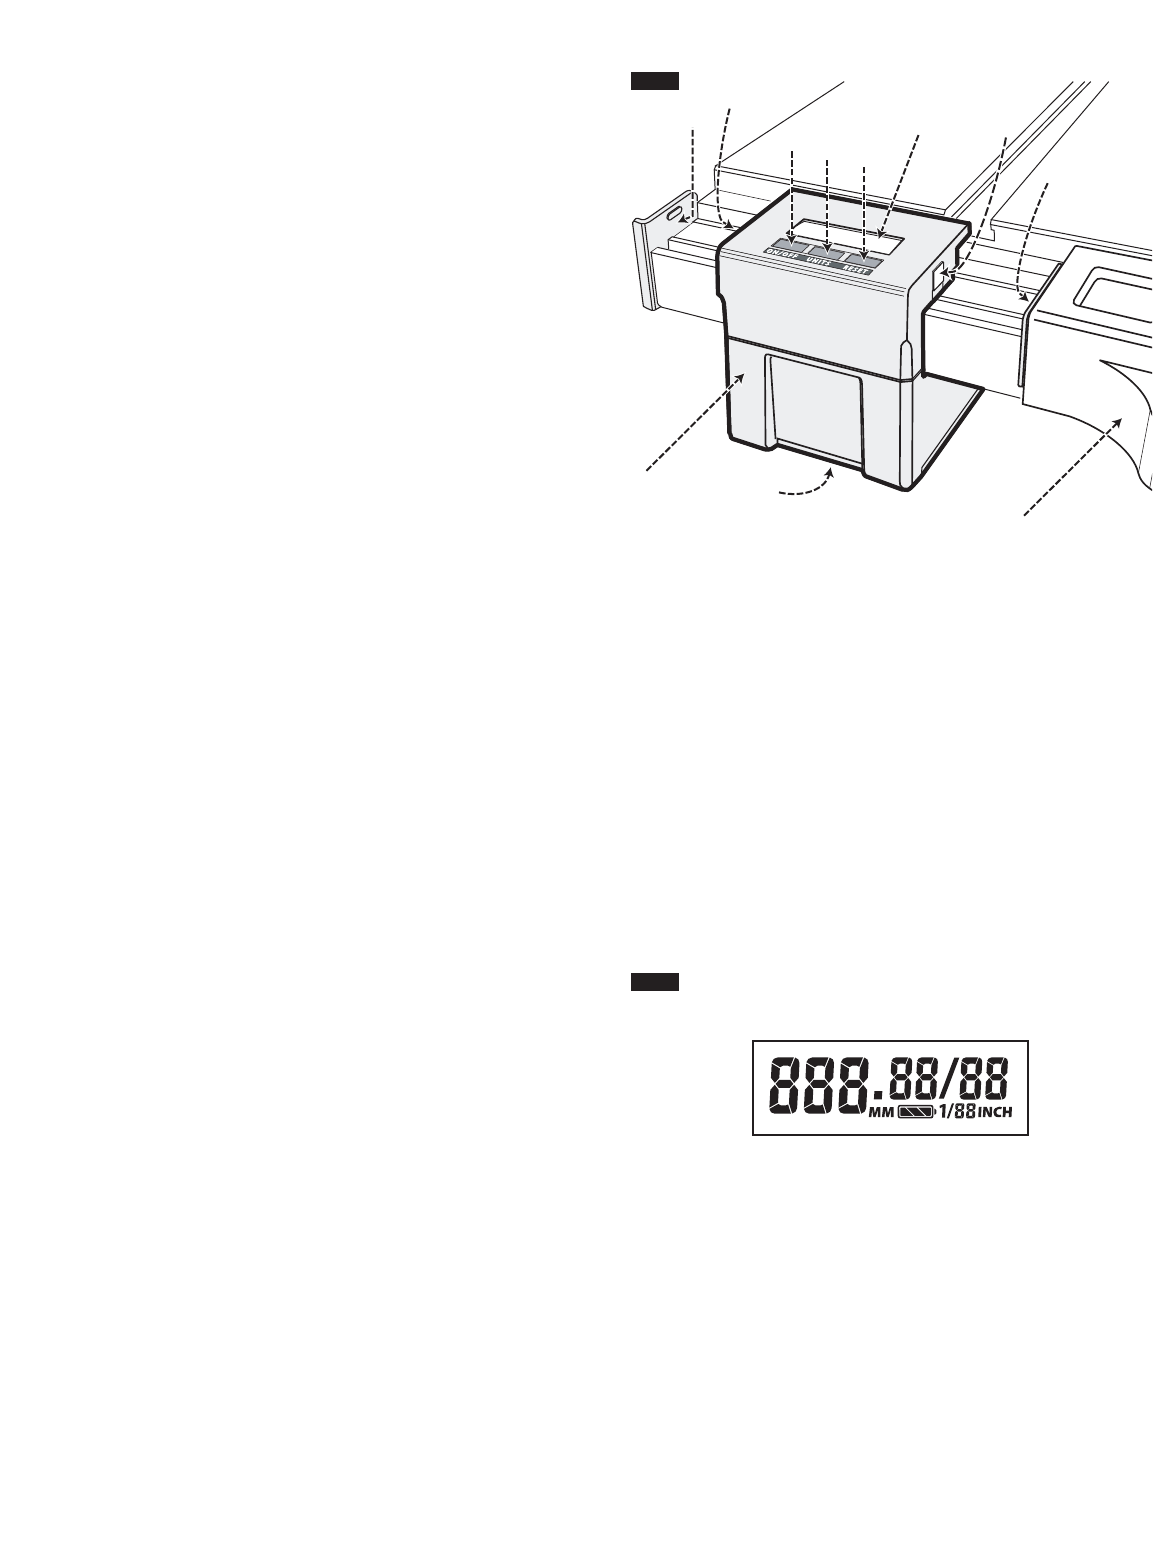
Features (see figures 37 & 38)
ON/OFF button 2: turns display ON or OFF.
UNITS button 3: sets display’s unit of measurement.
RESET button 4: resets the display to a zero
measurement.
LCD Display 5: displays digital measurements and
battery condition.
Magnets 6: connects digital carriage to side of
fence
9 or parking plate 10.
Battery cover 7: (not shown) opens to access 9V battery.
Connector plate 8: connects saw’s rip fence 9 to digital
carriage
1.
Parking plate 10: holds digital carriage 1 when not being
used.
2
3
4
5
6
8
10
6
1
9
7
FIG. 37
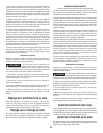
Installing 9 Volt Battery
(see figures 37 & 38)
The digital carriage includes a 9 Volt Alkaline Battery – remove
the battery from its package. Slide the digital carriage to the
“parking position” where the left magnet
6 is in contact with the
parking plate
10. Position the 4100 table saw on its side and
with the digital carriage resting on the parking plate. Using a
screwdriver, loosen the screw holding the battery cover
7 (not
shown) located on the bottom. Remove the cover - the loosened
screw should remain with the cover. Pull out the wires with the 9
volt battery connector with snap on endings – connect to new
battery by firmly pressing the connector on to the battery
terminals. Put the battery into its container and screw the
battery cover back in place.
Note 1: The digital carriage is designed to work best when using
a high quality 9 Volt Alkaline Battery.
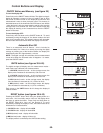
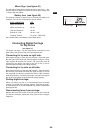
Note 2: Only when installing a new battery, all graphic segments
in the LCD display will turn on (a display test ) for a short period
of time (5 seconds), and then the display will change to the 1/16
INCH mode (default mode). The display can be turned off by
following the ON/OFF button instructions below or just do
nothing for approximately one minute and it will automatically
turn off.
DISPLAY TEST
FIG. 38