


SKU 91511 PAGE 14
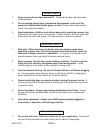
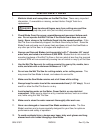
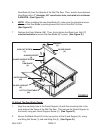
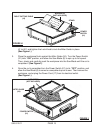
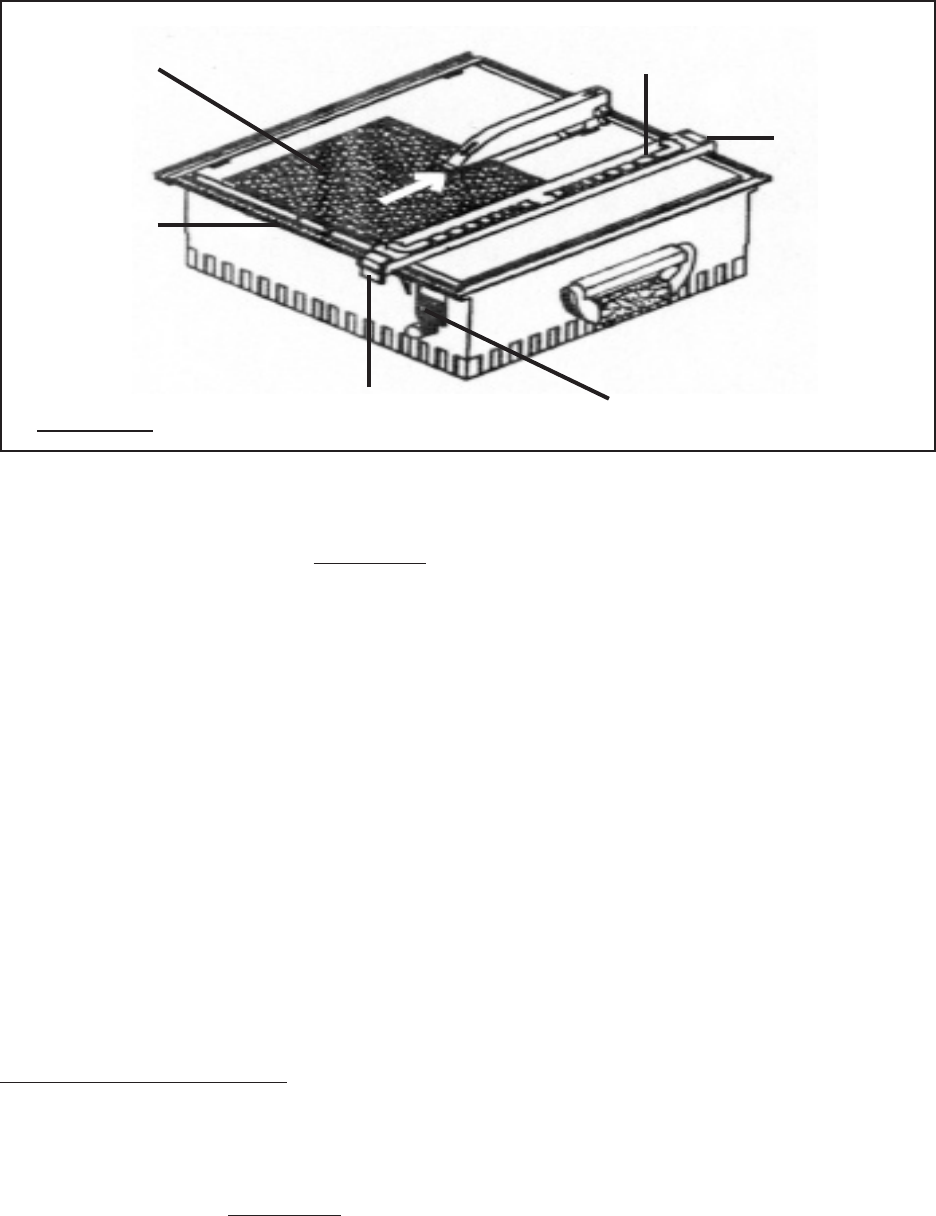
FIGURE G
WORKPIECE
(NOT INCLUDED)
FENCE
(11)
FENCE SCALE
FENCE LEVER
FENCE LEVER
POWER SWITCH
(21)
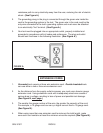
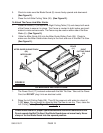
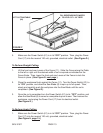
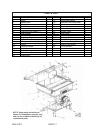
2. Raise the Right Cutting Table (10) to the desired angle of cut (i.e., 15°, 30°, 45°,
or 60° ). (See Figure next page.)
3. Place the two Stands underneath the Right Cutting Table (10) into the grooves to
hold the Cutting Table in position. (See Figure H.)
4. Place the workpiece finished side down onto the Right Cutting Table (10).
(See Figure H.)
5. Turn the Power Switch (21) to its “ON” position, and allow the Saw Blade (6) to
spin up to full speed. Then, slowly and carefully push the workpiece into the Saw
Blade until the cut is completed. (See Figure H.)
6. Once the cut is completed turn the Power Switch (21) to its “OFF” position, and
allow the Saw Blade (6) to come to a complete stop on its own. Then remove the
workpiece, and unplug the Power Cord (17) from its electrical outlet.
(See Figure H.)
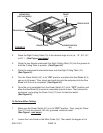
To Perform Miter Cutting:
1. Make sure the Power Switch (21) is in its “OFF” position. Then, plug the Power
Cord (17) into the nearest 120 volt, grounded, electrical outlet.
(See Figure I, next page.)
2. Loosen the Lock Knob on the Miter Guide (24). Then select the degree of cut