


Crestron DIN-1DIMU4 DIN Rail Universal Dimmer
NOTE: When installing in an enclosure, high-voltage devices should be
grouped separately from low-voltage devices.
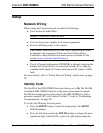
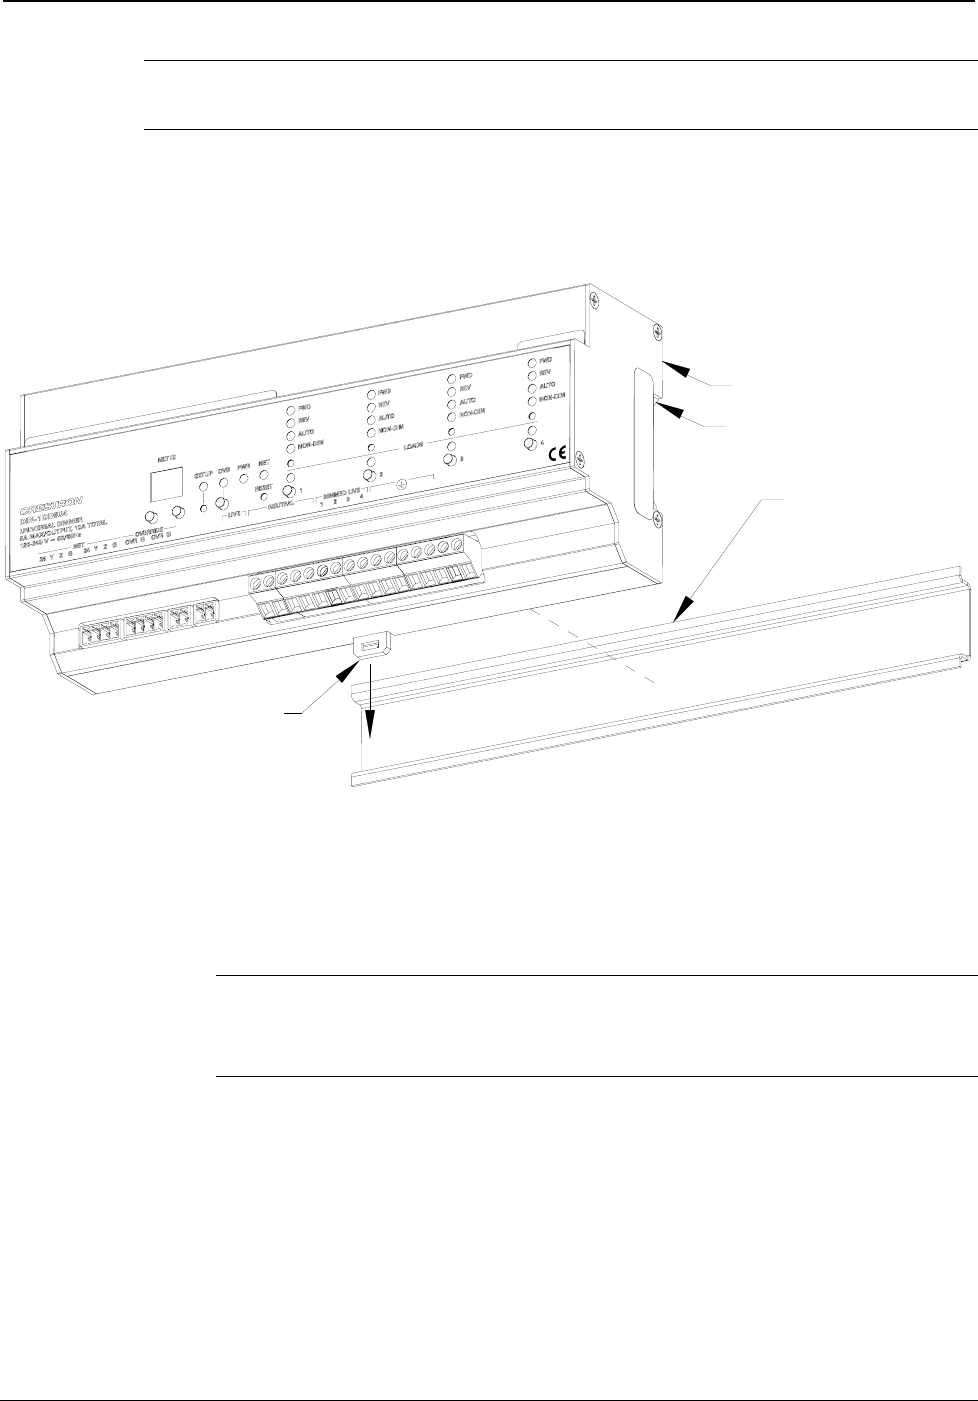
The DIN-1DIMU4 is designed for installation on a DIN rail. Refer to the
following diagram when installing.
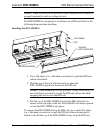
Installing the DIN-1DIMU4
DIN RAIL RELEASE
DIN RAIL
(NOT SUPPLIED)
DIN-1DIMU4
TOP
1. Use a flat object (i.e. a flat-head screwdriver) to pull the DIN rail
release downward.
2. With the top of the unit tilted toward you, place the
DIN-1DIMU4 against the bottom of the DIN rail.
NOTE: When mounting DIN rail products, it may be necessary to
use a flat-head screwdriver to pull the DIN rail release tab while
snapping the device onto the DIN rail.
3. Tilt the top of the DIN-1DIMU4 toward the DIN rail until it is
secure on the top edge of the rail. Push the DIN rail release upward
to lock the DIN-1DIMU4 into place.
To remove the DIN-1DIMU4 from the DIN rail, use a small, flat object
(i.e. a flat-head screwdriver) to pull the DIN rail release downward to
unlock it and tilt the top of the DIN-1DIMU4 away from the DIN rail.
Operations & Installation Guide – DOC. 6668A DIN Rail Universal Dimmer: DIN-1DIMU4 • 15