


English
8
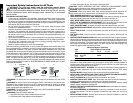
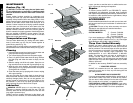
3. Pull up the on/off switch (A) to turn the saw on. Wait
until the stream of water from the water pump com-
pletely covers the cutting wheel.
NOTE: Cutting tile without water will damage the cut-
ting wheel.
4. Ease the cutting cart toward the cutting wheel then
slowly feed the tile into the cutting wheel. Continue
pushing until the cutting wheel cuts completely through
the tile.
4. Turn the saw off by pushing the on/off switch (A) down.
5. After the cutting wheel stops, remove the tile from the
cutting cart.
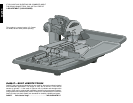
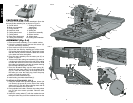
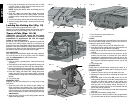
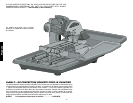
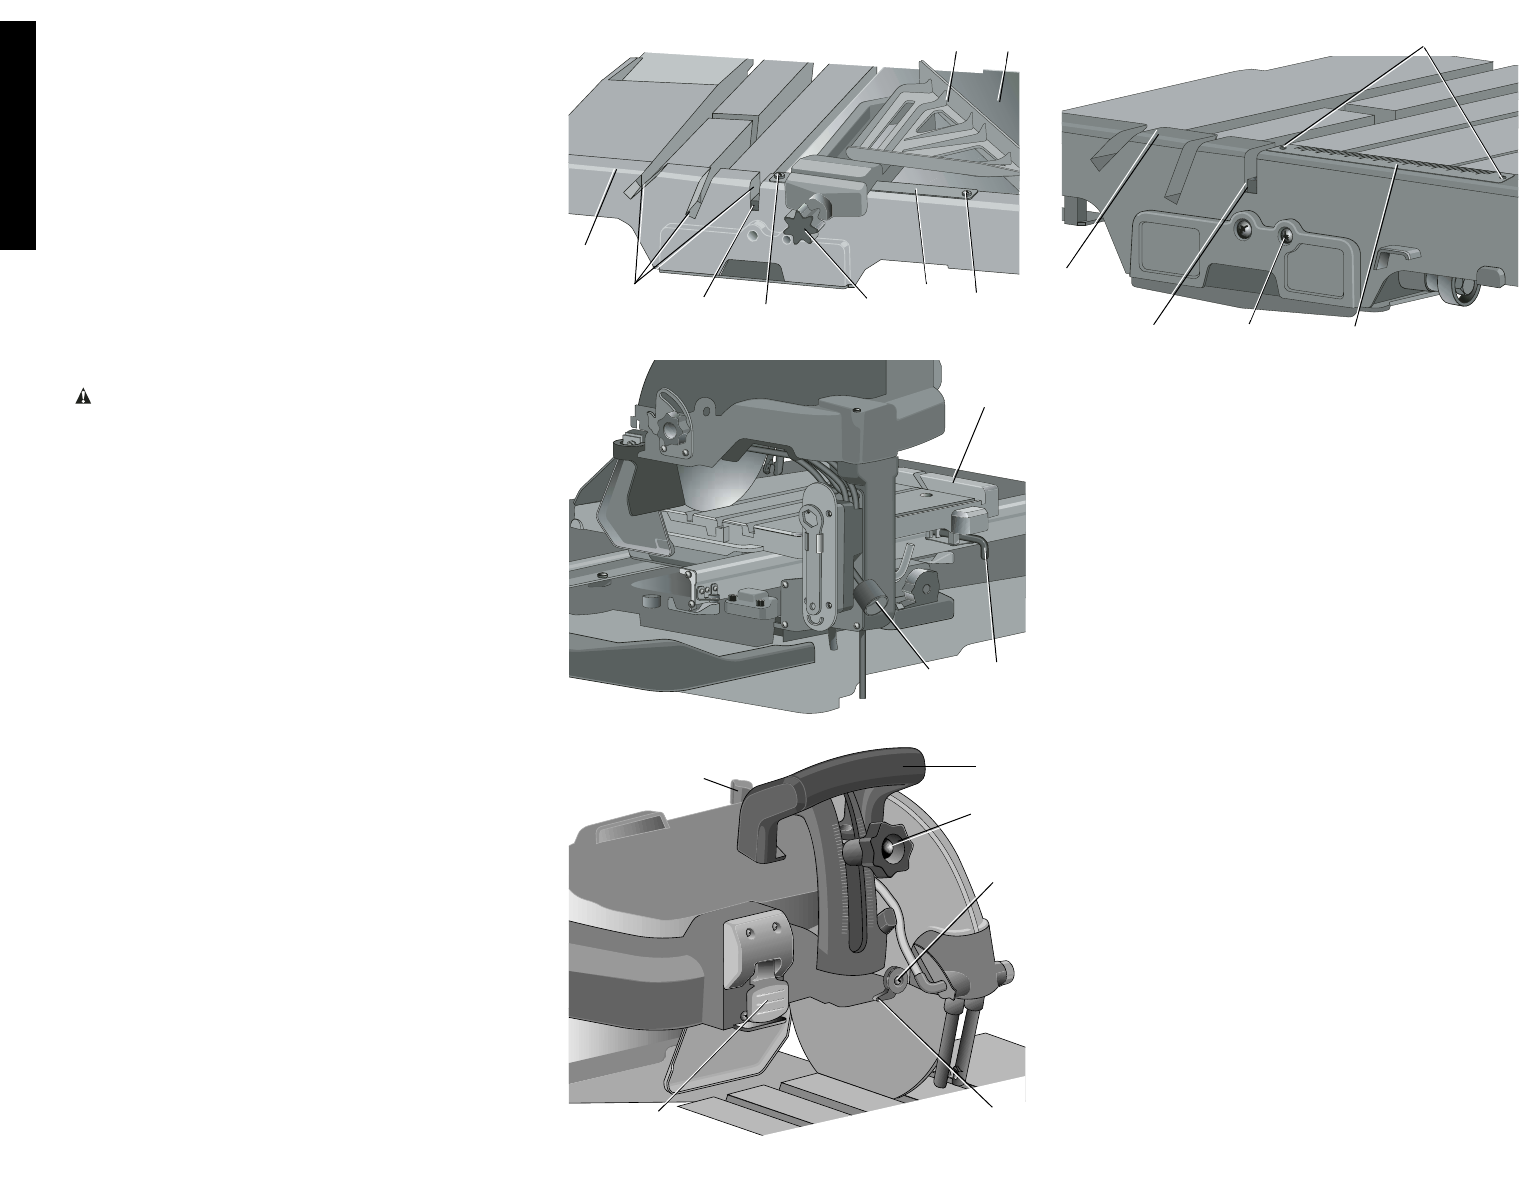
Locking the Cutting Cart (Fig. 13)
There are three locking positions for the cart.
Move the cart to the desired position and lock the cart by
rotating the pin (Z) and pushing it into a hole in the rail.
Types of Cuts (Figs. 12–15)
CAUTION: Turn off and unplug the tool before
making any adjustments or removing or installing
attachments or accessories. Be sure the trigger
switch is in the OFF position.
Always do a dry or practice run to acquaint yourself with
the path of the cutting wheel. Practice on a scrap tile to
ensure that you are comfortable with the feel of the cutting
operation. Push the cart past the cutting wheel before turn-
ing the saw on. Make sure the cutting wheel is adjusted to
the center of the groove and to the proper height.
CUT INDICATOR
After setting the cutting wheel depth and doing a practice
run, turn the saw on to cut a groove in the cut indicator
(AA). See Adjustments for further information.
STRAIGHT CUTS
1. Using a marker or grease pencil, mark the area to be
cut on tile.
2. Place the tile on the cutting cart against the cutting cart
fence (X) and align your mark with the cutting wheel.
3. Pull the on/off switch up to turn the saw on and wait for
the cutting wheel to be completely covered with water.
4. Ease the cutting cart toward the cutting wheel then
slowly feed the tile into the cutting wheel. Continue
pushing until the cutting wheel cuts completely through
the tile.
5. Turn off the saw.
DIAGONAL CUTS
Diagonal cuts are also referred to as “long point to long
point cuts.”
1. Align the point of the tile closest to the cutting cart
fence (X) with the cut indicator (AA). The cut indicator
signifies the exact location where the cutting wheel will
exit the cutting cart in the fence. Note that the cut indi-
cator will need to be cut when first using the saw (see
Adjustments).
2. Align the front of the tile to the cutting wheel and hold
against the edge guide.
AA
FIG. 15
NN
FF
EE
X
D
BB
A
C
LL
FIG. 14
X
Q
FIG. 13
FIG. 12
Y
AA
W
J
X
EE
FF
EE
Z
DD
H
3. Turn the saw on and make the cut.
4. Turn off the saw.
L-CUTS
An L-cut is a section that is removed from of a piece of tile
and is used when cutting a piece of tile to fit in a corner of
a cabinet or piece of trim molding.
1. Outline the area to be cut on both sides of the tile.
2. Align the tile to the cutting cart fence and make the cut
far enough into the tile without overcutting.
3. Make a cut on the other mark on the tile without over-
cutting.
4. Turn the tile over and make the cut along one of the
outlines, but this time an overcut can occur without
damaging the exposed surface of the tile due to the
radius of the cutting wheel. Overcut the other line and
the cut piece should be separate from the rest of the
tile.
5. Turn off the saw.
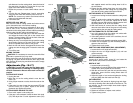
PLUNGE CUTS
Plunge cuts are utilized when removing the center of a
piece of tile for electrical outlets and for making cuts for air
conditioner registers.
1. Outline the area to be cut on both sides of the tile.
2. Release the cutting head by loosening the head lock
knob (D).
3. Adjust the depth of cut knob (BB) in the rear of the
cutting wheel guard to prevent the cutting wheel from
traveling too deep and cutting into the cutting cart.
Always do a dry or practice run to acquaint yourself
with the path of the cutting wheel. Practice on a
scrap tile to ensure that you are comfortable with the
feel of the cutting operation.
4. Place the tile on the cutting cart with the finished side
facing up.
5. Align the mark with the cutting wheel.
6. Turn the saw on. With one hand on the plunge handle
(C) and one hand on the tile, keeping both hands at a