


1111
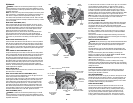
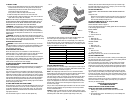
CUTTING LARGE MATERIAL
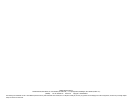
Occasionally you will encounter a piece of wood a little too large to fit
beneath the blade guard. If this occurs, simply place your right thumb on
the upper side of the guard and roll the guard up just enough to clear the
workpiece, as shown in Figure 23. Avoid doing this as much as possible,
but if need be, the saw will operate properly and make the bigger cut.
NEVER TIE, TAPE, OR OTHERWISE HOLD THE GUARD OPEN WHEN
OPERATING THIS SAW.
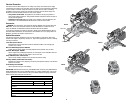
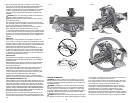
SPECIAL SET-UP FOR WIDE CROSSCUTS
Your saw can cut very wide [up to 391 mm (15.4")] workpieces when
a special set up is used. To set the saw up for these workpieces, follow
these steps:
1. Remove both left and right sliding fences from the saw and set
aside. To remove them, unscrew the fence capturing screws and the
fence knobs several turns and slide each fence outward. Adjust and
lock the miter control so that it is at 0 degrees miter.
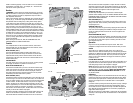
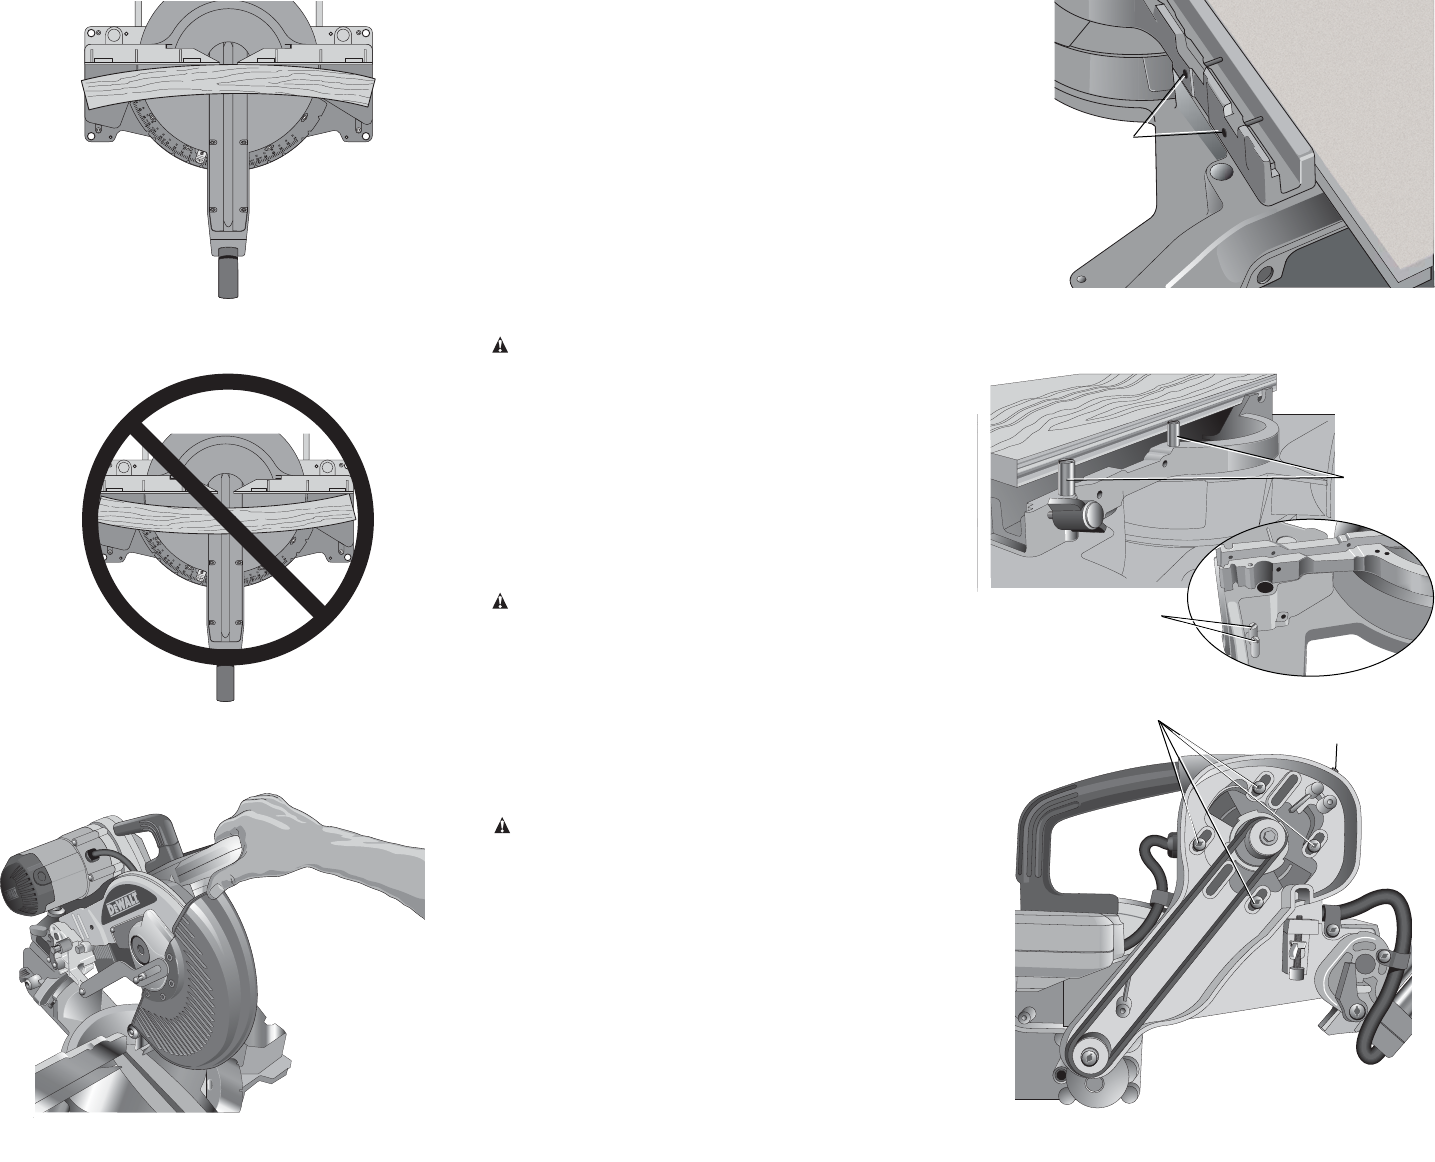
2. Remove backfence screws from right rear foot and install them into
the right hand fence screw holes (Fig. 25).
WARNING: Do not cut material using the special setup without
properly installing the backfence screws, otherwise the material will not
be supported properly and may cause loss of control and possible injury.
3. Make a platform using a piece of 38 mm (1.5") thick particleboard
or similar flat strong 38 mm (1.5") thick wood to the dimensions:
368 x 660 mm (14.5" x 26"). The platform must be flat otherwise
the material could move during cutting and cause injury.
4. Mount the 368 x 660 mm (14.5" x 26") platform to the saw using
4 three-inch long wood screws through the holes in the base fence
(Fig. 24). Four screws must be used to properly secure the material.
When the special set up is used, the platform will be cut into two
pieces. Ensure the screws are tightened properly otherwise material
could loosen and cause injury. Ensure the platform is firmly flat on
the table, against the fence, and centered evenly from left to right.
WARNING: Ensure the saw is mounted firmly to a stable flat surface.
Failure to do so could cause the saw to be unstable and fall causing
personal injury.
5. Place the workpiece to be cut on top of the platform mounted to the
table. Ensure the workpiece is firmly against the backfence screws
(Fig. 25).
6. Secure the material before cutting. Cut slowly through the material
using a out-down-and-back motion. Failure to clamp securely or cut
slowly could result in the material coming loose and causing injury.
After several cuts are made at various miter angles other than 0º, the
platform may weaken and not properly support the work. Install a new,
unused platform to the saw after presetting the desired miter angle.
CAUTION: Continued use of a platform with several kerfs may cause
loss of material control and possible injury.
Removing and Replacing Belt
The belt is designed to last the life of the tool. However, abuse of the tool
could cause the belt to fail.
If the blade does not turn when the motor is running, the belt has failed. To
inspect or replace the belt, remove the belt cover screws. Remove the belt
cover. Inspect the ribs of the belt for wear or failure. Check belt tension by
squeezing the belt as shown in Figure 26. The belt halves should almost
touch when squeezing firmly with the thumb and index finger. To adjust the
tension, loosen, but do not remove, the four Phillips head screws shown.
Then rotate the set screw on the top of the motor plate casting until the
proper tension is achieved. Tighten the four screws securely and replace
the belt cover.
NOTE: Over tightening the belt will cause premature motor failure.
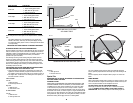
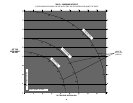
FIG. 21
RIGHT
FIG. 22
WRONG
FIG. 23
FIG. 24
SCREWS
(two each side)
SET SCREW
SCREWS
FIG. 26
FIG. 25
BACK FENCE
SCREWS
BACK FENCE SCREWS
SHOWN STORED