


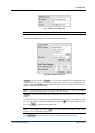


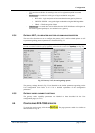

Configuration
1. Click
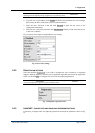
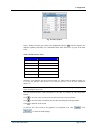
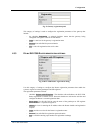
2. Select a condition (Busy, No answer, Unreachable, Unconditional) that will cause call
forward using the combo box in the column Fwd Condition
3. If the forward rule being configured applies to a particular calling number only, type the
necessary calling number in the edit box Source. Alternatively, you can write a regular
expression that covers a series of numbers.
Leave the edit box intact if the calling number is of no importance for the call forward
you are configuring.
4. When necessary, you can limit call forward to a particular time period and day or days
of week.
To define a call forwarding period, select the checkbox Time (in the column Activity
Schedule) and specify the period start and end time in the edit boxes From and To
respectively. To specify on what days call forwarding will take place, select the
checkbox Days and select call forward days on the drop-down menu invoked by a click
on the appearing down-arrow button.
5. Type in the forward number in the text box Fwd Number of the form and click
to validate the changes you have made to the record.
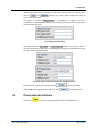
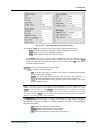
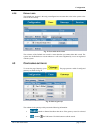
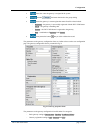
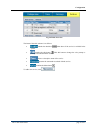
4.2.5 CODEC CAPABILITY SETTINGS
The add-new-user dialog appears with all codecs in place and frame-per-packet settings done
(see Fig. 18.) If you wish to delete unnecessary codecs, click the delete button
.
To add to the codec capability of the user’s terminal, click
and select the
required codec from the drop-down list of codec options.
DVX-7090 VoIP Router page 21 of 83