


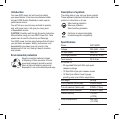

12
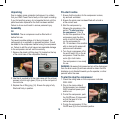
4. Close the tank 1 isolation valve (18).
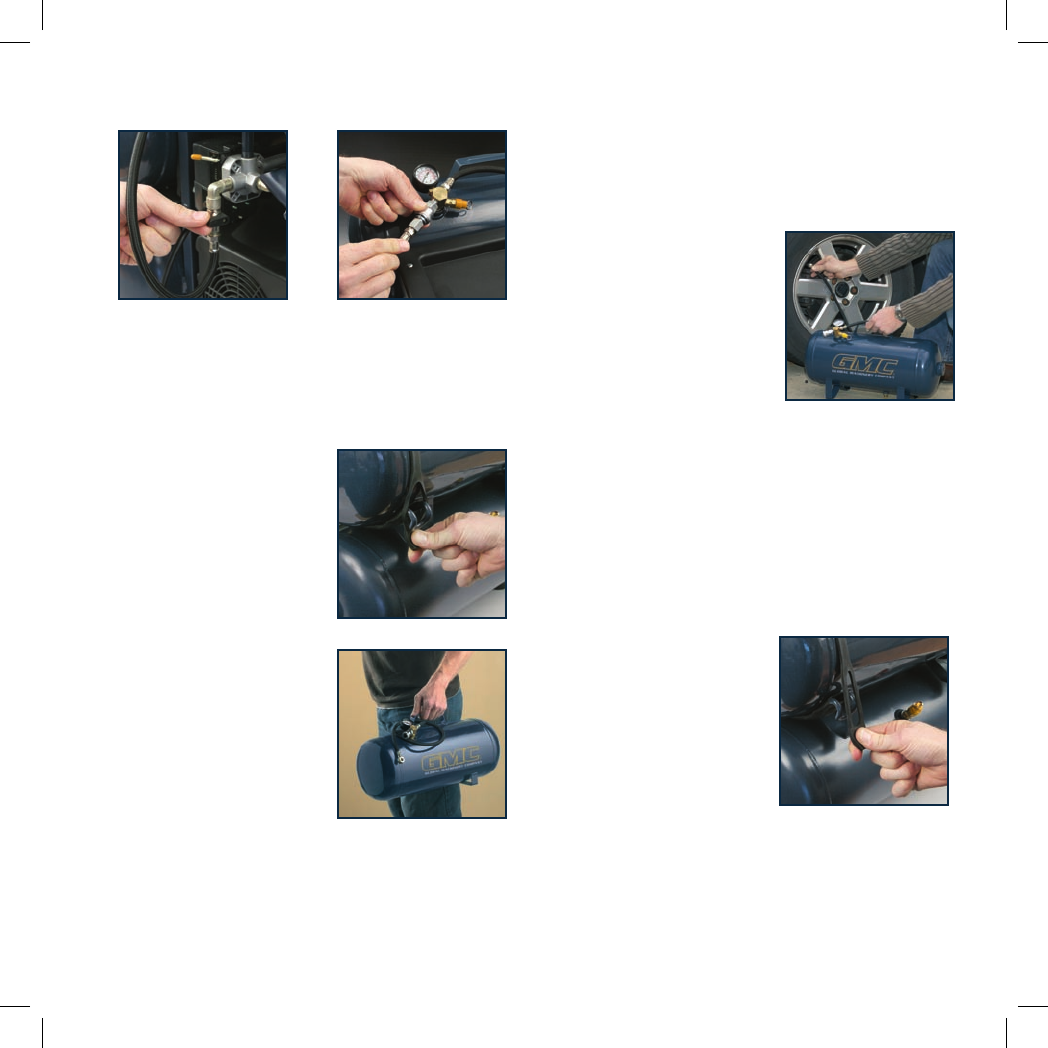
5. Disconnect the tank 1 inlet hose (25) from the combination
valve (8), by sliding back the sleeve of the quick connect
fitting and removing the inlet hose.
Note. The inlet hose has been fitted with a special one way
valve. On removal of the inlet hose there will be a slight
discharge of air.
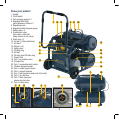
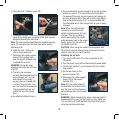
6. Place the tank 1 inlet hose
(25) on the provided clip.
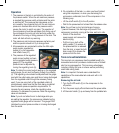
7. Disconnect the rubber support
straps (22) by pulling them
over the support brackets (23)
to release the air tank.
WARNING. Be careful when
releasing the straps they do have
a tight fit.
8. The tank has now been
correctly disconnected from the
air compressor unit. You can
now move the tank freely
by using the carry handle (20)
to lift and move the tank. You
can now use the removed tank.
The separated tank has two
outlets that you can choose
from;
a) the attached inflation hose; or
b) the provided quick connect coupler that you can connect
another air hose to. This can be done by sliding back
the sleeve of the quick connect coupler and inserting an
air hose assembly that is fitted with a Nikko style fittings.
Due to the limited supply of air it is recommended that
the removable tank is fully charged with air prior to being
removed.
Note. While the tank has been
removed you can still use the
master unit/compressor with only
one tank. This can be done by
simply reconnecting the master
unit/compressor back to the power
supply, and turning the unit on at
the On/Off switch (2).
CAUTION. When using the master unit/compressor with
the top tank removed always check to ensure that the air
isolation vale (18) is in the off position.
Installing the air tank:
1. Turn the On/Off switch (2) on the compressor to the
off position.
2. Turn the power supply off and disconnect the power cable.
3. Lift the main handle (1) up and away from the portable
tank location.
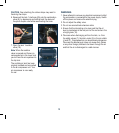
4. Sit the tank down on the
support brackets (23).
5. Reconnect the rubber support
straps (22) to the support
brackets (23).
Note. Grip the rubber straps at
the fixed end and stretch evenly
over the tank until the straps are
connected securely to the support
brackets.
WARNING. When extending the rubber straps be careful. If
released early they can flick back and hurt you. Make sure
that your face is at a safe distance from the rubber straps
while they are being stretched.