308–293 13
Operation
Pressure Relief Procedure
WARNING
PRESSURIZED
EQUIPMENT HAZARD
The system pressure must be manually relieved to
prevent the system from starting or spraying acci
-
dentally. T
o reduce the risk of an injury from acci
-
dental spray from the gun, splashing fluid, or
moving parts, follow the
Pressure Relief Proce
-
dure
whenever you:
D
are instructed to relieve the pressure,
D
stop spraying,
D
check or service any of the system equipment,
D
or install or clean the spray nozzle.
1. T
urn of
f the air and fluid supply to the gun.
2. T
rigger the gun into a grounded metal waste
container to relieve air and fluid pressure.
Applying the Fluid
When
using the HVLP spray gun, instead of a conven
-
tional air spray gun, you may need to use a slightly
slower hand movement and make fewer passes with
the gun to coat a part. This is due to the reduced spray
velocity produced by lower HVLP air pressures, along
with a larger fluid particle size because there is less air
to blow of
f solvents than what is produced by conven
-
tional air spray
. T
ake care to avoid runs or sags as you
spray.
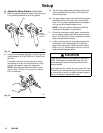
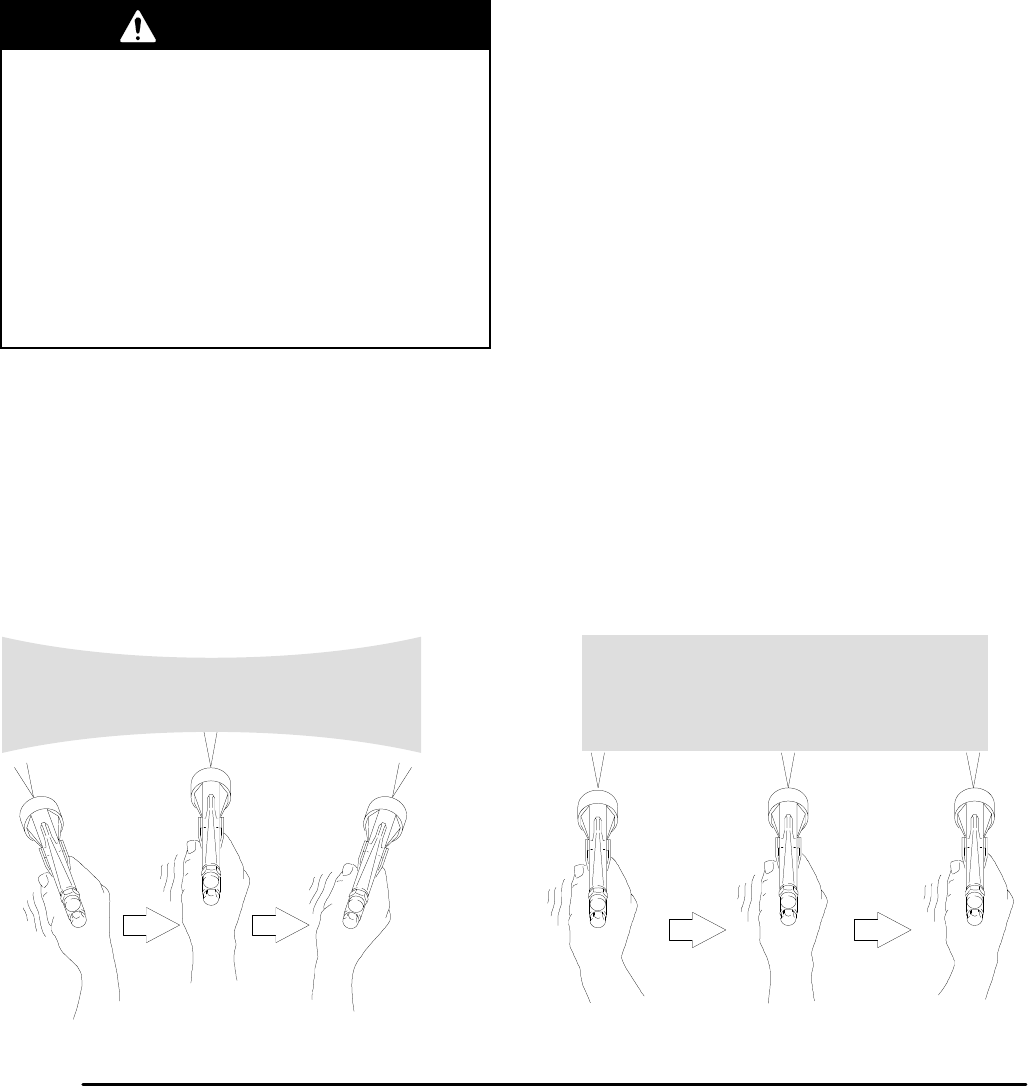
1. T
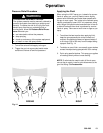
o achieve the best results when applying fluid,
keep the gun perpendicular to the surface and
maintain a consistent distance of approximately 6
to 8 inches (150 to 200 mm) from the object being
sprayed. See Fig. 14.
2. T
o obtain an even finish, use smooth, even strokes
across the object being sprayed with 50% overlap.
3.
Paint using parallel strokes. This spray gun applies
all coatings evenly without cross coating.
NOTE: T
o eliminate the need to shut of
f the air pres
-
sure at the air supply
, install a quick-disconnect at the
gun inlet fitting. See
Accessories.
WRONG RIGHT
Fig. 14
0793


