


308–293 23
Service
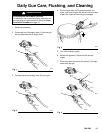
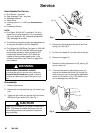
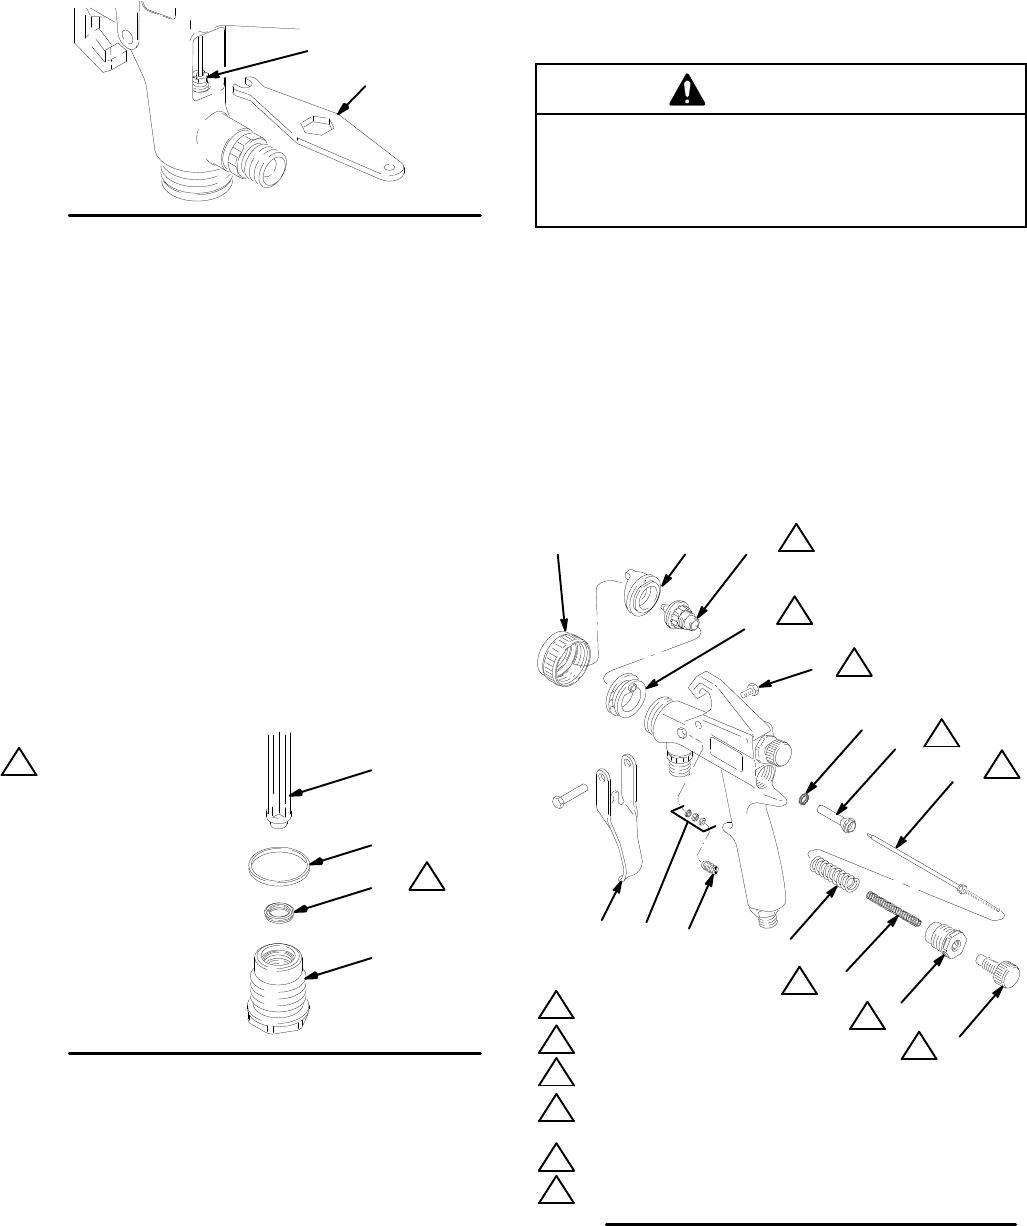
8. T
ighten the packing adjustment screw (31) with the
gun wrench (35), as shown in Fig. 10, until you can
feel a slight drag on the fluid needle. Do not over-
tighten the screw as this may bind the needle
movement.
Fig. 10
02104A
31
35
9.
Install the trigger (3). T
orque the screw (5) to
10–15 in-lbs (1.1–1.7 N
S
m). See Fig. 12.
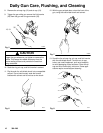
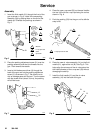
10. Remove
the
u-cup seal (32) from the fluid adjustment
nut (6). See Fig. 11. Be careful not to damage the
seal
surface or the nut’
s internal threads.
11.
Install the new u-cup seal (32) with the seal instal
-
lation tool (42); the u-cup lips must face toward the
tool as shown in Fig. 1
1. This will help apply even
pressure to the u-cup lips and avoid damaging
them.
12.
Push the u-cup seal (32) into the fluid adjustment
nut (6) until a definite snap is felt.
13.
Install the new packing ring (22).
Fig. 11
32
42
1
1
U-cup
lips
face
the
tool
02021
6
22
14. Install
the spring (15) and fluid adjustment nut (6).
T
orque the nut to 25–35 in-lbs (2.8–4.0 N
S
m). See
Fig. 12.
15. Install
the spring (16)
and fluid adjustment knob (8).
16. Trigger
the gun to test the needle movement. If the
needle does not return after the trigger is released
or is slow in returning, loosen the packing adjust
-
ment screw (31) with the gun wrench (35) until the
needle returns freely
. See Fig. 10.
17. T
rigger the gun while you install the fluid nozzle
(20) with the gun wrench (35).
CAUTION
When tightening the nozzle, do not exceed 40 in-lbs
(4.5 N
S
m) torque. Over-tightening the nozzle can
cause the nozzle hex to round, can af
fect the spray
pattern, and is unnecessary to guarantee a seal.
18.
Install the air cap ring (12) and air cap (19).
19.
Make sure the gun fluid packing assembly is
sealing properly by spraying solvent at low pres
-
sure before fully pressurizing the gun with the fluid
to be sprayed.
If the fluid packing leaks, tighten the packing
adjustment screw (31) slightly and retest until the
packing seals completely
.
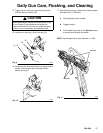
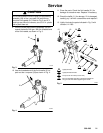
Fig. 12
12 19 20
16
8
31
3
5
21
02103A
1
Lightly
lubricate
Lightly lubricate threads
T
orque to 35–40 in-lbs (3.9–4.5 N
Sm)
Be sure the baf
fle protrusion is properly inserted
into
the gun insert hole before tightening the nozzle
T
orque to 25–35 in-lb (2.8–4.0 N
Sm)
T
orque to 10–15 in-lb (1.1–1.7 N
Sm)
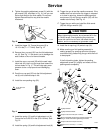
2
3
2
1
3
1
6
6
15
33
14
39
1
11
4
4
5
5
6