


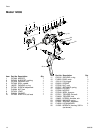
Installation
309739 5
Installation
Inspect flow gun for shipping damage. If damage is
found notify the carrier immediately.
1. Connect flow gun to any standard Graco hose
assembly.
2. Connect the opposite end of the heated hose
assembly to any fluid supply system. See Model
table, page 2 for maximum fluid working pressure
for your gun model.
3. Tighten fluid connections.
4. Before operating gun, squeeze and release trigger a
few cycles. Observe action of cartridge assembly.
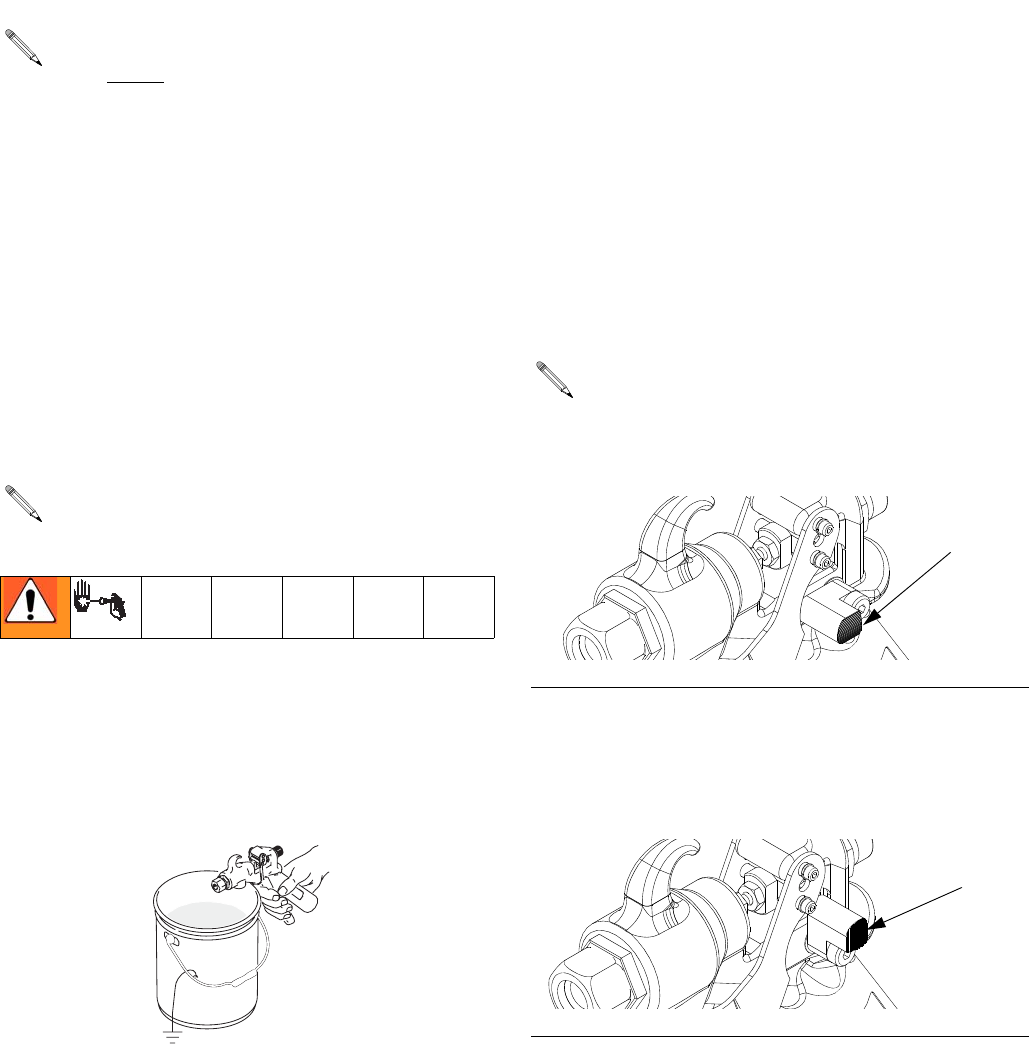
Pressure Relief Procedure
1. Shut off air to pump.
2. Close bleed-type master air valve (required in your
system).
3. Hold metal part of spray gun firmly to side of
grounded metal pail. Trigger gun to relieve pressure.
4. Open drain valve and/or pump bleeder valve having
a container ready to catch the drainage.
5. Leave drain valve open until you are ready to
spray/dispense again.
If you suspect the tip/nozzle or hose is completely
clogged or that pressure has not been fully relieved after
following the above steps, VERY SLOWLY loosen the
retaining nut or hose end coupling to relieve pressure
gradually. Then loosen it completely. Clear tip/nozzle or
hose.
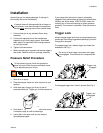
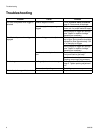
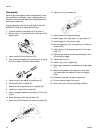
Trigger Lock
Always engage trigger lock when you stop dispensing to
prevent gun from being triggered accidentally by hand or
if dropped or bumped.
To engage trigger lock, release trigger and rotate lock
downward. See Fig. 1.
To disengage trigger lock, rotate it upward. See Fig. 2.
If material hose will be suspended by a hanger or
tool balancer, route hose through the suspension
device before
securing each end of material hose.
To help prevent injuries, follow this procedure
when you shut off the flow gun and before check-
ing or adjusting any part of gun.
ti3795a
Do not try to force trigger valve open with trigger
lock engaged. This could result in component fail-
ure.
F
IG. 1: Trigger Lock Engaged
F
IG. 2: Trigger Lock Disengaged
Trigger Lock
Engaged
Trigger Lock
Disengaged