


8 307741
Troubleshooting
Air Leaks
Air leaks are caused by worn or damaged gaskets or
seals. To locate the leaks, first shut off the air supply to
the pump and open the bleed-type master air valve to
relieve air pressure. Disconnect the main air supply
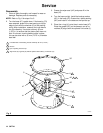
line from the air inlet. Remove the shield (27) as
explained on page 10, then reinstall the other parts
and connect the main air line to the inlet.
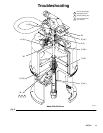
Open the bleed-type master air valve and adjust the air
pressure to .07–0.1 MPa, 0.7–1.0 bar (10–15 psi). Stall
the pump on both the up and down stroke as indicated
in the Check Chart below. Use the methods listed in
the Check Chart to find where air is leaking. See Fig.
2.
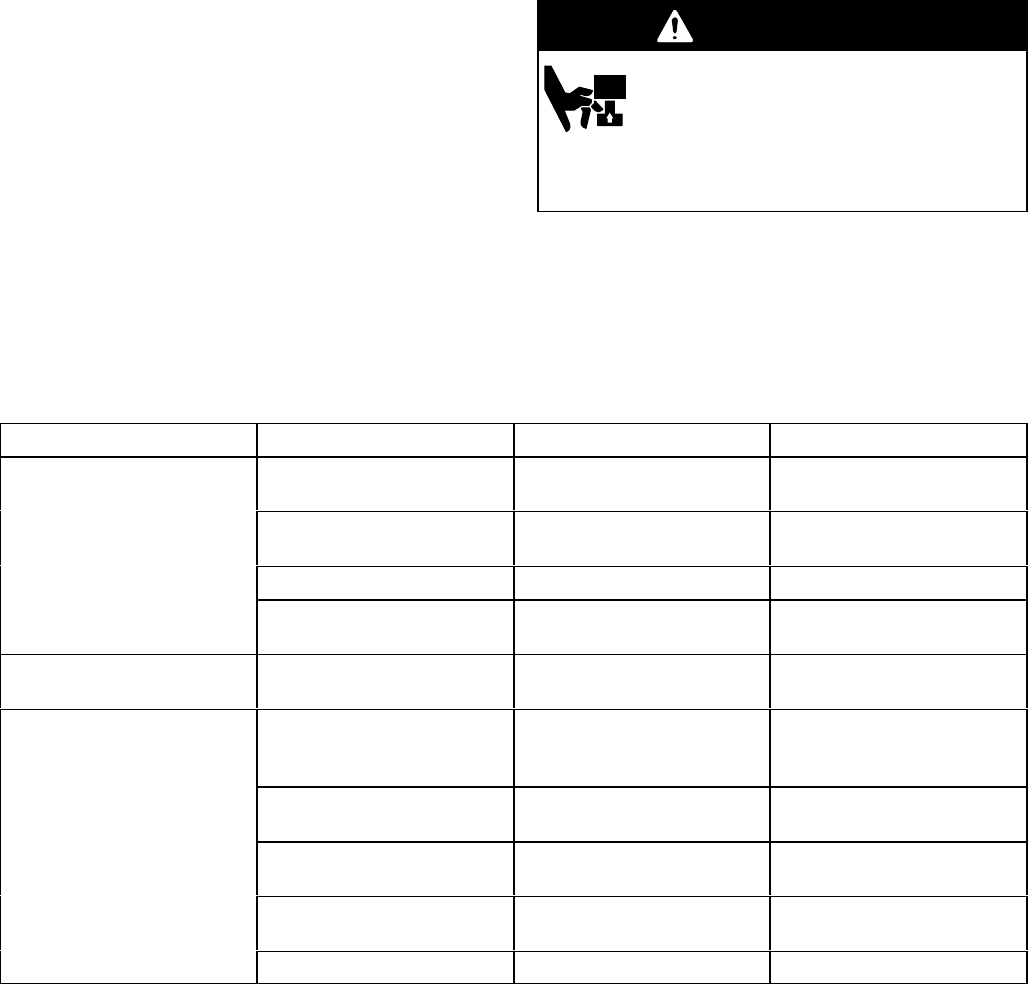
WARNING
MOVING PARTS HAZARD
Keep you fingers away from all moving
parts while performing this test, to
reduce the risk of pinching or amputating
your fingers. Reinstall the air motor shield before
resuming normal operation of the pump.
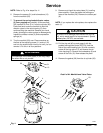
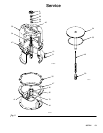
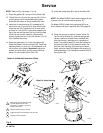
Check for air leaks by feeling, listening, or squirting oil
around the suspected area. The oil will bubble if there
is a leak.
CHECK CHART
Stroke Position Letter Ref. Points Check Method Cause of Leakage
UP stroke only F By listening for air leak at
exhaust outlets
Worn trip rod packing (65).
B By feel Blown air cylinder gasket
(35).
C Squirt oil around wiper (44) Worn throat packing (46).
G By feel Damaged cylinder gasket
(38).
DOWN stroke only D By feel. Damaged air manifold gas-
ket (30).
BOTH strokes E By feeling exhaust, or
hearing a high-pitched
sound
Worn director valve (3).
Replace, or lap faces with
no. 500 grit sandpaper.
F By feel, or hearing a high-
pitched sound
Worn piston o-ring (33).
D or G By feel Blown manifold gaskets
(38 and 30).
H Squirt oil around o-ring
(15)
Damaged housing o-ring
(15).
K By feel Damaged o-ring (26).