


H.E.R.O. INDUSTRIES 1100C & 1100NC OWNERS MANUAL
21
1.
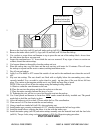
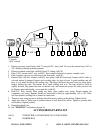
Remove the four bolts (ref# 14) and pull intake endcap (ref# 16), from the pump.
2. Remove the intake elbow (ref# 13), cage (ref# 19) and ball (ref# 18) from the endcap.
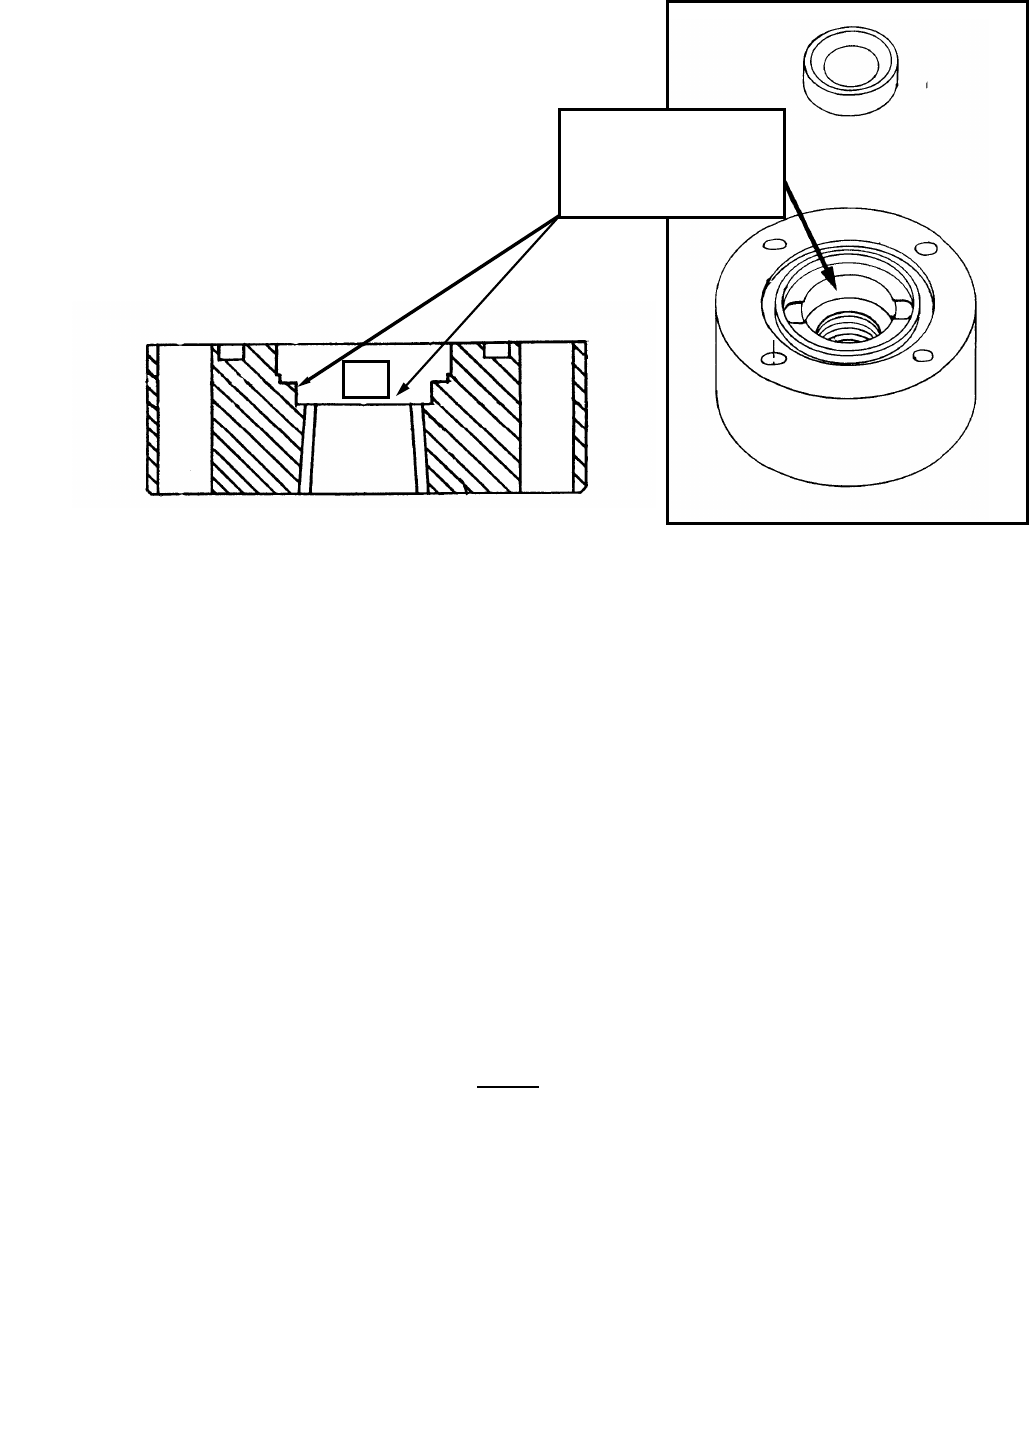
3. Use a socket or screw driver and hammer to tap to press the seat out of the endcap block. Access from
the side where the elbow was removed.
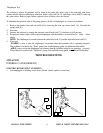
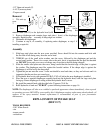
4. Inspect the machined area “A” from which the seat was removed. If any signs of wear or erosion are
evident, discard the entire endcap.
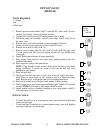
5. Use lacquer thinner to thoroughly clean the endcap and seat.
6. Place the endcap into very hot water and the new seat into cold water for 10 minutes. This will cause
the endcap to expand and the seat to contract, making installation easier.
7. Dry off seat and endcap.
8. Apply Loc-Tite #609 or #271 around the outside of seat and in the machined area where the seat will
rest.
9. Slip seat into endcap. The seat should rest flush with or slightly below the surrounding area, when
correctly installed. Use a wooded or nylon dowel to gently tap into place if the seat did not fall into
place. Use caution as the tungsten carbide seat is very brittle and may chip or break.
NOTE: If the seat will not fit into the endcap using the heating/cooling method;
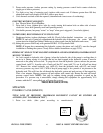
A. Obtain a socket the same diameter as the seat.
B. Place the seat into the endcap and place the socket on to the seat.
C. Place the entire assembly between the jaws of a vise.
D. Tightening the vise will act as a press and force the seat into the endcap.
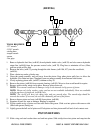
10. Use a steel punch and hammer to create four NEW marks around the newly installed seat. The punch
marks help to hold the seat firmly in place.
11. Allow the endcap to sit for at least 12 hours while the Loc-Tite cures/hardens.
12. Clean excess Loc-Tite from around the seat and endcap.
13. Always install new intake ball (ref# 18), when replacing seat.
14. Install intake cage, ensuring a minimum of 1/32” clearance between the ball and cage sides.
15. Install the intake elbow, ensuring the elbow is in line with the intake cage.
16. Install the intake spring (ref# 20) and entire endcap assembly onto the material head with the four bolts
(ref# 14). Torque bolts, using a crisscross pattern, to 30 ft. lbs. Repeat torquing procedure.
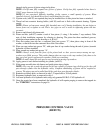
PISTON REPAIRS
This area must be
spotless before the
new seat is installed.
A