


HP StorageWorks Ultrium
1840/960
EH854-90929
© 2011 Hewlett-Packard Development Company, L.P.
Printed in the EU
www.hp.com
1 Introduction
This poster describes how to install your HP StorageWorks Ultrium full-height tape drive.
•
Connect to a dedicated Ultra320 SCSI HBA for Ultrium 1840 and 960 and do not daisy
chain with other drives.
• Use the supplied SCSI cable.
• Connect directly to the storage server (not over a network).
• Use the correct driver.
• Use HP Library & Tape Tools to check system and tape drive performance.
WARNING:
To avoid personal injury or damage to the server or tape drive,
disconnect your server from the mains power supply before installing the tape drive.
Always use the power cable supplied with the tape drive. See also Safety booklet on
the CD-ROM.
2 Preparing the host
IMPORTANT:
Refer to
www.hp.com/go/connect
for detailed compatibility
information about servers, operating systems, software applications and SCSI HBAs.
SCSI HBA
We recommend adedicated Ultra320 host bus adapter for Ultrium 1840 and 960. If
necessary, install a new HBA before you connect the tape drive. Ensure that you are
connecting to a supported HBA running the recommended firmware version.
Your tape drive will work with lower-rated LVDS SCSI but performance may be degraded.
Single-ended SCSI will degrade performance and limit cable length. Do not attach to
narrow or HVD SCSI.
Drivers
For Windows systems, we recommend that you use the installer on the CD-ROM. Subsequent
updates are available from Windows Update or the HP web site. For other operating
systems, patch to the latest version of the operating system, following the instructions in the
patch documentation. See also the “UNIX Configuration Guide” on the CD-ROM.
Backup software
Always upgrade your software application to ensure it works correctly with the tape
drive. The in-box software provides full support for all the features of your tape drive.
NOTE
: The HP driver is suitable for use in most applications, but refer also
to the documentation of your software application to ensure you are using the
recommended driver.
Free diagnostic tool
HP StorageWorks Library & Tape Tools (L&TT) is the recommended diagnostic and
support tool for your HP tape drive. It is available free on your HP StorageWorks
CD-ROM or at www.hp.com/support/tapetools.
Use it to verify installation, upgrade firmware and to aid in troubleshooting.
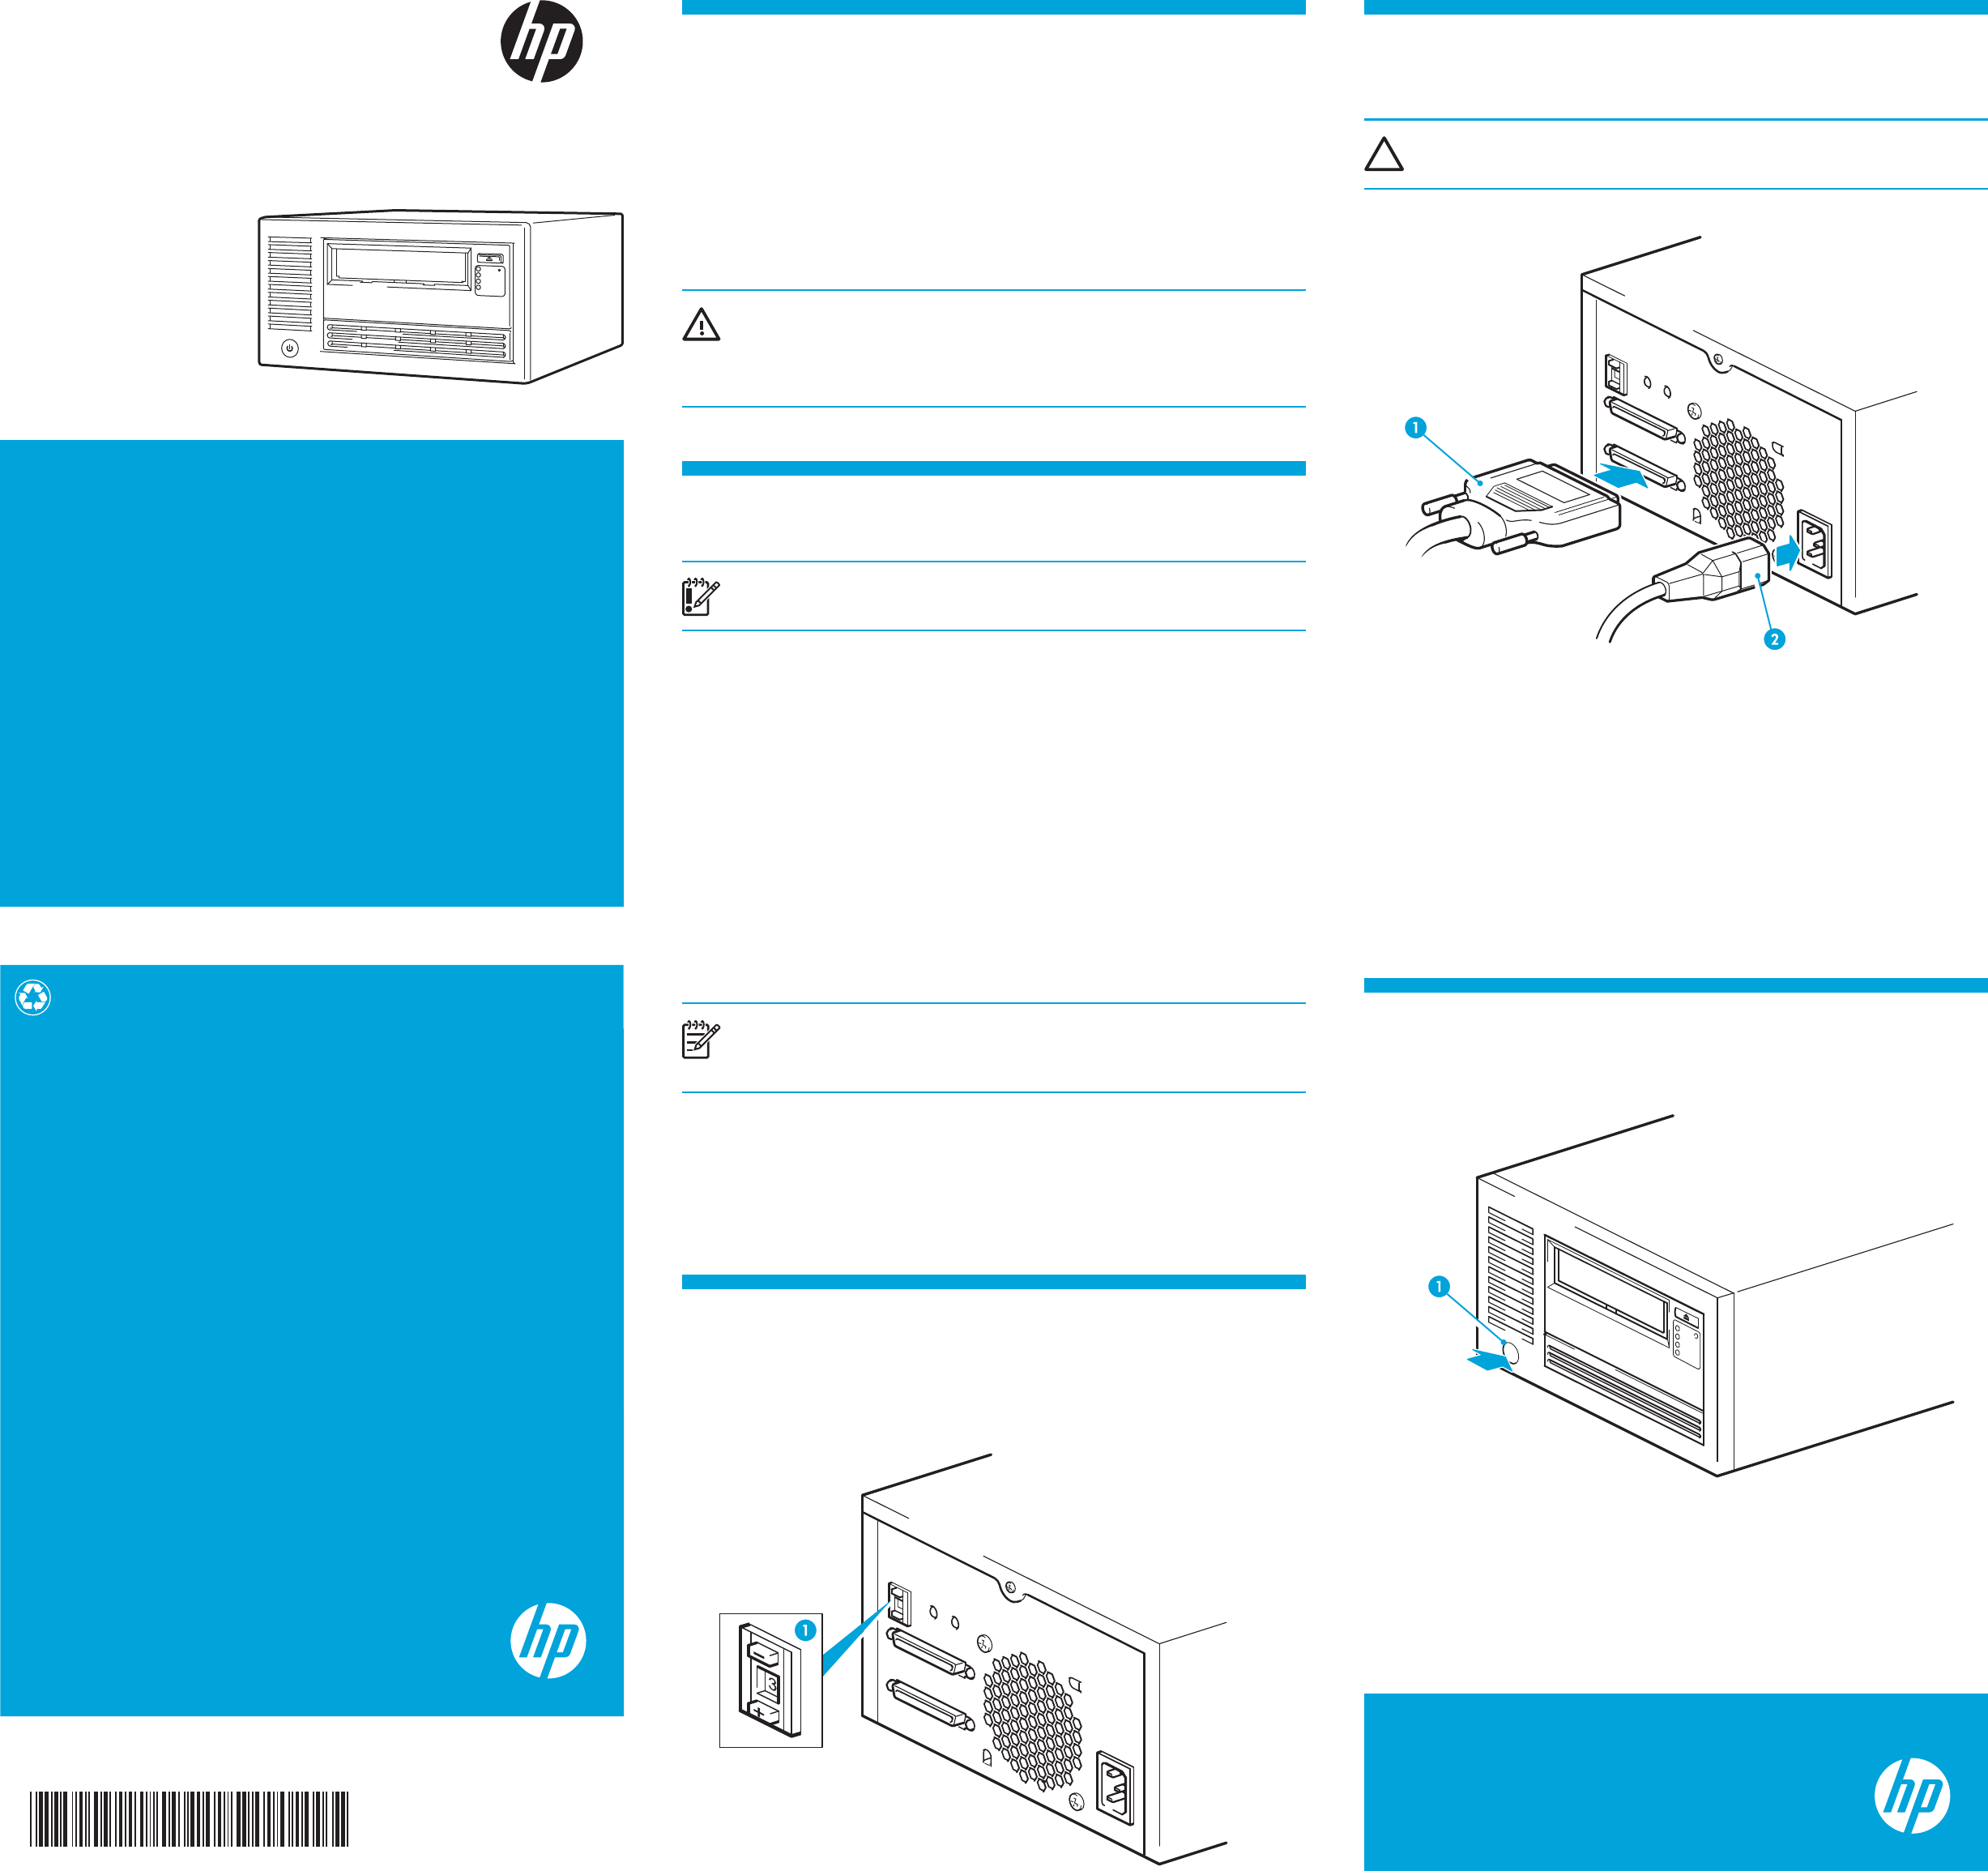
5 Powering on the tape drive and verify
connection
1 Power button
• Plug in the host server or workstation and all attached devices.
• Power on the tape drive using the power button located at the front of the tape drive.
• Check the Ready LED on the front panel to make sure the tape drive is ready for use.
• Turn on any other devices you turned off earlier. Turn on the server.
• Verify the connection using HP Library & Tape Tools.
4 Connecting the tape drive
CAUTION:
Turn off and remove the power cords from the server and all attached
accessories.
1 SCSI cable 2 Power cable
SCSI cable and termination
Use the 68-pin, wide, VHD-to-HD SCSI cable (1) supplied with the tape drive. The tape
drive provides active termination; it does not require a terminator, if it is the only or the
last device on the SCSI bus. Daisy-chaining multiple devices is not recommended. If you
do so, do not mix drive families (only daisy-chain with other Ultrium tape drives) and
attach no more than two devices to the same SCSI bus. The last device on the SCSI chain
must be terminated correctly.
Power cord
Use the supplied, HP approved power cord (2). This cord is appropriate for your specific
geographic region.
3 Setting the SCSI ID
Your HP StorageWorks Ultrium drive is shipped with a default SCSI ID of 3, but it can
beassigned any unused ID between 0 and 15. Do not use SCSI ID 7, which is reserved
for the SCSI controller, or SCSI ID 0, which is typically assigned to the boot disk.
1 SCSI ID
Start Here
External tape drive
C
M
Y
CM
MY
CY
CMY
K
EH854-90929 Ult FH Ext Eng front.pdf 1 07/01/2011 19:41