


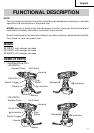
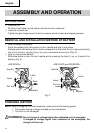
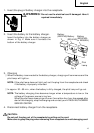

English
19
CAUTION:
● Failure to observe the following can result in battery leakage, rust or malfunction.
Position the plus (+) and minus (–) terminals correctly.
Replace both batteries at the same time. Do not mix old and new batteries.
Remove exhausted batteries from the hook immediately.
● Do not discard batteries together with normal trash and do not throw batteries into fire.
● Store batteries out of the reach of children.
● Use batteries correctly in accordance with the battery specifications and indications.
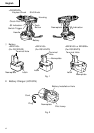
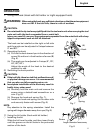
2. Using the bit holder.
CAUTION:
● Stow the bit in the specified location on the tool. If
the tool is used with the bit stowed improperly, the
bit may fall and cause bodily injury.
● Do not stow bits that are of a different length,
gauge or dimension than the plus driver bit (65 mm
long) included in the STANDARD ACCESSORIES.
The bit may fall and cause bodily injury.
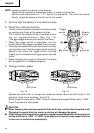
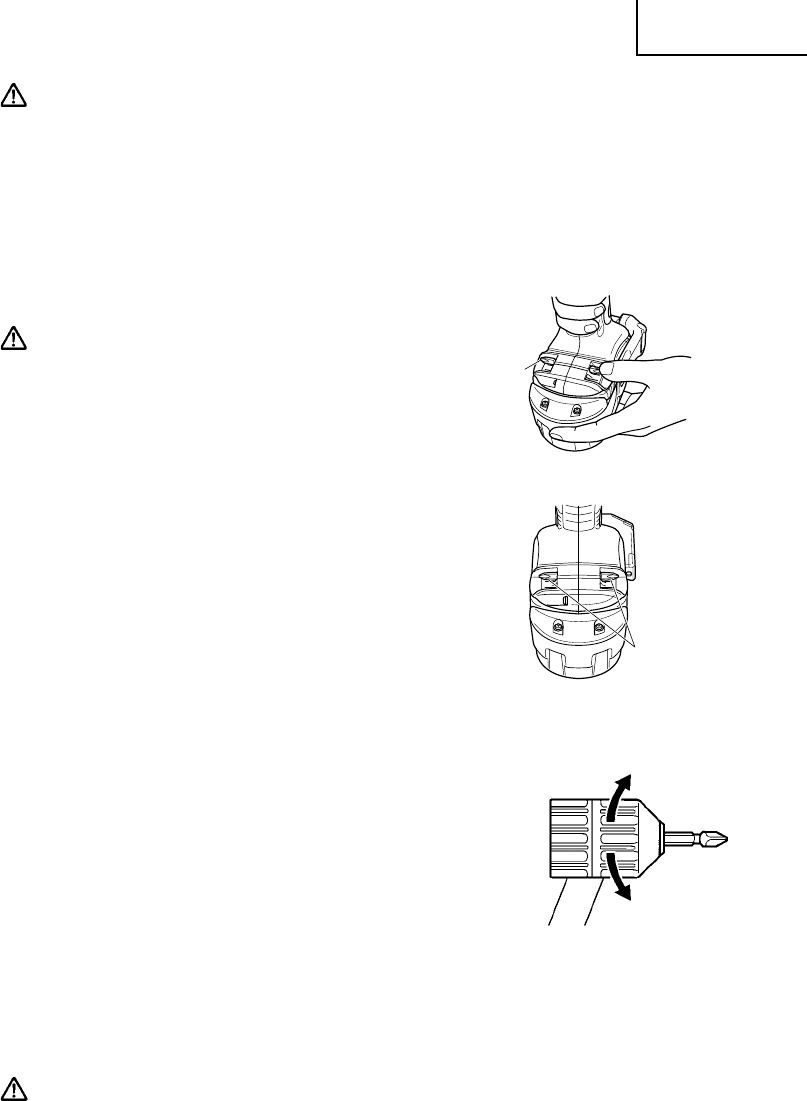
(1) Removing the bit
Securely hold the main unit and pull out the bit by
holding the tip with your thumb (Fig. 14).
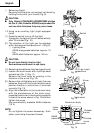
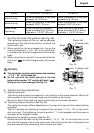
(2) Installing the Bit
Install the bit with steps opposite of when removing.
Insert the bit so that the right and left sides are
equal, as shown in Fig. 15.
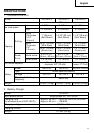
3. Mounting and dismounting of the bit.
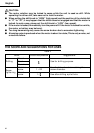
(1) Mounting the bit.
Insert a screwdriver bit etc. into the keyless drill
chuck.
Firmly grasp the ring and tighten the sleeve by
turning it toward the right (in the clockwise direction
as viewed from the front) (See Fig. 16).
NOTE: If the sleeve becomes loose during operation,
tighten it further.
The tightening force becomes stronger when
the sleeve is tightened.
(2) Dismounting the bit
Firmly grasp the ring and loosen the sleeve by turning it toward the left (in the
counterclockwise direction as viewed from the front) (See Fig. 16).
CAUTION:
When mounting a bit into the keyless chuck, tighten firmly. If the sleeve is not tight, the
bit may slip or fall out, causing injury.
Fig. 14
Bit
Fig. 15
Fig. 16
Tighten
Loosen
SleeveRing
Insert so that
bit does not
protrude
from main unit