OPERATING INSTRUCTIONS
OmniSource
®
3312V / Model BCR3312V
For NiMH, NiCd & Lead Acid Batteries
INTRODUCTION
Thank you for purchasing LENMAR’s OmniSource 3312V. The model BCR3312V can charge almost any 4.8, 6, 7.2, 9.6, 10 or 12V Volt NiMH,
NiCd or Lead Acid rechargeable battery, but is not compatible with Li-Ion batteries. When recharging NiCd type batteries, the BCR3312V will
operate as an AC/DC Battery Charger and Reconditioner to help avoid developing memory in your battery.
This charger will operate from a standard household AC outlet, or on the road from a 12 Volt cigarette lighter socket. It is a complete, convenient
system to charge and condition almost any of your rechargeable batteries.
Using the charger
Plug the unit into your selected power source
Choose the proper adapter for either 110V household current or 12VDC car cigarette lighter adapter. Plug the proper adapter into the power
source and plug the connector at the other end of the cord into the charger unit.
Adjust the contacts for your battery
The contacts on the charger must be properly adjusted to line up with the contacts on the battery before charging can take place. You must align
the two contacts on the charger to the two contacts on the battery marked “+” and “–“. There may be additional contacts on some batteries, which
must not be connected to. Only connect to the “+” and “-“ contacts on any battery. Connecting to the wrong contacts may damage the battery
and/or the charger.
Reversed polarity
Once the battery is placed on the charger, the charger should emit a short beep and begin charging the battery. If the charger beeps continuously,
the polarity to the battery is reversed. To remedy this, slide the switch (labeled S) on the side of the charger to the opposite side. The beeping will
stop and the charging will begin.
The temperature sensor
The temperature sensor is important for the safe charging of your battery, so be sure it is attached to the battery whenever you are charging.
Failure to do so could result in overheating and permanent damage to the battery. The sensor is magnetized and will stick to all battery types
except Lead Acid. The sensor may be left off for this type of battery without harm.
If the battery has Bottom contacts
Open the hinged jaw on the charger to unlock the moveable
contacts. Hold the battery over the charger so you can see
both the battery contacts and the charger contacts at the same
time. Move the charger contacts sideways to set them at the
proper distance from each other to match the contacts on the
battery. Set the battery down onto the contacts to test they are
in the correct position. The correct setup allows the battery to
rest against the long fence (marked “D”) and connect with the
charger contacts. This allows for easier alignment of the battery to the charger. For large batteries or in some circumstances, the “D” fence may
need to be reversed or removed to make more room for the battery. The same is true for the smaller “C” fence. When you are satisfied with the
contact locations, close and latch the hinged jaw to lock the charger contacts into place. Set the battery down on top of the charger and make sure
the charger contacts connect with the battery. Place the magnetic temperature sensor on top of the battery being charged.
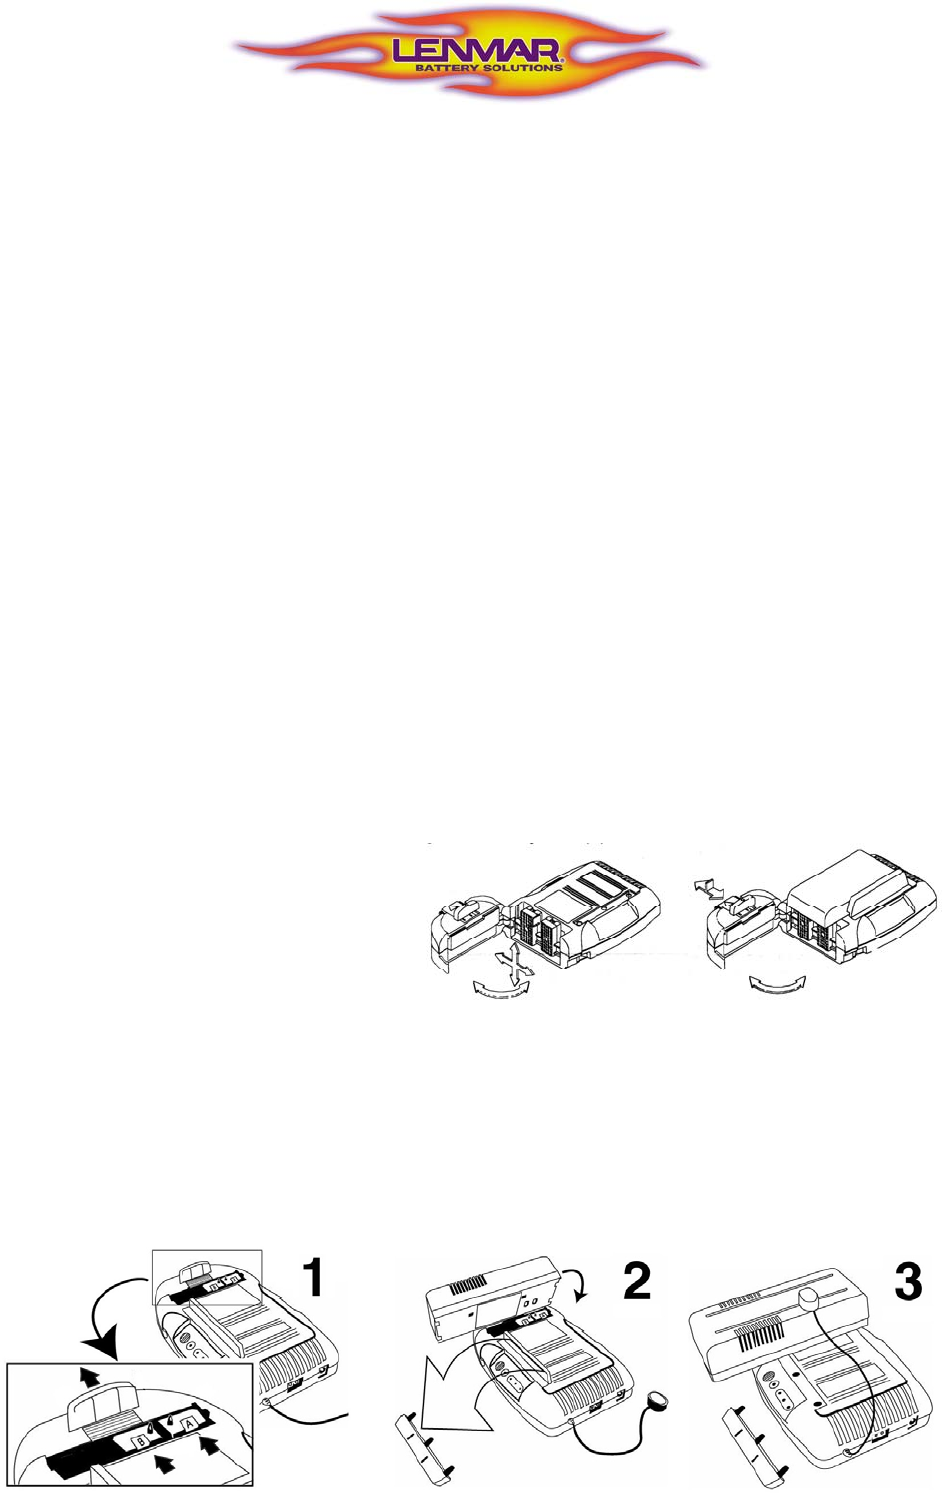
Special Instructions For Charging Sharp BT-30N Or Lenmar SBT30 Type Battery:
As shown in diagram 1, open the hinged jaw on the charger to unlock the moveable contacts and move contact “A” as far to the right as it will
go. Position contact “B” so that it is 3/8 inches left from the tip of “A”. Close and lock the hinged jaw. Slide Guide “C” out so that it hangs over
the end of the charger by ½ inch. As shown in diagram 2, remove the guide fence “D”. To place the battery onto the charger, hold as shown and
align the contacts on the battery to the contacts on the charger, and lay the battery flat on top of the charger. The charger should emit a short beep
and begin charging. If it makes a long continuous beep, see section titled “Reversed Polarity” above. As shown in diagram 3, place the magnetic
temperature sensor on top of the battery (optional).


