


9
relubricated after every 6 months of operation. Send the
complete tool to Makita Authorized or Factory Service
Center for this lubrication service.
Run the tool for several minutes to warm it up. Switch off
and unplug the tool.
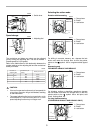
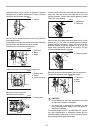
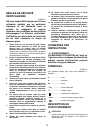
Loosen the four screws and remove the handle. Note that
the top screws are different from other screws.
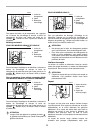
Disconnect the connector by pulling them.
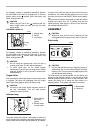
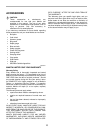
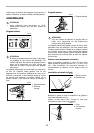
Loosen the screws and remove the change lever.
Remove the crank cap cover.
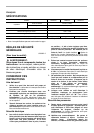
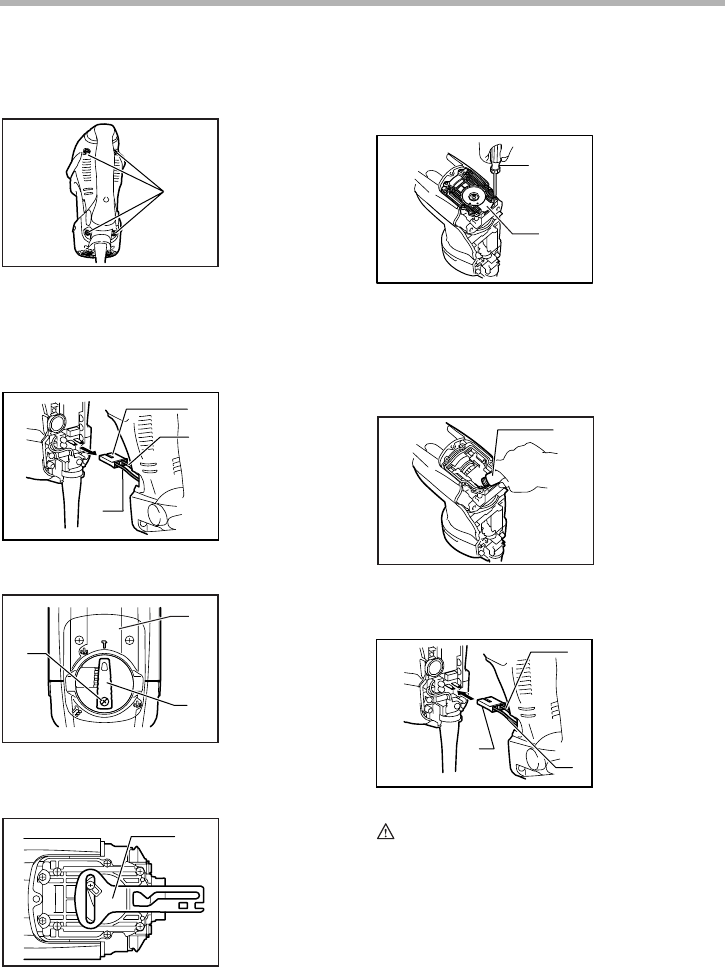
Remove the control plate.
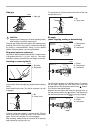
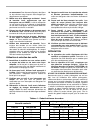
Loosen the six screws with a screwdriver and remove the
crank cap. Rest the tool on the table with the bit end
pointing upwards. This will allow the old grease to collect
inside the crank housing.
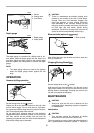
Wipe out the old grease inside and replace with a fresh
grease (60 g; 2 oz). Use only Makita genuine hammer
grease (optional accessory). Filling with more than the
specified amount of grease (approx. 60 g; 2 oz) can
cause faulty hammering action or tool failure. Fill only
with the specified amount of grease.
Reinstall the crank cap and tighten with the screwdriver.
Connect the connector and reinstall the handle.
CAUTION:
• Do not tighten the crank cap excessively. It is made
of resin and is subject to breakage.
• Be careful not to damage the connector or lead
wires especially when wiping out the old grease or
installing the handle.
To maintain product SAFETY and RELIABILITY, repairs,
any other maintenance or adjustment should be per-
formed by Makita Authorized or Factory Service Centers,
always using Makita replacement parts.
1. Screws
1. Connector
2. Black
3. White
1. Change lever
2. Screw
3. Crank cap cover
1. Control plate
1
006326
1
2
3
006327
1
2
3
006328
1
006329
1. Screwdriver
2. Crank cap
1. Hammer grease
1. Connector
2. Black
3. White
1
2
006330
1
006331
1
2
3
006332