


22
ENGLISH
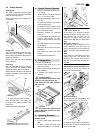
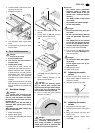
9.4 Adjusting the mitre fence
stops
The mitre fence's positive stops at both
45° positions and the 90° position are
adjustable.
1. Loosen the mitre fence locking han-
dle.
2. Set mitre fence to any positive stop
position and lock with locking handle.
3. Loosen locking nut (67) and turn
screw (68) so far out, until flip stop
(69) can be turned forward.
4. Turn screw (68) in until it just
touches the flip stop (69).
5. Tighten locking nut. The flip stop
should move without difficulty.
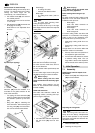
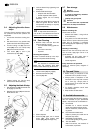
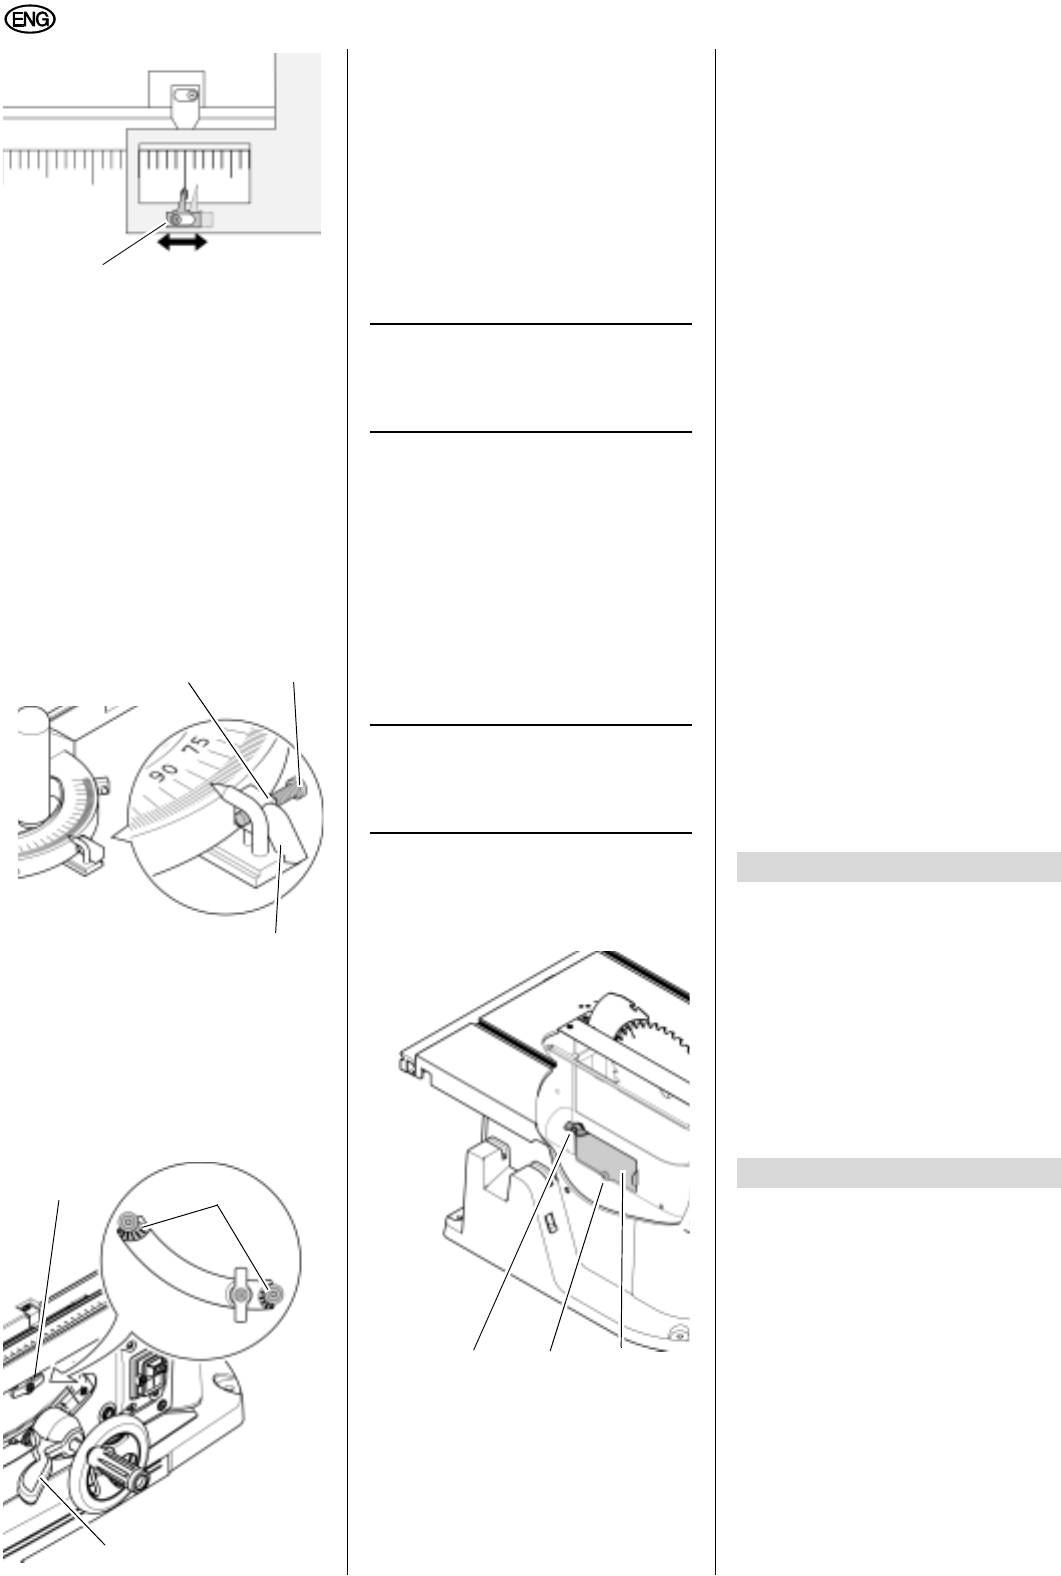
9.5 Adjusting the blade tilt stop
1. Set release lever (70) horizontal and
let engage (0q bis 45q).
2. Release lock lever (72) and set saw
blade tilt to 0°/45°.
3. Lock set bevel tilt by tightening lock
lever (72).
4. Check blade bevel angle:
0qsquare with the saw table
45qwith separate mitre square.
If these angles are not exactly
matched:
5. Adjust cam plates (71) of stops until
blade tilt against the saw table at
end positions is exactly 0°= square)
and 45°respectively.
3
Note:
To adjust the bevel tilt stop for
-1.5° to 46.5°, the release lever must be
pulled out and set into vertical position.
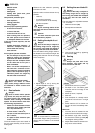
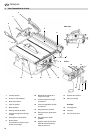
9.6 Saw Cleaning
x Remove chips and saw dust with
vacuum cleaner or brush:
from saw blade setting guide ele-
ments;
from motor vent slots;
chipcase.
Cleaning the chipcase.
If there is sawdust build-up in the chip-
case, the chipcase needs cleaning:
3
Note:
The chipcase is accessible from
below only. For cleaning, both table
insert and saw blade may be removed.
1. Loosen screw (74) only slightly.
2. Remove thumb screw (75).
3. Turn lid (73) 180°.
4. Clean chipcase.
5. Close lid (73) again, turn in thumb
screw (75). Then tighten both
screws (74), (75) hand-tight only.
9.7 Saw storage
A
Danger!
Store saw so that
it cannot be started by unauthor-
ized persons, and
nobody can get injured.
A
Caution!
Do not store saw unprotected
outdoors or in damp environment.
9.8 Maintenance
Before switching ON
Visual check to see if
distance saw blade – riving knife is
5 mm maximum;
riving knife is in line with saw blade.
Visual check of power cable and power
cable plug for damage; if necessary
have damaged parts replaced by a qual-
ified electrician.
Monthly (if used daily)
Remove saw dust and chips with vac-
uum or brush; apply light coat of oil to
guide elements:
threaded rod and guide rods of
blade rise and fall mechanismn:
swivel segments.
Every 300 hours of operation
Check all screwed joints, retighten if
necessary.
x Before cutting a workpiece to size
make trial cuts on pieces of scrap.
x Always place a workpiece on the
saw table in such way that it cannot
tilt or rock (e.g. always place a
curved board on the table with the
convex side up).
x To simplify repetitive cut-off work
use a stock stop .
x Keep surface of table clean.
For special tasks the following accesso-
ries are available at your specialized
dealer – see back cover for illustrations:
A Floor Stand
Provides for a secure machine
stand and optimal working height;
ideal in mobile use, folds up for sav-
ing space.
B Dust Collection Attachment
Helps to protect your health and to
keep the shop clean.
C Roller/Ball Transfer Stand
For accurate guiding of long stock.
D TCT Saw Blade
250 x 2.6/1.6 x 30, 48 inverted V/
hollow teeth, 2 pinholes
66
67 68
69
70
72
71
75 74 73
10. Tips and Tricks
11. Available Accessories