ISSUED:01-08-01 SHEET#: 055-9075-3 08-06-04
Visit the Peerless Web Site at www.peerlessindustries.com For customer service call 1-800-729-0307 or 708-865-8870.
1 of 1
IMPORTANT! Read entire instruction sheet before
you start installation and assembly.
Installation and Assembly - Side to Side Adapter Mount
Models: ACC 830
Description
A bracket
B LCD flush mount tube
C #10-32 x 1/8 socket pin screw
D #10-32 x 3/8 socket pin screw
Parts List
Qty.
1
1
1
1
Part Number
055-1184
580-0004
520-1106
520-1084
Note: Actual parts may appear slightly different than illustrated.
Before you start check the parts list below to
make sure all of the parts shown are included.
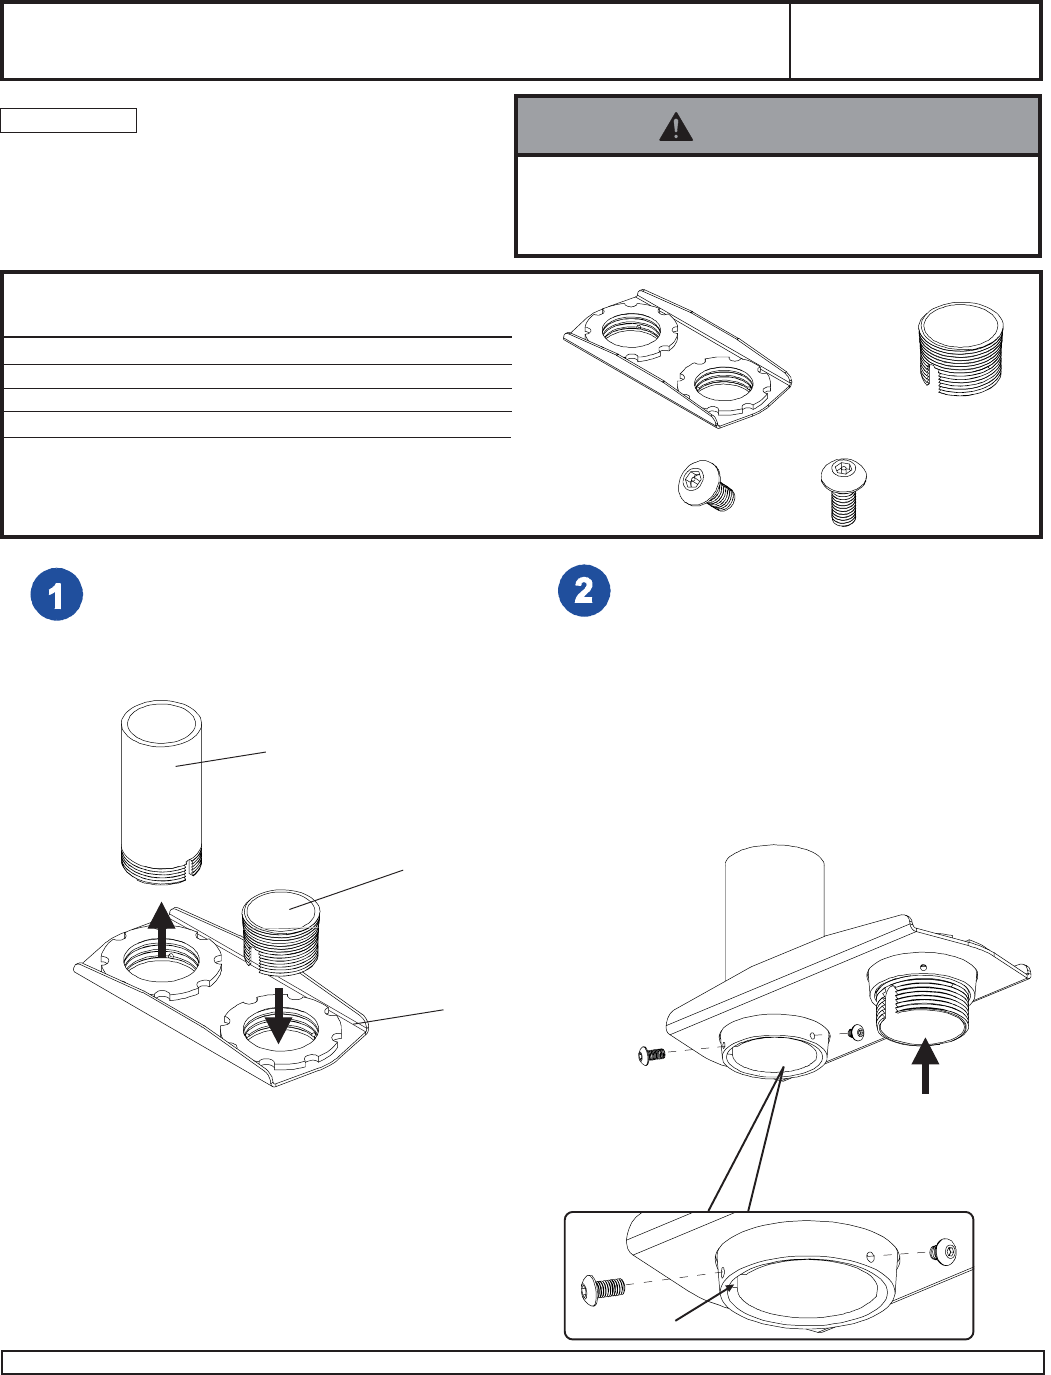
Attach adapter bracket (A) to bottom exten-
sion column (sold separately). Thread flush
mount tube (B) into bracket (A) as shown until
it is threaded all the way down.
A
B
D
B
Side to side adjustment is accomplished by
rotating adapter bracket (A) about extension
column. Lock into position by screwing 1/8"
long socket pin screw (C) into hole as shown,
jamming screw into threads. For extra
security, align one of the three holes in
adapter bracket (A) with notch in column,
then fasten 3/8" long socket pin screw (D)
into hole and through notch.
Note: The socket pin tool is sold with the
Vector Pro projector mount.
Extension Column
(sold separately)
A
D
C
C
Notch
PJC unit or
Accessories
© 2004 Peerless Industries, Inc. All rights reserved.
Peerless is a registered trademark of Peerless Industries, Inc.
All other brand and product names are trademarks or registered trademarks of their respective owners.
• Installer must verify that the ceiling will safely support
four times the combined weight of all attached equip-
ment and hardware.
WARNING


