


1350734_RevB_10-30-07
BIESEMEYER
®
SAW FENCE
SIDE ASSEMBLY REPLACEMENT
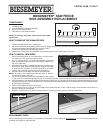
COMPONENTS
1. T-Molding Trim
2. 9-ply Finland Birch Replacement Side
3. #10 3/4" Hex-Head Screws
4. Laminate to Cover Replaced Side
NOTE: For accuracy and safety, replace all scored or dam-
aged fences.
1
2
3
4
1. Remove and discard the old t-molding trim.
2. Remove and discard the damaged plastic laminate. (Applying heat to the laminate or using acetone or lacquer thinner are effec-
tive ways to separate the laminate from the wood side.)
3. Remove and discard the old attaching screws.
4. Discard the old side. (DO NOT REMOVE any shimming tape from the steel body of the fence.
HOW TO REMOVE THE DAMAGED SIDE
HOW TO INSTALL NEW SIDES
1. Set the fence body back on your table saw in its normal posi-
tion. Slide two 1/32" spacers under the body.
2. Use "C" Clamps (A) Fig. 1 to secure the new side to the fence
body. Use a square (B) to see if the wood side is square to the
top of the table saw.
3. If the side is not square, unclamp and remove it from the body.
Place one or more layers of masking tape along the full length
of either the top or bottom of the fence body (Fig. 2). Repeat
Steps 2 and 3 until the side is square with the table top.
4. Use the #10 screws to attach the side to the fence body.
NOTE: The holes in the replacement sides are offset so that you
can drill fresh holes in the body.
5. Turn the new side up so that it is flat and parallel to the surface
of your saw. Use a metal straightedge (A) Fig. 3 to identify high spots. Sand the high spots prior to laminating the new side.
6. Align the bottom of the plastic laminate with the bottom of the fence. You will see a small amount of laminate overhang on the top
and ends of the fence. Glue the laminate to the new side. (Recommended adhesive: 3-M Fast-Bond #10 or #30 contact cement
or their quality equivalent.)
7. Trim the excess laminate with a flush router.
8. Use a sanding block to round off the outer edge of the plastic laminate. Leave a square edge on the laminate at the bottom of
the fence closest to the tablesaw.
9. Install the t-molding and trim off any excess. Miter the t-molding to fit the corners of the new wood side.
Masking Tape
Fig. 1
Fig. 2
Fig. 3
A
B
A
REPLACEMENT PARTS
Use only identical replacement parts. For a parts list or to order parts, visit our website at
biesemeyer.com.
You can also order parts from our
Customer Care Center at 1-800-782-1831.