


12
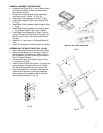
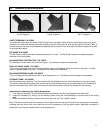
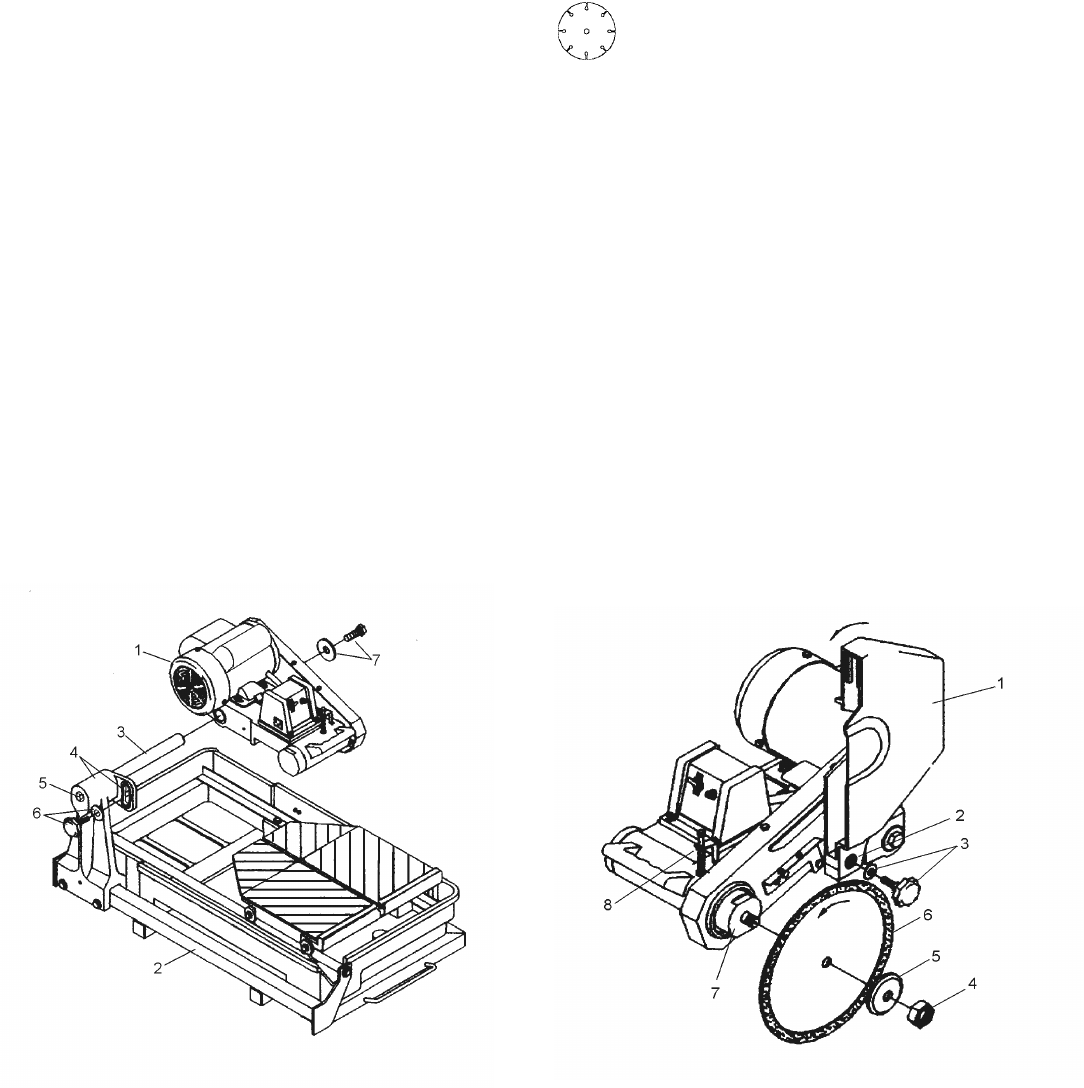
CUTTING HEAD INSTALLATION
(FIG 3)
• Remove Cutting Head Assembly (1) and Frame
and Pan Assembly (2) from carton.
• Using the multi-wrench provided, install the Motor
Support Shaft (3) into the Rear Support Post (4).
Install and tighten the Capscrew (5) with washer to
retain the Support Shaft (3).
• Slide the Cutting Head Assembly (1) onto the now
installed Motor Support Shaft (3) fully against the
Rear Support Post (4). Install the Head Locking
Knob and Washer (6) through the adjustment slot
in the Rear Support Post (4) and into the tapped
hole on the side of the Cutting Head Assembly (1)
base.
• Install and tighten Capscrew (7) with Washer to
retain the Cutting Head Assembly (1) on the
Support Shaft (3).
• With the Head Locking Knob (6) loosened, pivot
the Cutting Head (1) up for Blade Guard and
Blade installation.
Fig 3
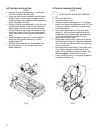
FITTING OR CHANGING THE BLADE
(FIG 4)
BLADE INSTALLATION AND REMOVAL
• Turn motor switch off.
• Disconnect power cord.
• Carefully raise the blade guard (1) to its highest
position and tighten the adjustment knob (6, Fig 3)
on the rear support to hold firmly in place while
installing blade (6).
• Remove the blade shaft nut (4) and the outer
flange (5). With one hand, depress the spring
loaded shaft lock (8) and loosen the blade shaft
nut (4) with the wrench provided. Turn nut
counter-clockwise to loosen.
• Place blade onto the shaft, pushing it up against
the Pulley/Inner Flange (7). Make sure the blade
(6) is mounted with the directional arrow pointing
counter-clockwise.
• Next replace the outer flange (5) and blade shaft
nut (4). Again depress the shaft lock (8) and
tighten nut (4) clockwise with multi-wrench. Do
not over-tighten. Release Shaft lock (8).
• Lower the blade guard (1) into operating position
and tighten the knob (3).
FIG 4