


14
EXTENSION CORDS
• Use only extension cords that are intended for
outdoor use. These cords are identified by a
marking “Acceptable for use with outdoor
appliances; store indoors while not in use.” Use
only extension cords having an electrical rating not
less than the rating of the product. Do not use
damaged extension cords. Examine extension
cord before using and replace if damaged. Do not
abuse extension cords and do not yank on any
cord to disconnect. Keep cord away from heat
and sharp edges. Always disconnect the
extension cord from the receptacle before
disconnecting the saw from the extension cord.
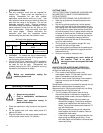
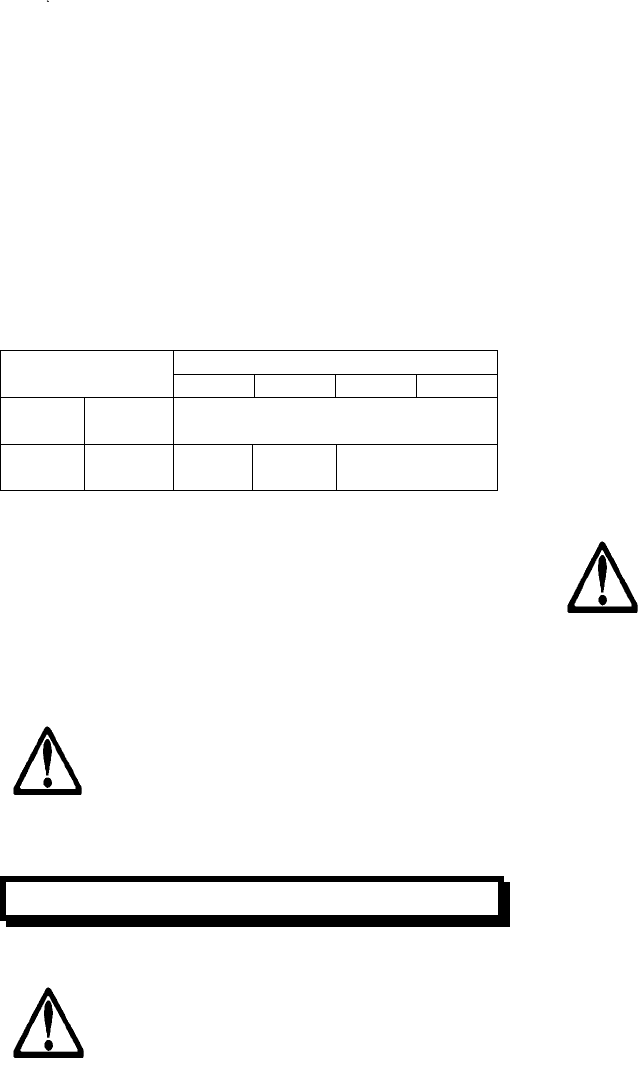
Minimum wire gage for cord
Total length of cord in feet
Ampere Rating
25ft. 50 ft. 100 ft. 150 ft.
More
Than
Not more
Than
AWG
12 16 14 12 Not
recommended
• WARNING - To reduce the risk of electrocution,
keep all connections dry and off the ground. Do
not touch plug with wet hands.
• Ground Fault Circuit Interrupter (GFCI) protection
should be provided on the circuit(s) or outlet(s) to
be used for the tile saw. Receptacles are
available having built-in GFCI protection and may
be used for this measure of safety.
Before any examination, unplug the
machines power cord.
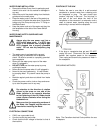
4. Operating Procedures
• Always be very careful.
• Find a comfortable, well-balanced
position.
• Always keep protective casing in
place while working.
• Place the machine on a dry surface or the optional
stand.
• Fill the holding tank with clean water [holds 5.3
gallons (20 liters).
• Plug the machine into the correct power outlet and
turn the motor switch to the “On” position.
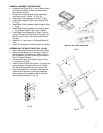
CUTTING TABLE
THE CUTTING TABLE IS MARKED IN INCHES AND
MILLIMETERS TO MAKE YOUR DIMENSIONAL
CUTS ACCURATE.
STEPS FOR POSITIONING THE 90 DEGREE RIP
• Slide the rip guide onto the table backstop from
one end.
• Set the rip guide by positioning it at the desired
point on the front end of the cutting table front lip
and flipping down the thumb lock until the rip guide
is firmly locked in place. Note that the thumb lock
will hold accessory firmly in place without using the
full travel of the thumb lock. Additional movement
is designed for any long term wearing that may be
experienced. Unnecessary clamping with the
thumb lock could raise the end of the accessory
up off the table surface.
• The rip guide can be used for straight 90° cuts
from both the left and right sides.
• After the rip guide is positioned for the desired cut,
place material flush against the rip guide and the
measurement rail.
• Now you are ready to make your cut.
After completing any work, switch off
the machine. There is no point in
leaving the motor running and the blade
turning.
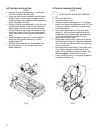
QUICK TIPS FOR WATER PUMP OPERATION
If you are having trouble getting water flow properly
through the water pump, try this:
• First, check to see that the pump is fully
submerged in water. Fill the water tray with clean
water to completely cover the pump.
• Second, check to see if all tubing is connected to
the pump correctly and its feeds are properly
attached.
Sometimes the tubing is not pushed far enough into its
attachment, allowing water to escape at the
attachment point. Simply push tubing firmly into fitting
until it stops and will not pull back out.
• Third, if problems still persist, there is also a
chance that debris or sediment is clogging the
water pump intake screen, the pump impeller or
inside the tubing.
- Clearing these areas with fresh water can
alleviate the clogging. The build up sediment
needs to be cleaned from the bottom of the
Water Tray and the intake screen cleaned. Fill
tray with fresh water.
- With pump intake removed, look inside the
area impeller and check for debris. Clean as
needed with fresh water.
- If the tubing is clogged, remove ends from the
water pump and Blade guard fitting. Flush
with fresh water until all debris is removed and
reconnect tubing.