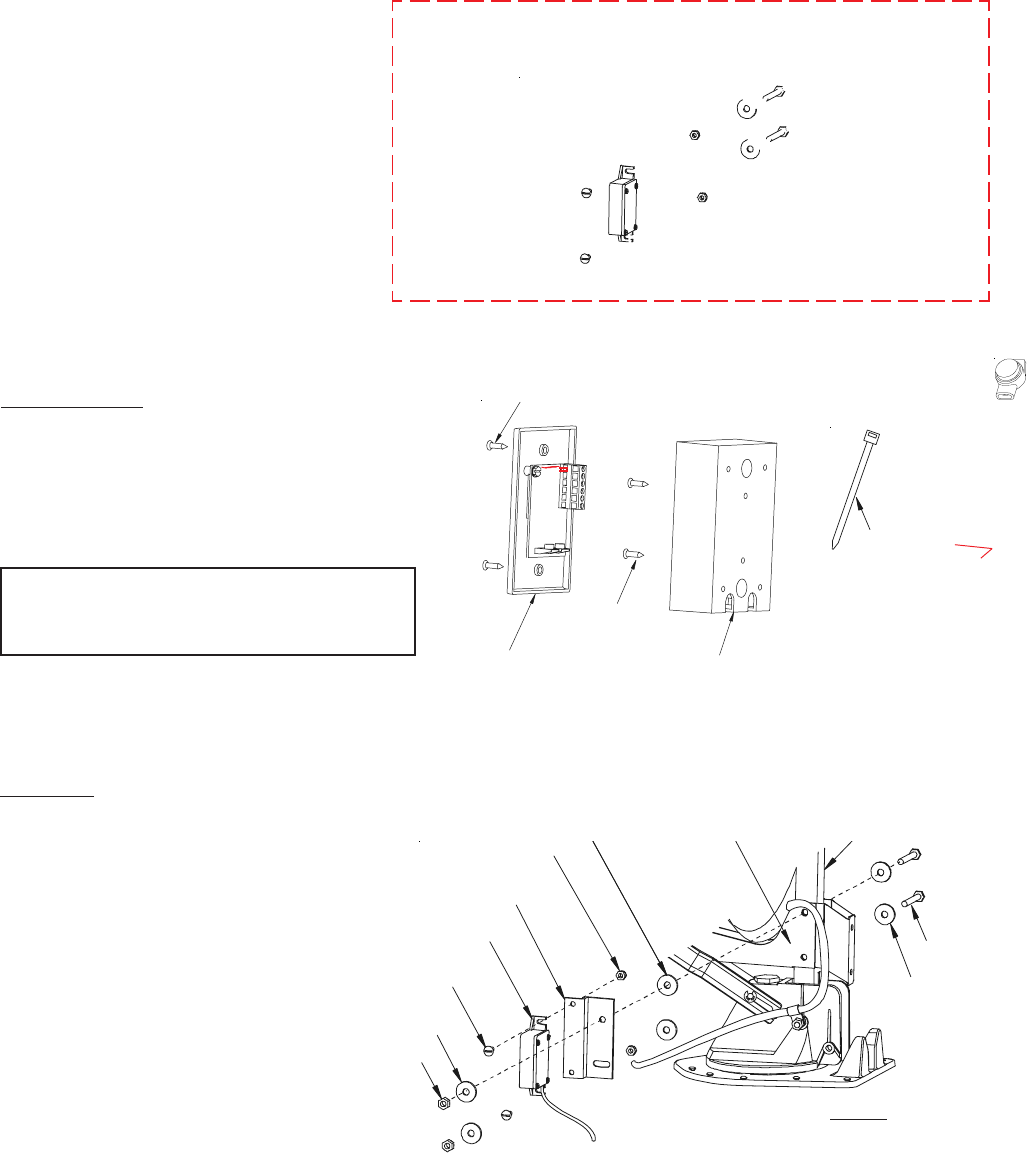
Figure 1
(2) 2160280
1/4-20 x 2" Hex Bolt
(2) 2160039
1/4" Flat Washer
Sensor w/Cable
2763236, DE-4600
2763235, DE-4646
(2) 2160216
#10-32 Hex Nut
(2) 2160172
#10-32 x 1/2"
Screw
DE-4600/4646 Only
CAUTION: Sensor MUST be mounted on side
that coax cable is attached to gear housing.
Mounting differently than shown WILL
CAUSE IMPROPER OPERATION.
®
Figure 3
SM-1000
Surface Mount Box
DE-4600 Only
(2) 2160147
#6 x 5/8" Phillips
Head Screw
(2) 2160104
#6 x 1/2" Hex Head
Slotted Screw
DE-4600 Only
DR-6400
Wallplate
Display Unit
DE-4600
DE-4646
Before you begin, take a few minutes to
look at Figure 1. Be sure you have
received all parts pertaining to your
specific model. Contact Winegard
Company for help with questions
concerning our products.
Customer service hours are 7:30 a.m. to
5:00 p.m., Mon. - Thu., 7:30 a.m. to 4:00
p.m., Fri., Central Time. Call toll-free
1-800-288-8094.
WINEGARD
Digital Elevation Sensor
Electronic Calibrated Model for RM and RD models
Model DE-4600/4646
U.S. Patent 5,945,945
Step 1. Figure 2. Assemble
Sensor to mounting plate using
the two (2) #10-32 x 1/2" screws
and #10-32 hex nuts, Figure 2.
CAUTION: Over-tightening
screws is unnecessary and may
cause breakage of case.
Step 2. Figure 3. Positioning
antenna to a near vertical angle
will make installation easier.
Assemble mounting plate
against fixed feed arm by
removing existing 1/4" nuts,
bolts and washers. Using new
hex bolts and previously
removed nuts and
washers assemble parts as
shown. Align the plate parallel,
Figure 3, to elevating tube and
tighten hardware. Go to Step 9.
(4) 2180183
3M UR Terminal
DE-4646 Only
(7) 2190104
5-1/2" Cable Tie
DE-4600/4646
3720503
Mounting Plate
Figure 2
Elevating Tube
Fixed Feed
Arm
(2) 1/4" Flat
Washer, for
RD-4610 only
#10-32 Hex Nut
Mounting Plate
Sensor
#10-32 x 1/2" Screw
1/4-20 Hex Nut
1/4" Flat Washer
1/4" Flat Washer
1/4-20 x 2" Hex Bolt
THIS UNIT HAS
BEEN CALIBRATED
AT THE FACTORY.
No further calibration
is necessary.
(If for some reason, this unit’s
calibration fails, See Steps 4 through
8 in this manual.)
For RD models, use Steps 1 and 2.
For RM models, use Step 3.
