


4
SULFATED BATTERIES. FAILURE TO OBSERVE THESE WARNINGS MAY RESULT IN PROPERTY DAMAGE OR SERIOUS PERSONAL
INJURY OR DEATH.
To recharge a sulfated battery:
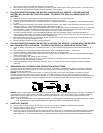
1. Attach the battery clamps as described in the instruction manual.
2. Always use the charger's lowest rate when turning the charger on. Set the charger to the charger's highest rate for the voltage of the battery
being charged.
CAUTION: NEVER CHARGE A BATTERY AT VOLTAGES RATES ABOVE THAT OF THE BATTERY.
3. The battery will show little or no amperage at the start of the charging process. This will continue until the sulfation begins to break down.
CAUTION: AS THE SULFATION BREAKS DOWN, THE AMPERAGE MAY RAPIDLY RISE. CONSTANT
ATTENTION MUST BE OBSERVED TO PREVENT SERIOUS OVERHEATING OF THE BATTERY.
4. Lower the charge rate to the lowest rate for the voltage of battery being charged.
5. Charge the battery at this low rate until the electrolyte reaches the fully charged state as described in the tables in your instruction manual.
This may take as long as two or three days.
NOTE: SOME BATTERIES MAY BE SO BADLY SULFATED THEY CAN NOT BE RESTORED TO A NORMAL OPERATING CONDITION,
REGARDLESS OF THE RATE OF CHARGE OR THE LENGTH OF TIME THE CHARGE IS APPLIED. IF THE BATTERY CANNOT BE
RESTORED TO A FULLY CHARGED CONDITION BY A SLOW CHARGING, IT SHOULD BE REPLACED.
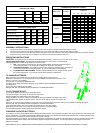
BATTERY TEST
1. Battery should be off charge for at least 1 hour and should not have any loads on it if in a vehicle.
2. Connect charger to the battery per the instructions in the previous sections. Press the test switch.
3. If the battery is charged and good then the needle will be in the green-GOOD or G area. Meter reading 12V is on the right side and 6V is on
the left side.
4. If the battery is low or not fully charged then the needle will be in the red-LOW area and should be charged. Some old batteries may not
show good after charging and further evaluation may be needed to determine the health of the battery.
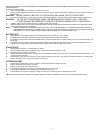
STARTER TEST
1. Perform Battery Load Test - proceed if battery is "Good".
2. Connect charger to the battery per the instructions in the previous sections (charger is not on).
3. Disable the ignition so the car will not start.
4. While pressing the test button, crank the engine and note the needle reading on the top left scale. It should remain in the green area. Do not
crank more than 10 seconds.
5. If the needle is in the red area to the left, this could indicate excessive current draw. This may be due to bad connections or a failing starter
motor: or the battery is too small for the vehicle's requirements.
ALTERNATOR TEST
1. Connect charger to the battery per the instructions in the previous sections (charger is not on).
2. Start the automobile and let idle for 5 minutes.
3. Depress the test switch and monitor the meter.
4. If the needle is stable and in the green-G on the top right scale, turn on the lights.
5. If the needle is still stable and in the green area, the alternator tests good.
6. If the needle is in the red area to the right or left of the green area, or bouncing, then the alternator may be bad.
Note: The above tests are good indicators of the battery, alternator and starter conditions but should not be considered the definitive test.