


3
NOTE: USE OF AN ADAPTER IS NOT ALLOWED IN CANADA. IF A GROUNDING TYPE RECEPTACLE IS NOT AVAILABLE, DO NOT USE THIS
APPLIANCE UNTIL THE PROPER OUTLET IS INSTALLED BY A QUALIFIED ELECTRICIAN.
20.
CHARGE PERIOD
The approximate required time to bring a battery to full charge state depends upon the number of ampere-hours (AH) depleted from the battery.
AH's are determined by multiplying the number of hours times the number of amps supplied by a battery to a load and normally indicated on the
battery. For example, if a load was connected to a battery, which drew 7 amps for a period of 5 hours, the battery will have supplied 35 AH.
The approximate recharge time would then be calculated by dividing the 35 AH depleted from the battery, by the charge rate of the charger. To
allow for tapering of the charge rate add 25 percent to the charge time.
OPERATING INSTRUCTIONS
The Model BC-91407 EASY CHARGER™ battery charger is designed to charge 12 volt and 6 volt lead-acid batteries of conventional,
maintenance-free, or deep cycle construction. This charger will charge both large and small batteries, such as motorcycle and garden tractor
batteries. The battery charger will automatically adjust the charging current appropriate to the type of battery.
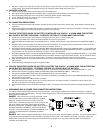
a. Follow the steps under DC CONNECTION PRECAUTIONS in section 16 when connecting the clamps to the battery. The charger has a "no-
spark attachment" feature, however for maximum safety follow the DC CONNECTION PRECAUTIONS.
b. Plug the power cord into a properly grounded electric outlet.
c. The RED indicator lamp will turn on when the battery charger is charging the battery. If the light does not turn on check the output clamps
on the battery terminals for proper polarity. The red clamp should be connected to the positive terminal of the battery. If the connections
are reversed, unplug the battery charger from electric outlet, and reverse the connections following the DC CONNECTION PRECAUTIONS
and plug the power cord into the electric outlet. If the indicator lamp still does not light the charger requires service, unplug the charger's
AC power cord and disconnect the charger from the battery.
d. The indicator lamp will begin to blink when the battery is fully charged. The battery charger will stop charging and continuously monitor the
battery. The clamps may be removed and the battery is ready for use. ALWAYS DISCONNECT THE CHARGER FROM THE ELECTRICAL
OUTLET WHEN NOT IN USE.
e. If you wish to maintain a battery for an extended period such as winter storage, weekend use only, etc., follow the charging steps above
and leave the charger connected to the battery. The charger will automatically turn on when needed to maintain the battery at a full
charge. It is recommended that the battery be checked periodically when charging for extended intervals.
The charger may "hum" even when the output is not on because of the AC power used by the transformer. The wattage consumed by
the charger when it is plugged in but not charging is small (about 20 watts).
REVERSE CLAMP PROTECTION: If the DC output clamps are connected to the battery backwards, the output of the charger will remain off and
the indicator lamp will not light.
SPARK PREVENTION: The output of the EASY CHARGER™ charger will not activate until there is a voltage across the DC clamps of about 2
volts or higher. [At temperatures below -20 degrees F., charging may not begin unless the battery voltage is above 3 volts.] Additionally the
voltage must be present for one second or longer. This prevents an output while the user is attaching the clamps. However if the clamps are
removed while the charger is charging, a spark can occur. It is always best to unplug the charger from the electrical outlet BEFORE removing
the clamps from the battery.
UPPER BATTERY VOLTAGE LIMITS: The EASY CHARGER™ charger will not start charging if the battery voltage is above 13.5 volts, this
prevents overcharging a battery with a high surface charge. An absolute upper limit of 16 volts has also been included, which applies to 12
volt batteries, and 8 volts for 6 volt batteries.
LOW VOLTAGE CHARGING LIMITS: Charging will not begin unless the voltage across the DC output clamps is above 2 volts. If the charger
stops after a few minutes (about 3) unplug the charger from the electric outlet for a few seconds, plug the charger back into the electric outlet
to begin the charging cycle again. If the charger again fails to indicate charging after a few minutes unplug the charger from the electric outlet
and disconnect the DC clamps from the battery. Have the battery checked at a qualified service center.
TIME LIMIT ON CHARGING: A charging time limit of 17 hours has been set for added safety.
CHARGE COMPLETE SIGNAL: The EASY CHARGER™ microcomputer checks the battery voltage and monitors the change in voltage with
charging time. When the microcomputer determines a full charge the indicator lamp will blink. Output current will be turned off and the lamp will
continue blinking until the DC clamps are removed or the charger is unplugged from the electric outlet. It is always best to unplug the charger
from the electric outlet BEFORE removing the DC clamps from the battery.
EXTENDED BATTERY MAINTAINER: The EASY CHARGER™ charger is ideal for maintaining batteries while not in use. When charging is
complete, the charger will turn off charging current completely with NO TRICKLE charge that could overcharge a battery. If the battery self
discharges below approximately 12.6 volts the charger will activate and recharge the battery, a 6 volt battery will restart at 6.3 volts. It is
recommended that the battery be checked periodically when charging over extended intervals.
ENGINE START - 60 AMPS: The Model BC-91407 EASY CHARGER™ charger has a 60 amp engine start feature. When using this feature be
sure that the CHARGE/ENGINE STARTER selector switch is set to the CHARGE position when connecting the DC clamps of the charger to the
battery. The charger MUST have one minute of charging before attempting an engine start. After this initial charge time you may try an engine
start by first setting the selector switch to the ENGINE STARTER position and then turn the ignition key to start the vehicle. A 1.3 second 60