5
CAUTION: NEVER TIGHTEN COLLET NUT WITHOUT A 1/4” SHANK SIZE BIT
INSERTED INTO COLLET. TO DO SO MAY BREAK OR DAMAGE COLLET.
REMOVING BITS
CAUTION: Burn hazard. Router bits get hot during use. Allow sufficient time for bit
to cool before replacing.
• Keepthespindlelockbutton(2)depressed.
• Placetherouterupsidedownonasmooth,flatsurface.
• Loosen(counterclockwise)thecolletnut(4)usingthewrenchprovided.
• Releasebuttonandremovebit.
CONTROLS
WARNING: To reduce the risk of injury, do not overload the tool. Let it work at its own pace.
WARNING: To reduce the risk of injury, turn off and remove battery from tool or
disconnect plug from power source before making any adjustments or removing or
installing attachments or accessories.
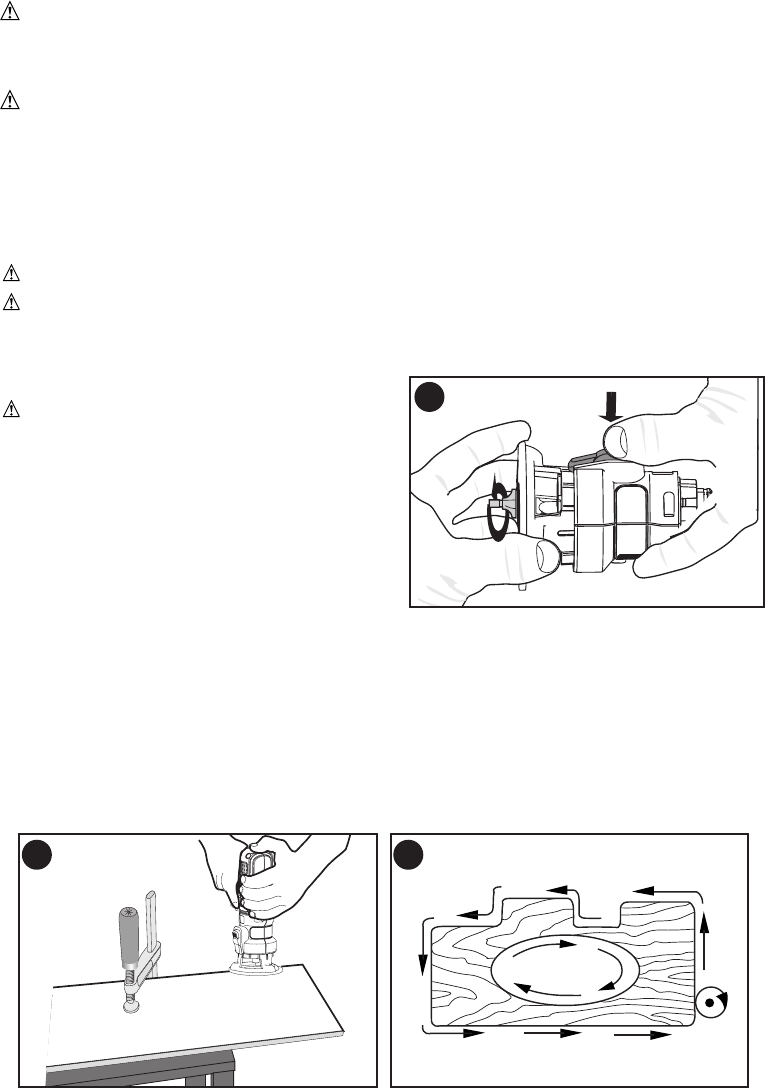
SETTING THE ROUTING DEPTH (FIG. C)
WARNING: Turn the router off and
remove battery from tool or disconnect plug
from power source.
1.Keepthespindlelockbutton(2)depressed
and rotate the router base (8) as shown in
gure C.
Rotating the base clockwise will
increase the routing depth while rotating the
basecounterclockwise will decrease the depth.
Two complete revolutions of the base equals
about 2 millimeters.
2. After obtaining the desired routing depth,
release the spindle lock button (2). Continue
turning the base until the notch under the spindle lock button aligns with the next closest
locking slot in the depth of cut scale (6).
USING THE ROUTER (FIG. D & E)
1. Make sure that the material to be cut is clamped down and is stable enough to support
the router during operation.
2. Use both hands on the power unit to control the router, and run the router at full speed
at all times. See gure D.
3. Move the router counterclockwise when cutting outside edges. Move clockwise when
cutting inside edges. See gure E.
C
D
Bit Rotation ( View from top of router)
Router travel should follow arrows
E


