


6
bits without the risk of bit breakage, drilling into light and brittle
materials without shattering, and optimal tool control for precise
chiseling. To set the control dial, turn the dial to the desired level. The
higher the number, the greater the speed and impact energy. Dial
settings make the tool extremely flexible and adaptable for many
different applications. The required setting
depends on the bit size and hardness of material
being drilled.
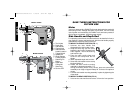
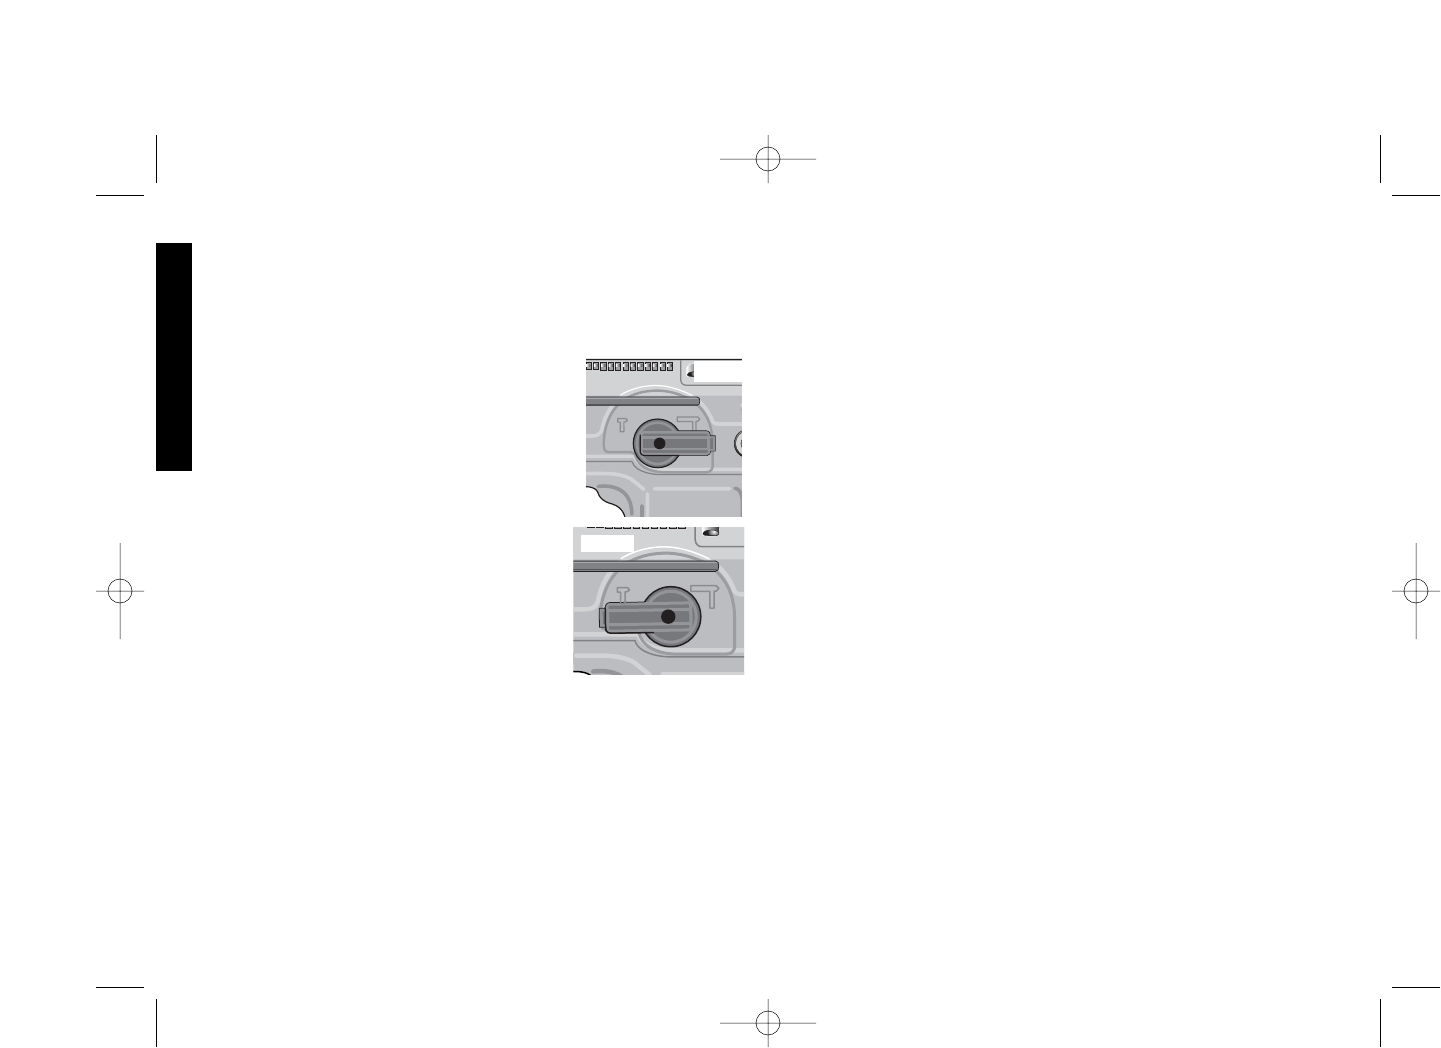
Mode Selector (Fig. 6 & 7)
Your rotary hammer (all units except D25550) can
be used in two operating modes. In hammer
drilling mode, the tool simultaneously rotates and
impacts the work. This mode is appropriate for
all concrete and masonry operations. In the
hammering-only mode, the spindle-lock on the
tool is engaged. The tool only impacts the work
without rotating. This mode is appropriate for
light chipping, chiseling and demolition
applications.
NOTE: In impact-only mode, the hammer can
also be used as a lever to free a jammed drill bit.
To select the required operating mode, rotate
the selector lever over the safety lock until it covers the correct symbol.
SERVICE AND POWER INDICATOR LEDS (D25600, D25650)
The red service indicator LED lights up when the carbon brushes are
nearly worn out to indicate that the tool needs servicing. After
approximately 8 hours of use the motor will automatically be shut off.
Take the tool to a D
EWALT service location for routine inspection and
maintenance.
DRILLING WITH A SOLID BIT
1. Set the speed and impact control dial.
2. Set the model selector to the “hammer drilling” position (for all units
except D25550).
3. Insert the appropriate drill bit.
4. Fit and adjust the side handle.
English
5. If necessary, set the drilling depth rod.
6. Mark the spot where the hole is to be drilled.
7. Place the drill bit on the spot and press the ON/OFF switch.
8. Push with only enough force so that the hammer beats smoothly.
The hammer only needs enough pressure or force to engage the
mechanism. Pushing harder will not make the hammer drill faster.
9. To stop the tool, release the ON/OFF switch. Always turn the tool off
when work is finished and before unplugging.
DRILLING WITH A CORE BIT
1. Turn the speed and impact control dial to the maximum torque
position. (D25550, D25500, D25551, D25600, D25650, )
2. Set the model selector to the “hammer drilling,” position (for all units
except D25550).
3. Fit and adjust the side handle.
4. Assemble the centering bit and adapter shank into core bit.
5. Mark the spot where the hole is to be drilled.
6. Place the centering bit on the spot and press the ON/OFF switch.
NOTE: Some core drills require the removal of centering bit after about
1 cm of penetration. If so, remove and continue drilling.
7. When drilling through a structure thicker than the depth of the core
bit, break away the round cylinder of concrete or core inside the bit
at regular intervals. To avoid unwanted breaking away of concrete
around the hole, first drill a hole the diameter of the centering bit
completely through the structure. Then drill the cored hole halfway
from each side of the structure.
8. To stop the tool, release the ON/OFF switch. Always turn the tool off
when work is finished and before unplugging.
CHIPPING AND CHISELING
1. Set the model selector to the “hammering only with spindle lock”
position (all models except D25550).
2. Set the impact control dial to desired impact energy.
3. Insert the appropriate chisel and rotate it by hand to lock it into the
desired position. For spline units, use a 3/4” hex x 21/32” round
insert tool and for SDS Max models use SDS Max insert tools.
4. Fit and adjust the side handle.
FIG. 7
FIG. 6
582429-00/D25500 etc 1/29/03 9:29 AM Page 6