8
Operating Instructions
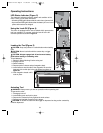
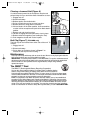
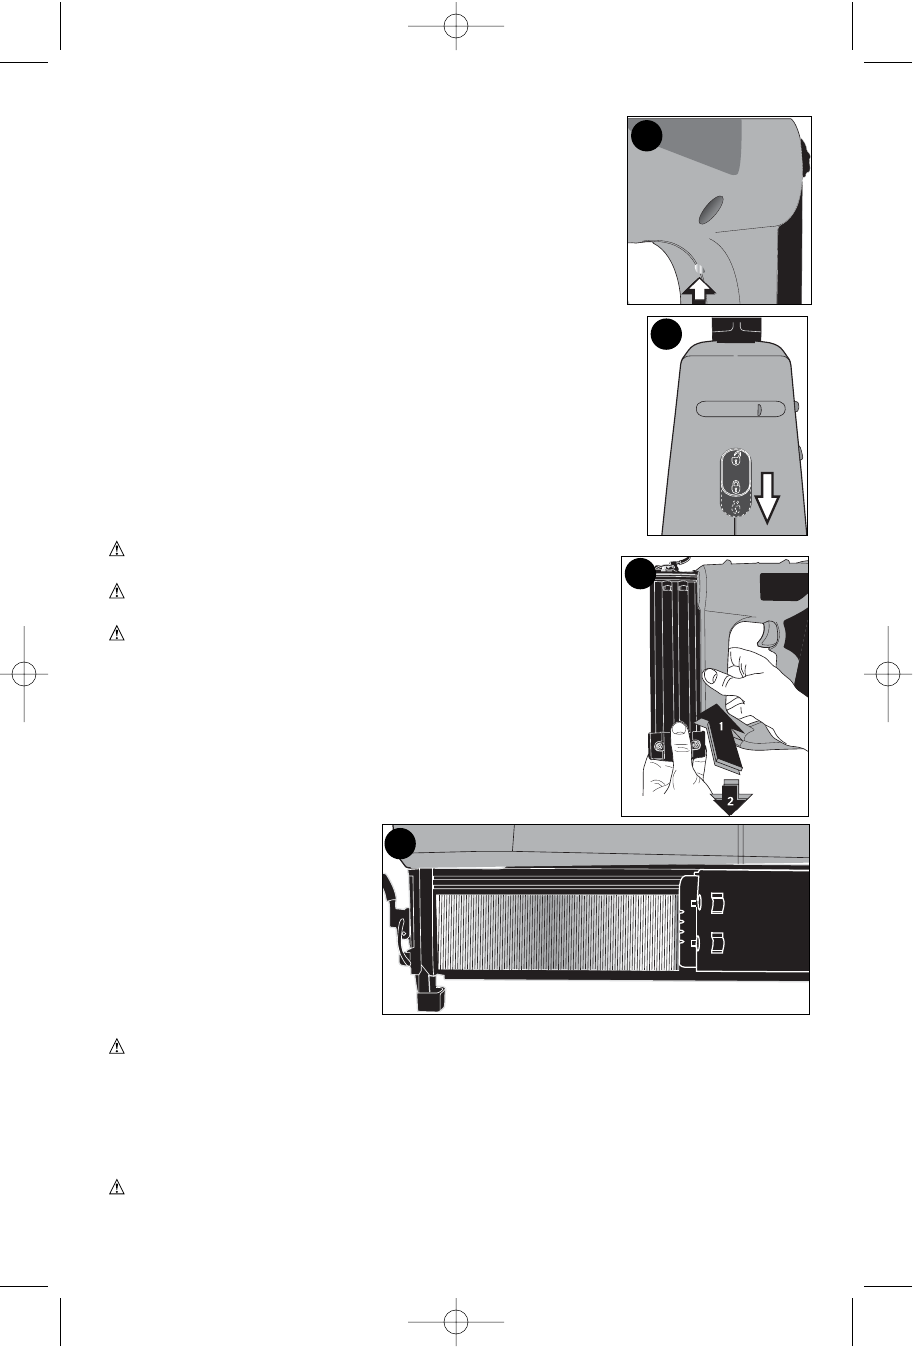
LED Status Indicator (Figure 3)
The electronic indicator tracks the status and condition of the
nailer. There are two basic indicators:
• A flashing RED light indicates that the nailer has a jammed nail.
• A permanent RED light indicates that the battery is low or out of
power and needs to be charged.
Using the Lock-Off (Figure 4)
The nailer is equipped with a lock-off switch which prevents the
tool from actuating. To engage, push the lock-off to the full
rearward position as shown in figure 4.
Loading the Tool (Figure 5)
CAUTION: Keep tool pointed in a safe direction when loading
nails.
CAUTION: Never load nails with the contact trip or trigger
activated.
CAUTION: Always engage lock off and remove battery
pack before loading or unloading nails.
To load fasteners:
1. Read all “Safety Warnings” before using tool.
2. Engage lock off.
3. Remove battery.
4. Depress pusher release and pull magazine back.
5. Insert fasteners into the side of the magazine. Be sure the
fasteners ride on their tips in the nail channel as shown in
figure 5A.
6. Push magazine closed until it
locks in place.
Actuating Tool
WARNING: Always wear eye and ear protection when operating tool.
To operate the nailer:
1. Disengage lock off.
2. Insert battery pack and lock in place.
3. Depress the contact trip firmly against the work surface.
4. Depress and maintain pressure on the trigger.
CAUTION: A nail will fire each time the trigger is depressed as long as the contact trip
remains depressed.
4
3
5
5A
905013144 wo depth 11/28/06 7:43 AM Page 8


