


-9-
Disconnect battery pack
from tool or place the
switch in the locked or off position before
making any assembly, adjustments or
changing accessories.
Such preventive
safety measures reduce the risk of starting the
tool accidentally.
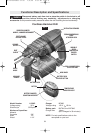
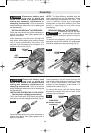
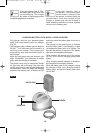
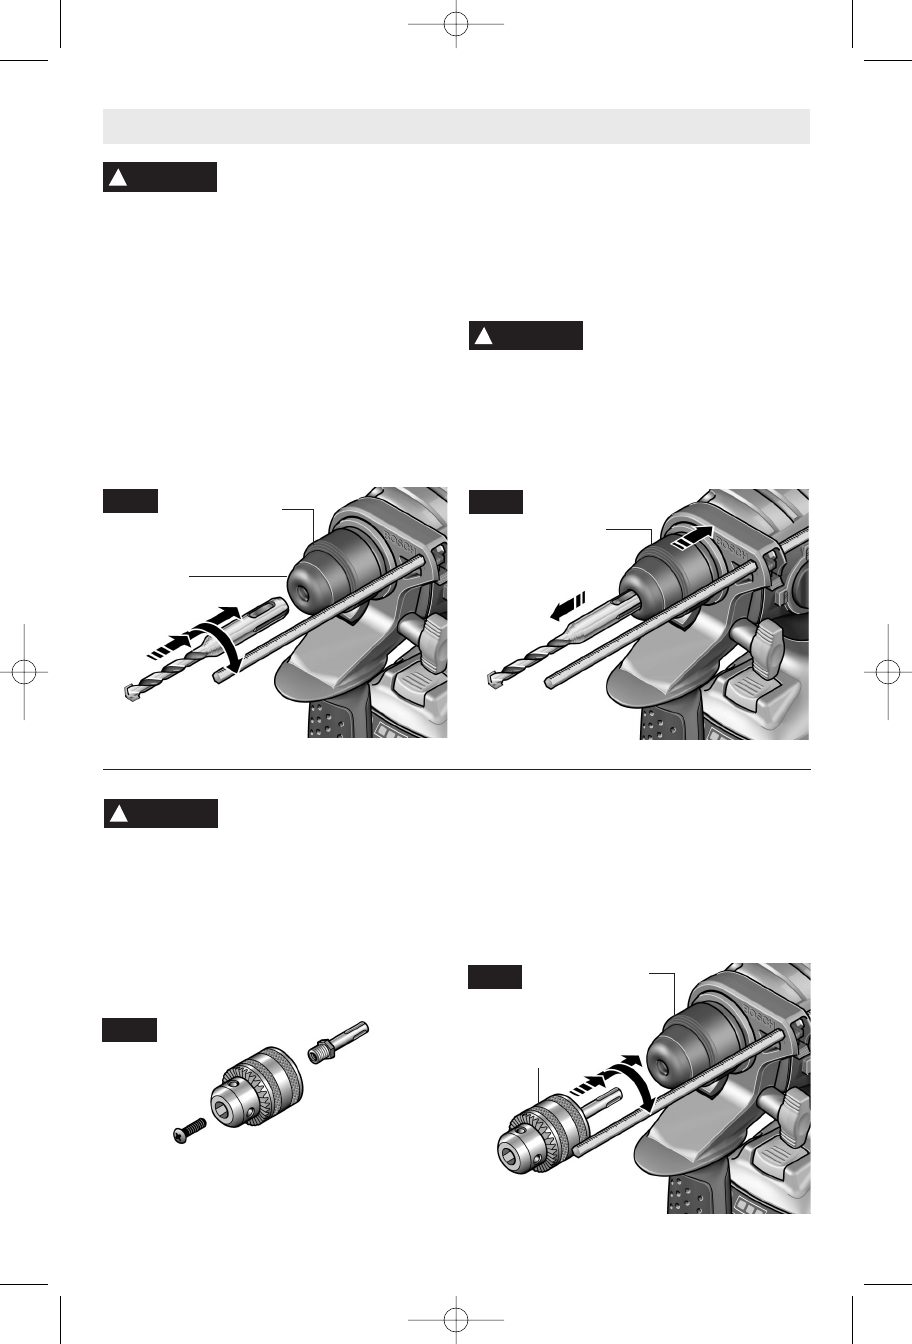
INSTALLING SDS-plus
®
ACCESSORIES
Clean the insert shank end of the accessory to
remove any debris, then lightly grease with a
light oil or lubricant
Insert accessory into the chuck through the
dust shield, while twisting and pushing inward
until it locks automatically into place. Pull
outward on the accessory to be certain it is
locked into the chuck (Fig. 2).
NOTE: The high efficiency available from the
rotary hammers can only be obtained if sharp
and undamaged accessories are used. The
"cost" to maintain sharp and undamaged
accessories is more than offset by the "time
saved" in operating the tool with sharp
accessories.
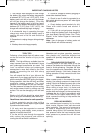
REMOVING SDS-plus
®
ACCESSORIES
Accessories may be hot after
use. Avoid contact with skin
and use proper protective gloves or cloth to
remove.
To remove an accessory, pull locking sleeve
backward and pull bit forward. All accessories
should be wiped clean after removing (Fig. 3).
FIG. 2
FIG. 3
DUST
SHIELD
LOCKING
SLEEVE
!
WARNING
Assembly
!
WARNING
SDS-plus
®
CHUCK
Disconnect battery pack
from tool or place the
switch in the locked or off position before
making any assembly, adjustments or
changing accessories.
Such preventive
safety measures reduce the risk of starting the
tool accidentally.
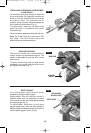
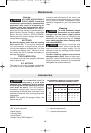
INSTALLING & REMOVING 3-JAW CHUCK
(Not included, available as accessory)
The 3 Jaw Chuck with SDS Shank can convert
your tool for use with straight shank bits (Fig. 4).
Clean the insert shank end of the accessory to
remove any debris, then lightly grease with a
light oil or lubricant
Insert accessory into the chuck through the
dust shield, while twisting and pushing inward
until it locks automatically into place. Pull
outward on the accessory to be certain it is
locked into the chuck (Fig. 5).
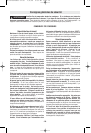
To remove the chuck, pull the locking sleeve
backward (towards the rear of tool), while
pulling the chuck forward.
!
WARNING
LOCKING
SLEEVE
3-JAW CHUCK
(Not included, available
as accessory)
FIG. 4
FIG. 5
BM 1619929800 01-08 1/8/08 9:39 AM Page 9