


-8-
(Model 1295D 1295DH & 1295DVS)
Your random orbit sander uses hook-and-loop
backed accessories, which firmly grip the pad
when applied with moderate pressure. To
change the accessory, merely peel off the old
accessory, remove dust from the pad if
necessary, and press the new accessory in
place. Be sure to align the sanding disc holes
with the holes in the backing pad to allow the
dust extraction system to function.
After considerable service the pad surface will
become worn, and the pad must be replaced
when it no longer offers a firm grip. If you are
experiencing premature wearout of the pad
facing, decrease the amount of pressure you
are applying during operation of the tool.
(Model 1295DP only)
Your sander is equipped with PSA backed
accessories with pressure sensitive adhesive.
To change accessory, peel protective sheet
from the back of accessory. Align accessory
with backing pad and press firmly in place. To
remove, lift an edge of accessory with your
finger nail and peel it off the backing pad.
NOTE: Do not store tool with sanding disc on
pad, as sanding creates heat which increases
the adhesive bond. If the disc is left in place it
may become very difficult to remove.
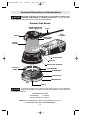
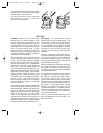
DUST COLLECTION CANISTER
The integral dust extraction system collects
sanding dust in canister supplied with your
sander. For maximum efficiency, the dust
canister should be emptied frequently during
operation.
When the canister is removed from the tool an
(optional vacuum hose accessory) can be
attached to the dust port.
To use this feature, attach vacuum adapter
and vacuum hose (optional accessories) to
dust port, then connect opposite end of the
vacuum hose to a shop vacuum cleaner.
CLEANING AND EMPTYING
THE DUST CANISTER
To empty, lift lid of canister. Knock excess
dust out of the micro filter, or remove dust
with your fingers or a soft brush.
You may notice that all the dust may not come
out of the canister. This will not affect sanding
performance but will reduce dust collection
efficiency.
NOTE: Do not wash the micro filter with soap
and water. Dust may become more firmly
lodged in the pores, which will reduce dust
collection, and damage the micro filter.
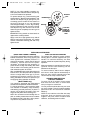
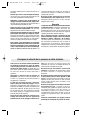
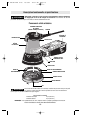
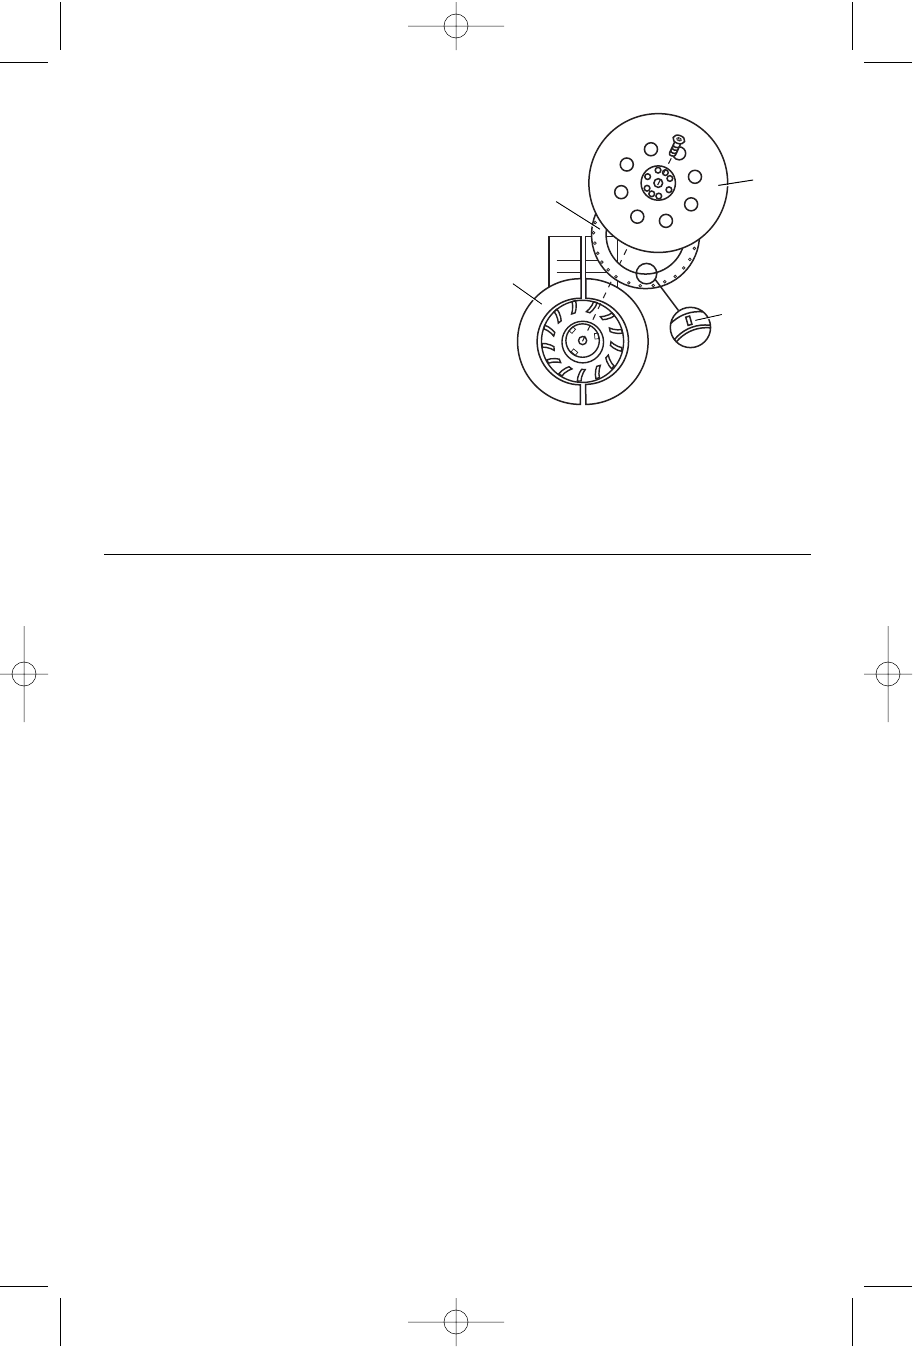
INSTALLING ACCESSORIES
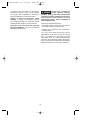
NOTE: If you notice steadily increasing no-
load speed, this indicates that the damper ring
is worn and needs to be replaced.
To replace damper ring, remove backing pad
as described in “Backing Pad Installation” and
remove worn damper ring by pulling firmly out
of locating groove. Loosen the two screws on
shroud just enough so you can separate
shroud approximately 1/4 inch. Align locating
bumps on damper ring with cut outs in shroud
and depress ring with thumbs until shroud
seats into groove completely around ring, then
tighten screws.
IMPORTANT: Ring should not have bends or
ripples when correctly seated.
Apply a thin film of light grease to top side of
backing pad where the damper ring makes
contact, reassemble backing pad and firmly
tighten screw.
DAMPER RING
SHROUD
BACKING
PAD
LOCATING
BUMPS ON
UNDERSIDE
OF DAMPER
RING
BM 2610914126 9-03 10/1/03 10:31 AM Page 8