


6
paddle lever. The switch is spring loaded and
will return to “OFF” position automatically.
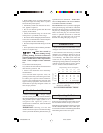
Nibbling to a Scribed Line
or with a Template
Cuts may be executed easily by guiding the
nibbler along a template or a straight edge.
A preboring of 21mm (.827") diameter is re-
quired for internal cut-outs.
When cutting, guide the unit with a slight thrust
in the cutting direction. Cutting takes place
during the downward movement of the punch.
The chips are ejected downward through the
knurled nut 9.
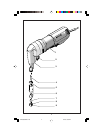
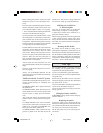
Rotating the Die holder
By rotating the die holder 6, cutting can be
preformed at a right angle to the forward axis of
the machine. Loosen the winged screw 2 and turn
the die holder 6 (including the die 7 and knurled
nut 9), to the right or left by 90°. Re-tighten the
winged screw 2. The winged screw must engage
one of the 3 holes in the die holder 6.
Tool Tips
The corrugated nibbler is especially designed
for working with corrugated sheets of both
trapezoidal and rectangular profiles.
Always use both hands to guide the nibbler.
Do not use force; this will lead to premature die
and punch wear.
Before running the nibbler, be sure the punch
and die are properly lubricated. See "Punch and
Die Lubrication" section.
Never start the nibbler with the punch and die in
contact with the material being cut.
Always be sure material is resting on lower die
during operation.
Changing Punches and Dies
CAUTION! Unplug nibbler before changing
punches and dies.
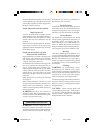
Replacing the punch
Loosen the winged screw 2 and pull the die
holder 6 (including the die 7 and knurled nut 9)
out of the housing 3. Slide the punch 4 sideways
out of the groove and remove downward.
Oil the new punch well, insert into the groove
and center.
Before running the nibbler, inspect the punch
and die for excessive wear, and replace if nec-
essary.
Do not exceed recommended capacities for this
nibbler. Premature punch and die failure will
occur when the nibbler is under- or over-gaged.
• Never start the nibbler with the punch and die
in contact with the material being cut.
For clean and fast cuts, hold the nibbler so that
the cutting head is at a right angle to the cutting
path, with the body of the tool parallel to the
corrugations. Move the cutting head in and out
of the corrugations, constantly keeping the head
at a right angle to the material being cut.
Feed the nibbler into the work with a minimum
of pressure. Let the nibbler do the work. If the
nibbler doesn’t cut correctly, check for a dull
punch or die. Dulling will be apparent as more
pressure is required to feed the nibbler into the
material. Burrs will also show along the cut
edge. A harder material will dull the punch and
die faster than a soft material.
Always direct the cord toward the rear, and
away from the nibbler. Keep it away from sharp
edges.
Secure or clamp small workpieces to be cut to
prevent slippage.
Always use recommended lubricant for the
material being cut. Lack of lubricant will shorten
punch and die life.
Paddle Switch with “Lock-ON” feature
The Paddle Switch enables the operator to con-
trol the switch functions of “ON/OFF” and
“Lock-ON”.
TO SWITCH TOOL “ON”: Squeeze and hold
the paddle lever.
TO SWITCH TOOL “OFF”: Release pressure
on the paddle lever. The switch is spring loaded
and will return to “OFF” position automati-
cally.
The “Lock-ON” feature, incorporated into the
paddle switch, is a convenience for long opera-
tions.
TO LOCK SWITCH “ON”: After switch has
been activated, PULL the front portion of the
paddle lever completely BACKWARD and
release pressure on the paddle lever.
TO SWITCH TOOL “OFF”: Squeeze the rear
portion of paddle lever and then release the
BM 3609929430 4-04 4/22/04, 9:56 AM6