


English | 21
Bosch Power Tools 1 619 929 736 | (30.8.07)
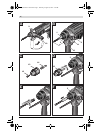
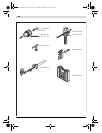
Adjusting the Drilling Depth on the Dust
Extraction Attachment (see figure H)
The required drilling depth X can also be adjust-
ed when the dust extraction attachment is
mounted.
Insert the SDS-plus drilling tool to the stop into
the SDS-plus tool holder 1. Otherwise, the mova-
bility of the SDS-plus drilling tool can lead to in-
correct adjustment of the drilling depth.
Loosen the wing bolt 19 on the dust extraction
attachment.
Without switching the power tool on, apply it
firmly to the drilling location. The SDS-plus drill-
ing tool must face against the surface.
Position the the guide pipe 20 of the dust extrac-
tion attachment in its holding fixture in such a
manner that the head of the dust extraction at-
tachment faces against the surface to be drilled.
Do not slide the guide pipe 20 further over the tel-
escopic pipe 18 of the dust extraction attachment
than required, so that as much as possible of the
scale 18 on the telescopic pipe remains visible.
Retighten the wing bolt 19 again. Loosen the
clamping screw 16 on the depth stop of the dust
extraction attachment.
Move the depth stop 17 on the telescopic pipe 18
in such a manner that the clearance X shown in
the figure corresponds with the required drilling
depth.
Tighten the clamping screw 16 in this position.
Operation
Starting Operation
f Observe correct mains voltage! The voltage
of the power source must agree with the
voltage specified on the nameplate of the
machine. Power tools marked with 230 V can
also be operated with 220 V.
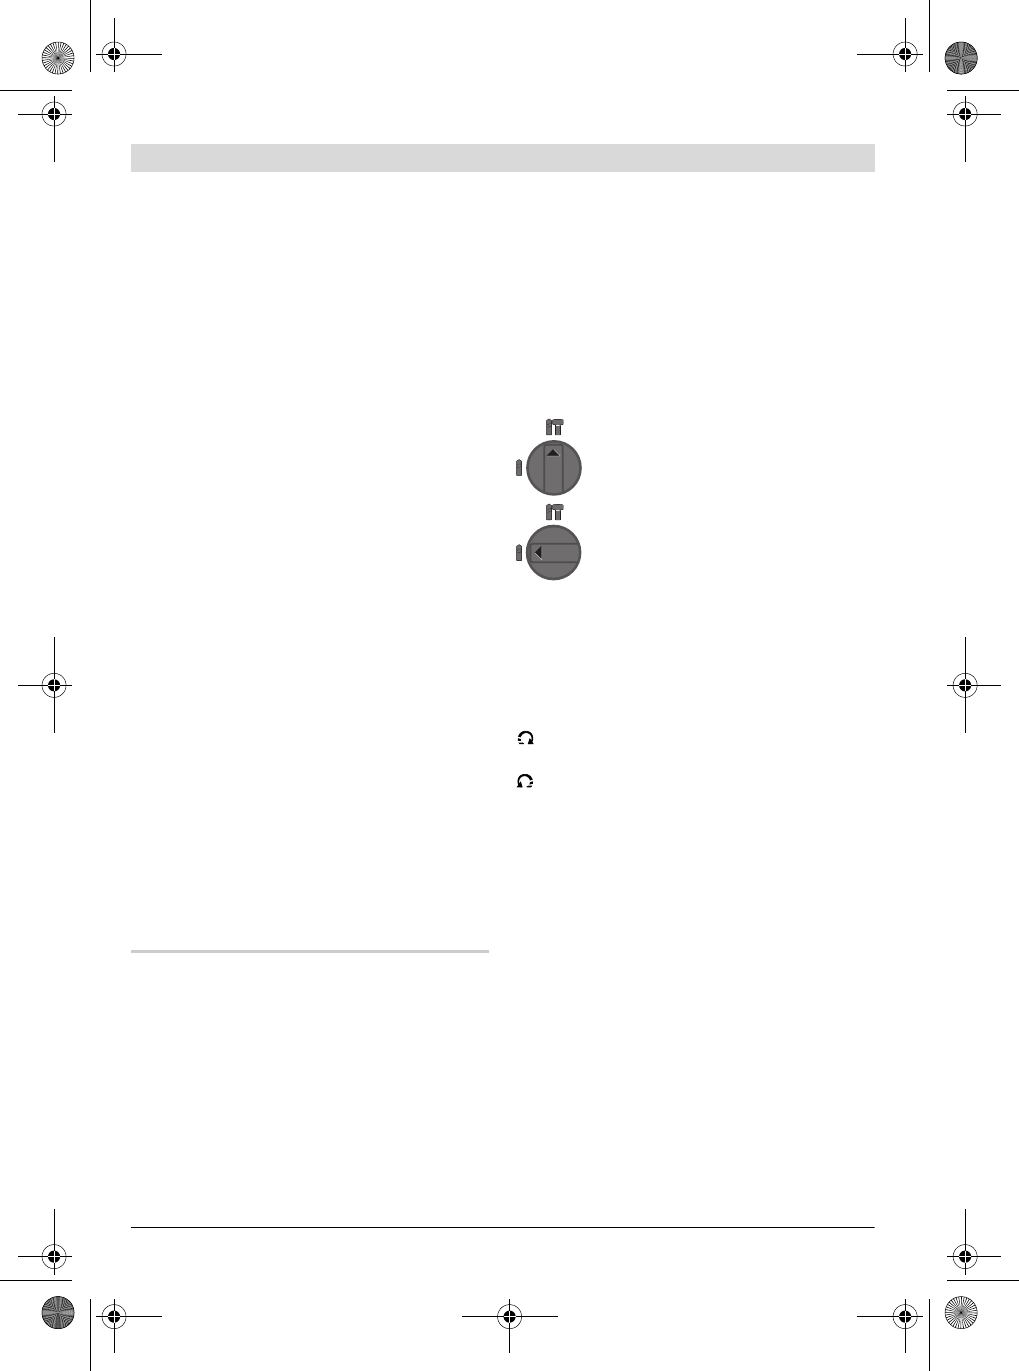
Setting the Operating Mode
With the selector switch for drilling/hammer
drilling 7, the operating mode of the machine is
selected.
Note: Change the operating mode only when the
machine is switched off! Otherwise, the machine
can be damaged.
To change the operating mode, turn the selector
switch for “drilling/hammer drilling” 7 to the
requested position.
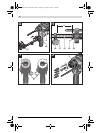
Reversing the Rotational Direction
(GBH 2-18 RE) (see figure I)
The rotational direction switch 6 is used to re-
verse the rotational direction of the machine.
However, this is not possible with the On/Off
switch 5 actuated.
Right rotation: Push the rotational direction
switch 6 rightward to the stop.
Left rotation: Push the rotational direction
switch 6 leftward to the stop.
For hammer drilling and drilling, always set the
direction of rotation to right rotation.
Switching On and Off
To start the machine, press the On/Off switch 5.
To lock the On/Off switch, keep it pressed and
additionally push the lock-on button 4.
To switch off the machine, release the On/Off
switch 5. When the On/Off switch 5 is locked,
press it first and then release it.
Setting the Speed/Impact Rate
The speed/impact rate of the switched on power
tool can be variably adjusted, depending on how
far the On/Off switch 5 is pressed.
Light pressure on the On/Off switch 5 results in
low speed/impact rate. Further pressure on the
switch increases the speed/impact rate.
Position for hammer drilling in
concrete or stone
Position for drilling without impact
in wood, metal, ceramic and plastic
as well as for screwdriving
OBJ_BUCH-427-001.book Page 21 Thursday, August 30, 2007 4:35 PM