


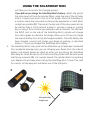

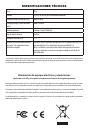
TO SolarWrap
INPUT PORT
(mini USB plug)
FROM PC USB PORT
(standard USB plug)
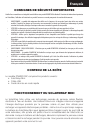
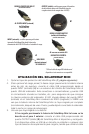
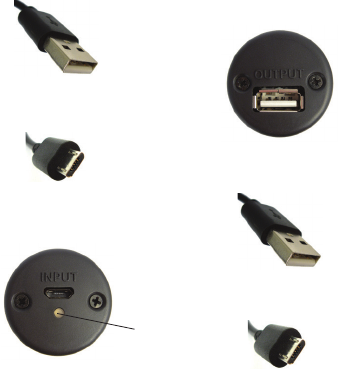
OUTPUT-Used for charging your device
from the SolarWrap’s internal battery
(once charged via solar energy or USB)
B
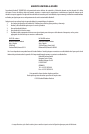
INPUT-Used for charging the SolarWrap
Mini’s internal battery from a USB power
source. LED indicates charge state.
A
LED CHARGE
(Internal Battery)
INDICATOR
* Use USB charging cable included with your
device if this connector is not compatible.
TO PORTABLE DEVICE
CHARGING PORT*
(mini USB plug)
FROM SolarWrap
OUTPUT PORT
(standard USB plug)
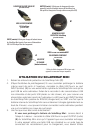
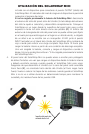
USING THE SOLARWRAP MINI
1. Remove the protective end caps from the SolarWrap Mini (C, next page).
2. (Optional Pre-Charge Step) If you want to pre-charge the internal battery before
you leave for your outdoor adventure, connect the supplied USB cable from the
INPUT port (A) on one end of the SolarWrap Mini cylinder to your computer’s
USB port. Avoid connecting to unpowered USB hubs and USB ports located
on keyboards, etc. to ensure you get full power from the computer. The LED
below the INPUT port on the SolarWrap Mini will change from RED (charging)
to GREEN once the SolarWrap Mini’s internal battery has been fully charged
(typically after about 4 hours-you may leave it connected to your computer
overnight without risk of overcharge).
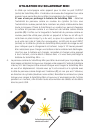
3. Once you arrive at your destination:
If you pre-charged the SolarWrap Mini battery as described in Step 2
above: connect the provided USB cable from the OUTPUT port (B) of the
SolarWrap Mini to your device to recharge it. If your device uses a non-
standard size USB or other type of docking connector to charge it, you
will need to use the cable that came with your device to connect to the
SolarWrap Mini’s OUTPUT port. The charge level indicator on your device