


Cómo usar la
Clavadora (Continuación)
tra la superficie de trabajo. Apriete
el gatillo. La clavadora DEBE OPER-
AR.
Una
herramienta que funciona de manera
inadecuada no debe usarse. No active
la herramienta a menos que esté
colocada firmemente contra la pieza de
trabajo.
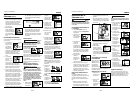
PARA CARGAR Y DESCARGAR LA
CLAVADORA
1. Siempre conecte la herramienta a
la fuente de suminsitro de aire
antes de colocarle los clavos.
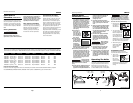
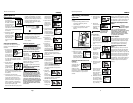
2. Empuje el
cierre hacia
abajo. Mueva
la tapa del car-
gador hacia
atrás.
3. Coloque una
serie de clavos
Campbell
Hausfeld o
equivalentes (Vea la sección de
clavos) en el car gador.
Cerciórese de que los extremos pun-
tiagudos de los clavos estén hacia la
parte inferior del cargador.
Cerciórese de que los clavos no
estén sucios ni dañados.
4. Tire la tapa del
cargador hacia
adelante hasta
que calce el
pestillo.
5. Siempre descargue el sujetador
antes de remover la herramienta de
servicio. La descarga se hace
siguiendo el proceso inverso de la
carga; sin embargo, siempre se
tiene que desconectar la
manguera de aire antes de descar-
garla.
!
ADVERTENCIA
CÓMO AJUSTAR LA PENETRACIÓN
DEL CLAVO
La CHN101 viene equipada con un
mecanismo clavador de profundidad
ajustable. Esto le permite al usuario
determinar a qué profundidad se va a
clavar en la superficie de trabajo.
1. Ajuste la presión de operación a aquél-
la que usará con regularidad para
clavar los clavos. No exceda la presión
de 6,90 bar.
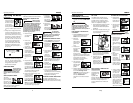
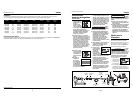
2. Para dirigir el calador de clavos, gire
la rueda (C) hacia la derecha hasta
el punto deseado.
3. Para clavar el clavo más profundo,
gire la rueda (C) hacia la izquierda
hasta el punto deseado.
4. Asegúrese que el
gatillo y el Elemento
de Contacto de
Trabajo se mueven
libremente hacia
arriba y hacia abajo sin atascarse o
pegarse después de cada ajuste.
PARA AJUSTAR LA DIRECCION DEL
TUBO DE ESCAPE
La clavadora mod-
elo CHN101 está
equipada con un
deflector
ajustable de la
dirección del tubo de escape. Éste le
permite al usuario cambiar la dirección
del tubo de escape. Simplemente
mueva el deflector hacia la dirección
deseada.
QUE HACER CUANDO LA CLAVADO-
RA TENGA UN CLAVO ATASCADO
1. Desconecte la
clavadora de la
fuente de sum-
inistro de aire.
2. Remueva todos
los clavos del
depósito (vea
Carga /
Descarga).
Si no se
retiran
todos los sujetadores éstos saldrán por el
frente de la herramienta.
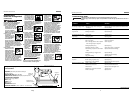
3. Destrabe el gan-
cho presionando
el botón en el
lado del car-
gador. El botón
destrabará el gancho de la boquil-
la.
4. Ahora se puede
girar la puerta,
dejando al descu-
bierto el sujeta-
dor que esté tra-
bado.
5. Retire todos
los sujeta-
dores que
estén traba-
dos, utilizan-
do unas pinzas o un destornillador
si fuera necesario.
6 Vuelva a girar la
puerta a su posi-
ción de cerrado.
7. Vuelva a presion-
ar el botón para
levantar el gan-
cho. Cierre la
puerta y suelte el
botón para volver a trabar el gan-
cho con la boquilla.
8. Asegúrese de que el
gatillo y el elemento
de contacto de tra-
bajo (WCE) se mue-
van libremente
hacia arriba y hacia abajo sin
adherirse ni trabarse.
!
ADVERTENCIA
CHN101
5-Sp
Manual de Instrucciones
(C)
Operating The Nailer
(Continued)
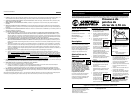
2. An oiler can be
used to provide oil
circulation through
the nailer. A filter
can be used to
remove liquid and
solid impurities which can rust or
“gum up” internal parts of the nail-
er.
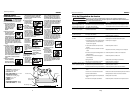
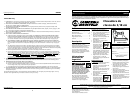
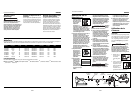
3. Always use air supply hoses with a
minimum working pressure rating
equal to or greater than the pres-
sure from the power source if a reg-
ulator fails, or 150 psi, whichever is
greater. Use 3/8” air hose for runs
up to 50’. Use 1/2” air hoses for 50’
run or longer. For better perfor-
mance, install a 3/8” quick plug
(1/4” NPT threads) with an inside
diameter of .315” (8mm) on the
nailer and a 3/8” quick coupler on
the air hose.
4. Use a pressure regulator on the
compressor, with an operating pres-
sure of 0 - 125 psi. A pressure regu-
lator is required to control the oper-
ating pressure of the nailer
between 60 and 100 psi.
OPERATIONAL MODE
Always know the
operational mode
of the nailer before using. Failure to
know the operational mode could
result in death or serious personal
injury.
SINGLE SEQUENTIAL MODE
This mode
requires the trig-
ger to be pulled
each time a nail
is driven. The nailer can be actuated by
depressing the Work Contact Element
(WCE) against the work surface fol-
lowed by pulling the trigger.
!
WARNING
7. Pull trigger
and depress
the work con-
tact element
(WCE) against the work surface. The
nailer MUST NOT OPERATE.
8. Depress the
Work Contact
Element
(WCE) against
the work surface. Pull the trigger.
The nailer MUST OPERATE.
An improperly
functioning tool
must not be used. Do not actuate the
tool unless the tool is placed firmly
against the work piece.
LOADING/UNLOADING THE NAILER
1. Always connect the tool to the air
supply before loading fasteners.
2. Push down on
the latch. Pull
back on the
magazine cover.
3. Insert a stick of Campbell Hausfeld
nails or equiva-
lent (see
"Fasteners"
section) into
the magazine. Make sure pointed
ends of nails are resting on bottom
ledge of magazine when loading.
Make sure nails are not dirty or
damaged.
4. Push the maga-
zine cover for-
ward until the
latch catches.
5. Always unload all fasteners before
removing tool from service.
Unloading is the reverse of loading,
except always disconnect the air
supply before unloading.
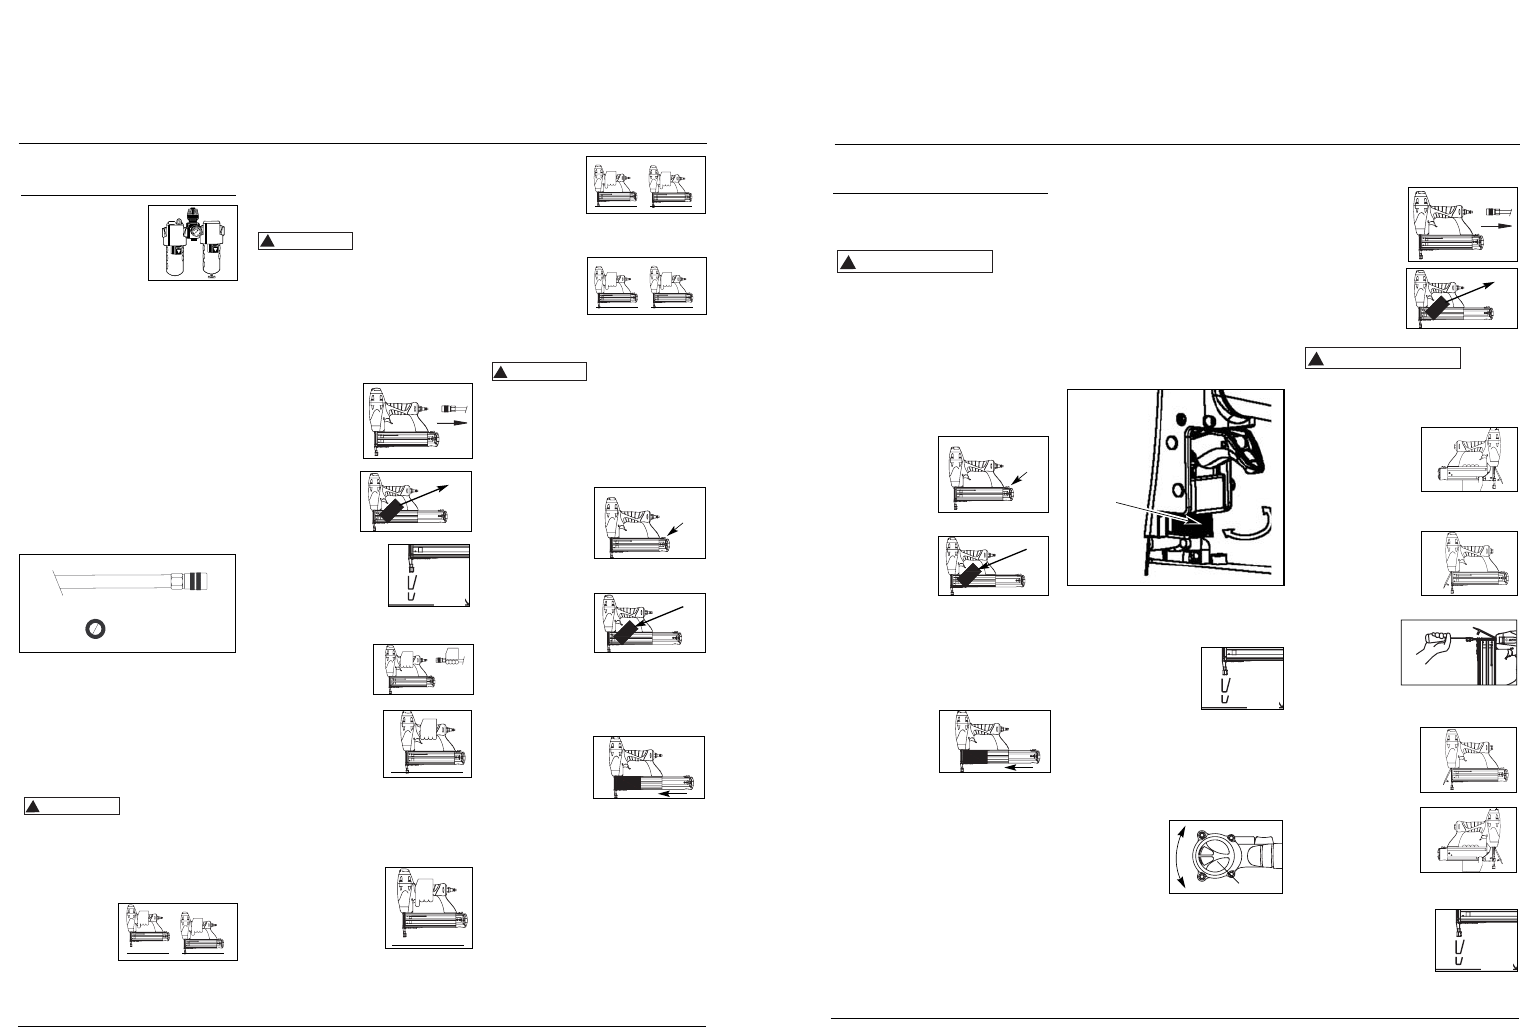
ADJUSTING THE NAIL PENETRATION
The nailer is equipped with an
adjustable depth of drive feature. This
allows the user to determine how deep
!
WARNING
Trigger must be released to reset the
tool before another nail can be driven.
OPERATING A SEQUENTIAL TRIP
NAILER
Check the opera-
tion of the Work
Contact Element (WCE) trip mechanism
before each use. The WCE must move
freely without binding through its
entire travel distance. The WCE spring
must return the WCE to its fully extend-
ed position after being depressed. Do
not operate the nailer if the WCE trip
mechanism is not operating properly.
Personal injury may occur.
1. Disconnect the
air supply from
the nailer.
2. Remove all
nails from the
magazine (see
Loading/
Unloading).
3. Make sure trigger
and work contact
element (WCE)
move freely up and
down without stick-
ing or binding.
4. Reconnect air
supply to the nail-
er.
5. Depress the Work
Contact Element
(WCE) against the
work surface with-
out pulling the trig-
ger. The nailer MUST NOT OPER-
ATE. Do not use the tool if it oper-
ates without pulling the trigger.
Personal injury may result.
6. Remove the nailer from the work
surface. The Work
Contact Element
(WCE) must return
to its original down
position. The nailer
MUST NOT OPER-
ATE. Do not use the tool if it oper-
ates while lifted from the work sur-
face. Personal injury may result.
!
CAUTION
CHN101
Operating Instructions
4
www.chpower.com
movement
Latch
movemiento
BUILT TO LAST
Gire
150 psi or greater
3/8” I.D.
1
2
movemiento
Pestillo
1
2