


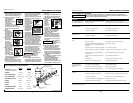
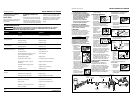
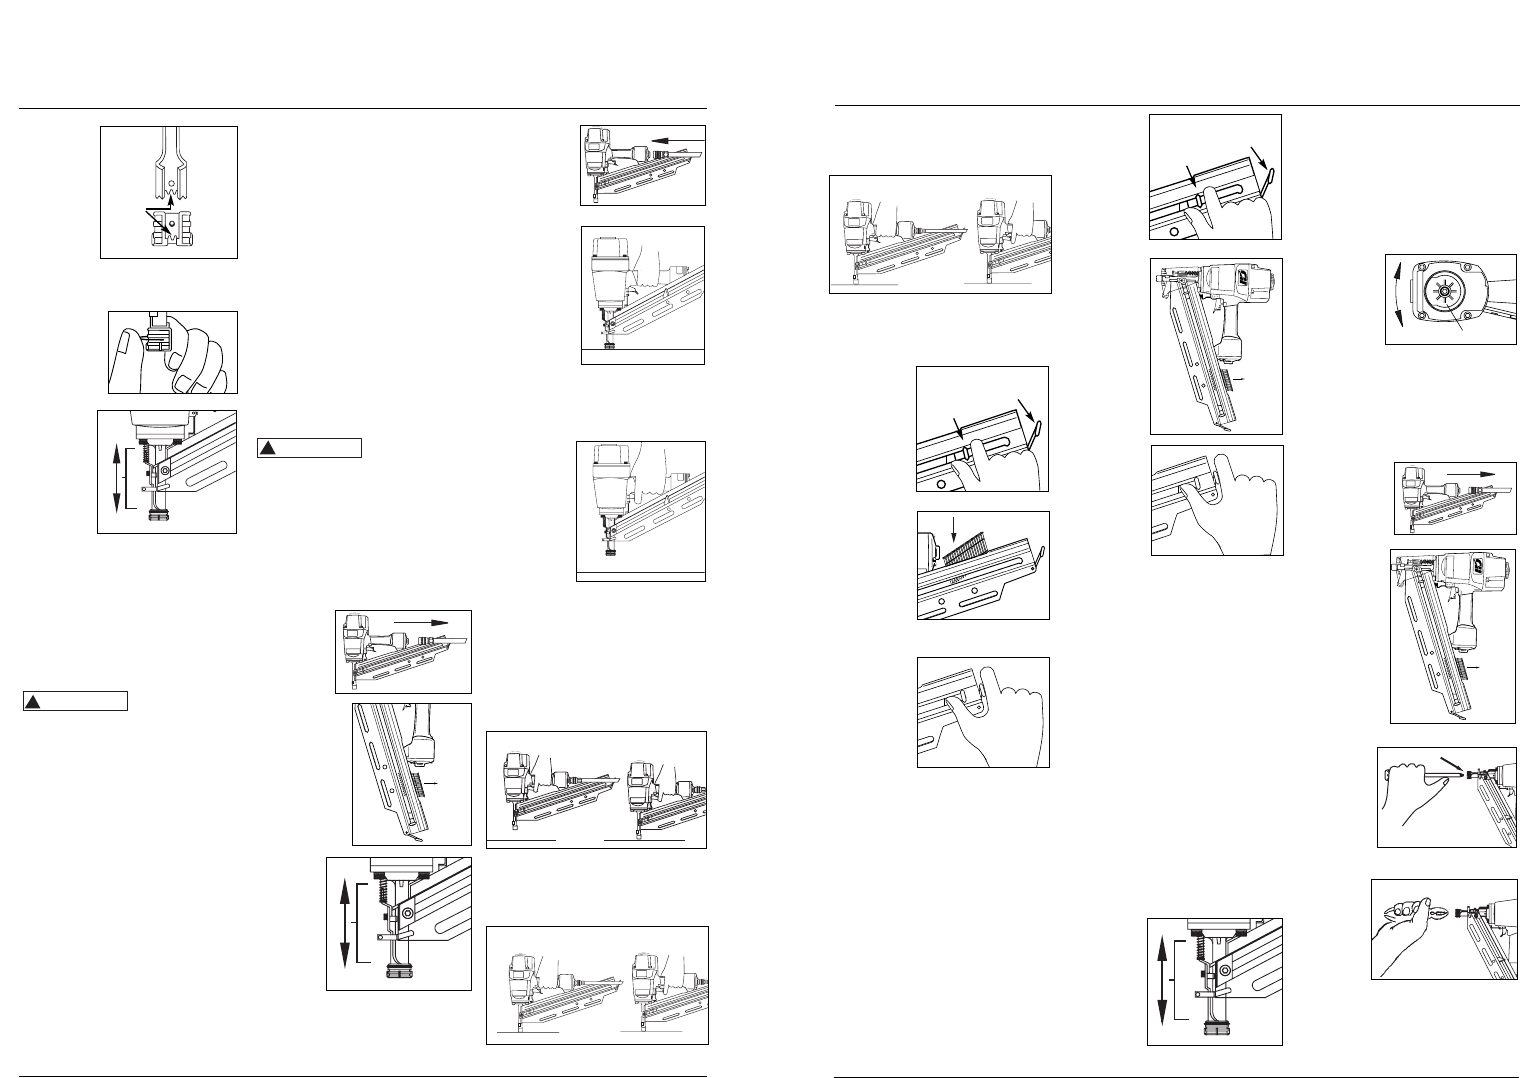
4. Carefully
place no-
mar tip
over the
end of
work
contact
element.
Position
tip onto
WCE
making certain serrated gooves on
each piece are in line and fit snugly
together.
5. Position
retaining
ring on no-
mar tip and
press firmly
in place.
6. Check
that the
WCE and
trigger
move up
and down
freely
without
sticking or
binding.
Operational Modes
The IFN2190 and IFN3490 stick framing
nailers may be operated in the “Single
Cycle” or the “Bottom Trip” mode. The
nailer is delivered in the single cycle
mode. A separate ‘red’ trigger for
“Bottom Trip” mode is included with
tool as an accessory.
Always know the
operational
mode of the nailer before using.
Failure to know the operational
mode could result in death or serious
personal injury.
SINGLE CYCLE MODE
When the black trigger is installed,
nailer is in single cycle mode. This
method is recommended when precise
nail placement is required. Operation
in this mode requires trigger to be
pulled each time a nail is driven. Nailer
can be actuated by depressing the WCE
against work surface followed by
pulling the trigger.
The trigger must be released after each
fastener is driven to allow tool to reset.
BOTTOM TRIP MODE
When the red trigger is installed, the
nailer is in bottom trip mode. This
method is recommended when less
precise nail placement is required.
Operation in this mode requires trigger
to be depressed with nailer off of the
!
WARNING
and down
without
sticking or
binding.
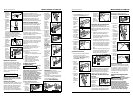
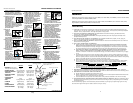
4. Reconnect
air supply to
the nailer.
5. Depress the
Work
Contact
Element
(WCE)
against the
work surface
without
pulling the
trigger. The
nailer MUST NOT OPERATE. Do not
use the tool if it operates without
pulling the trigger. Personal injury
may result.
6. Remove
nailer from
work
surface. The
Work
Contact
Element
(WCE) must
return to its
original
down position. Pull the trigger. The
nailer MUST NOT OPERATE. Do
not use the tool if it operates while
lifted from the work surface.
Personal injury may result.
7. Pull the trigger and depress the
work contact element (WCE) against
the work surface. The nailer MUST
OPERATE.
8. Depress the Work Contact Element
(WCE) against work surface. Pull
the trigger. The nailer MUST
OPERATE.
work surface. Then, the nose of the
nailer is tapped against the work
surface causing a nail to be driven.
Each time the Work Contact Element is
depressed, a nail is driven into the work
surface. Extreme care should be taken
because a nail will be driven when the
WCE is pressed against any surface.
To convert the tool from one mode to
the other:
1. Remove o-ring on the side of
trigger pin.
2. Remove trigger pin, trigger, and
trigger spring.
3. Switch out only the trigger.
4. Replace trigger spring, trigger,
trigger pin, and o-ring.
WORK CONTACT ELEMENT (WCE)
Check the opera-
tion of the Work
Contact Element (WCE) trip
mechanism before each use. The WCE
must move freely without binding
through its entire travel distance.
The WCE spring must return the WCE
to its fully extended position after
being depressed. Do not operate the
nailer if the WCE trip mechanism is
not operating properly. Personal
injury may occur.
1. Disconnect
the air
supply
from the
nailer.
2. Remove all
nails from the
magazine
(see
Unloading
The Nailer).
3.
Make
sure the
trigger
and work
contact
element
(WCE)
move
freely up
!
CAUTION
Model IFN3490 and IFN2190
Operating Instructions
4
Modelo IFN3490 and IFN2190
5-Sp
Manual de Instrucciones
1
2
1
2
8. Presione el elemento de contacto de
trabajo (WCE) contra la superficie de
trabajo. Tire del gatillo. La clavadora
DEBE FUNCIONAR.
CÓMO CARGAR LA CLAVADORA
1. Siempre conecte la herramienta al
abastecimiento de aire antes de
cargar los sujetadores.
2. Jale el
mecanismo
del
empujador
de clavos
hasta que
éste
engrane
con el
enganche
del
cargador.
3. Cargue la
tira de
sujetadores
en la ranura
del
cargador.
Asegúrese
de que los
clavos estén colocados en la
herramienta en la orientación
correcta.
4. Presione el
empujador
con el
enganche
para desen-
ganchar al
empujador.
Asegúrese
de que la cabeza del último clavo
esté debajo de la cabeza del
empujador.
CÓMO DESCARGAR LA CLAVADORA
1. Siempre descargue todos los
sujetadores antes de retirar la
herramienta de funcionamiento. La
acción de descargar es lo contrario
a la de cargar, con la excepción que
siempre debe desconectarse la
manguera de aire antes de
descargar.
2. Jale el
mecanismo
del empu-
jador de
clavos hasta
que el
empujador
se engrane
con el
enganche
del cargador.
3. Sostenga la
herramienta
hacia arriba
para que
los clavos se
deslicen
para atrás
hacia la
ranura del
cargador.
4. Presione el
empujador
con el
enganche
para desen−
ganchar al
empujador
una vez que
se hayan
retirado
todos los
clavos.
CÓMO AJUSTAR LA PENETRACIÓN
DEL CLAVO
Las clavadoras NS2090 y NS2890 tienen
una característica de profundidad de
accionamiento ajustable. Esto permite
que el usuario determine qué tan
profundo se va a introducir un clavo en
la superficie de trabajo.
1. Ajuste la presión de operación a una
presión que accionará uniformemente
a los sujetadores. No exceda la
máxima presión de operación de la
clavadora de 8,27 bar.
2. Para ajustar la profundidad de
accionamiento, afloje el perno de 4
mm que está encima de la nariz. Para
aumentar la profundidad, presione el
elemento de contacto de trabajo
(WCE), hacia la nariz, tanto como lo
desee. Vuelva a ajustar el perno. Para
disminuir la profundidad, retire el
WCE tanto como desee. Vuelva a
ajustar el perno.
3. Asegúrese de que el gatillo y el
elemento de contacto de trabajo
(WCE) se
muevan
fácilmente
hacia
arriba y
hacia abajo
sin pegarse
o atracarse
luego de
cada
ajuste.
ANTI DISPARO SIN CARGA
La IFN2190 está equipada con una
característica de anti disparo sin carga. Esto
evita que se presione el WCE cuando sólo
queden pocos clavos. Simplemente cargue
nuevos clavos a continuación de los que
quedan, para continuar disparando.
CÓMO AJUSTAR LA DIRECCIÓN
DEL ESCAPE
Las clavadoras
NS2090 y
NS2890 vienen
con un
deflector de
escape de
dirección
ajustable. Esto
está diseñado para que el usuario
pueda cambiar la dirección del escape.
Con la llave de 5 mm que se
proporciona, afloje el tornillo del
deflector; luego gire el deflector en la
dirección deseada y vuelva a ajustar el
tornillo.
CÓMO DESATASCAR LA CLAVADORA
1. Desconecte
la clavadora
del abaste-
cimiento de
aire.
2. Retire todos
los clavos del
cargador
(ver Cómo
cargar o
Cómo
descargar).
Si se ignora
este paso,
los clavos
saldrán
disparados
por la parte
frontal de la
herramienta.
3. Inserte un
desar-
mador en
la nariz de
la he-
rramienta.
Empuje la
cuchilla
del accionador para soltar el clavo
atracado.
4. Sujete el
clavo
atracado
con unos
alicates,
y retírelo.
Servicio Técnico
Si desea hacer alguna pregunta
referente a la reparación u operación de
las clavadoras, sírvase llamar a nuestro
número especial, 1-800-543-6400. Si
llama desde Ohio o fuera de los Estados
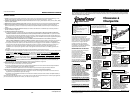
El mecanismo
del
empujador
de clavos
El
enganche
Rotate
El mecanismo
del
empujador
de clavos
El
enganche
Gire
Grooves
www.chpower.com
1
2