


6
Rote la puerta
hacia atrás a la
posición cerrada.
7. Extienda el
pestillo de alam-
bre y colóquelo
sobre los gan-
chos de la
boquilla.
8. Cierre el pestillo
empujándolo
hacia adentro
hasta que ajuste
en su posición.
9. Asegúrese que
el gatillo y el
Elemento de
Contacto de
Trabajo se
mueven libre-
mente, hacia arriba y hacia abajo sin
pegarse o atascarse.
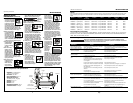
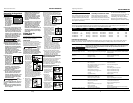
4. Use a pressure regulator on the
compressor, with an operating pres-
sure of 0 -125 psi. A pressure regu-
lator is required to control the
operating pressure of the nailer
between 70 and 120 psi.
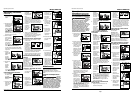
Sequential Trip Safety
Mechanism
The tool is equipped with a sequential
trip safety mechanism. When the oper-
ator depresses the Work Contact
Element (WCE) against the work sur-
face and then pulls the trigger, a fas-
tener will be driven.
OPERATING A SEQUENTIAL TRIP
TOOL
1. Release trig-
ger and place
nose of tool
against work
surface.
2. Depress the
Work contact
element (WCE)
against the
work surface
and pull the
trigger to drive
a fastener.
3. Release the
trigger and lift
the tool from
the work sur-
face after
each fastener
is driven.
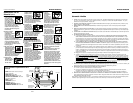
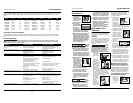
CHECKING THE WORK CONTACT
ELEMENT (WCE)
Check the
opertion
of the Work Contact Element (WCE) trip
mechanism before each use. The WCE
must move freely without binding
through its entire travel distance. The
WCE spring must return the WCE to its
fully extended position after being
depressed. Do not operate the nailer if
the WCE trip mechanism is not operating
properly. Personal injury may occur.
1. Disconnect the
air supply from
the nailer.
2. Remove all nails from the magazine
(see Loading/ Unloading The Nailer).
3.
Make sure the trig-
ger and work con-
tact element (WCE)
move freely up and
down without
sticking or binding.
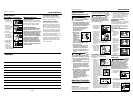
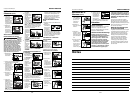
used, manual lubrication through the
air inlet is not required on a daily basis.
The work
surface
can become damaged by excessive
lubrication. Proper lubrication is the
owner’s responsibil- ity. Failure to
lubricate the nailer properly will dra-
matically shorten the life of the nailer
and void the warranty.
1. Disconnect the
air supply from
the nailer to
add lubricant.
2. Turn the nailer
so the air inlet
is facing up.
Place 4-5 drops
of 30 W non-
detergent oil
into air inlet.
Do not use
detergent oils,
oil additives, or air tool oils. Air tool
oils contain solvents which will
damage the nailer's internal com-
ponents.
3. After adding
oil, run nailer
briefly. Wipe
off any excess
oil from the
cap exhaust.
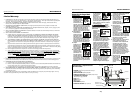
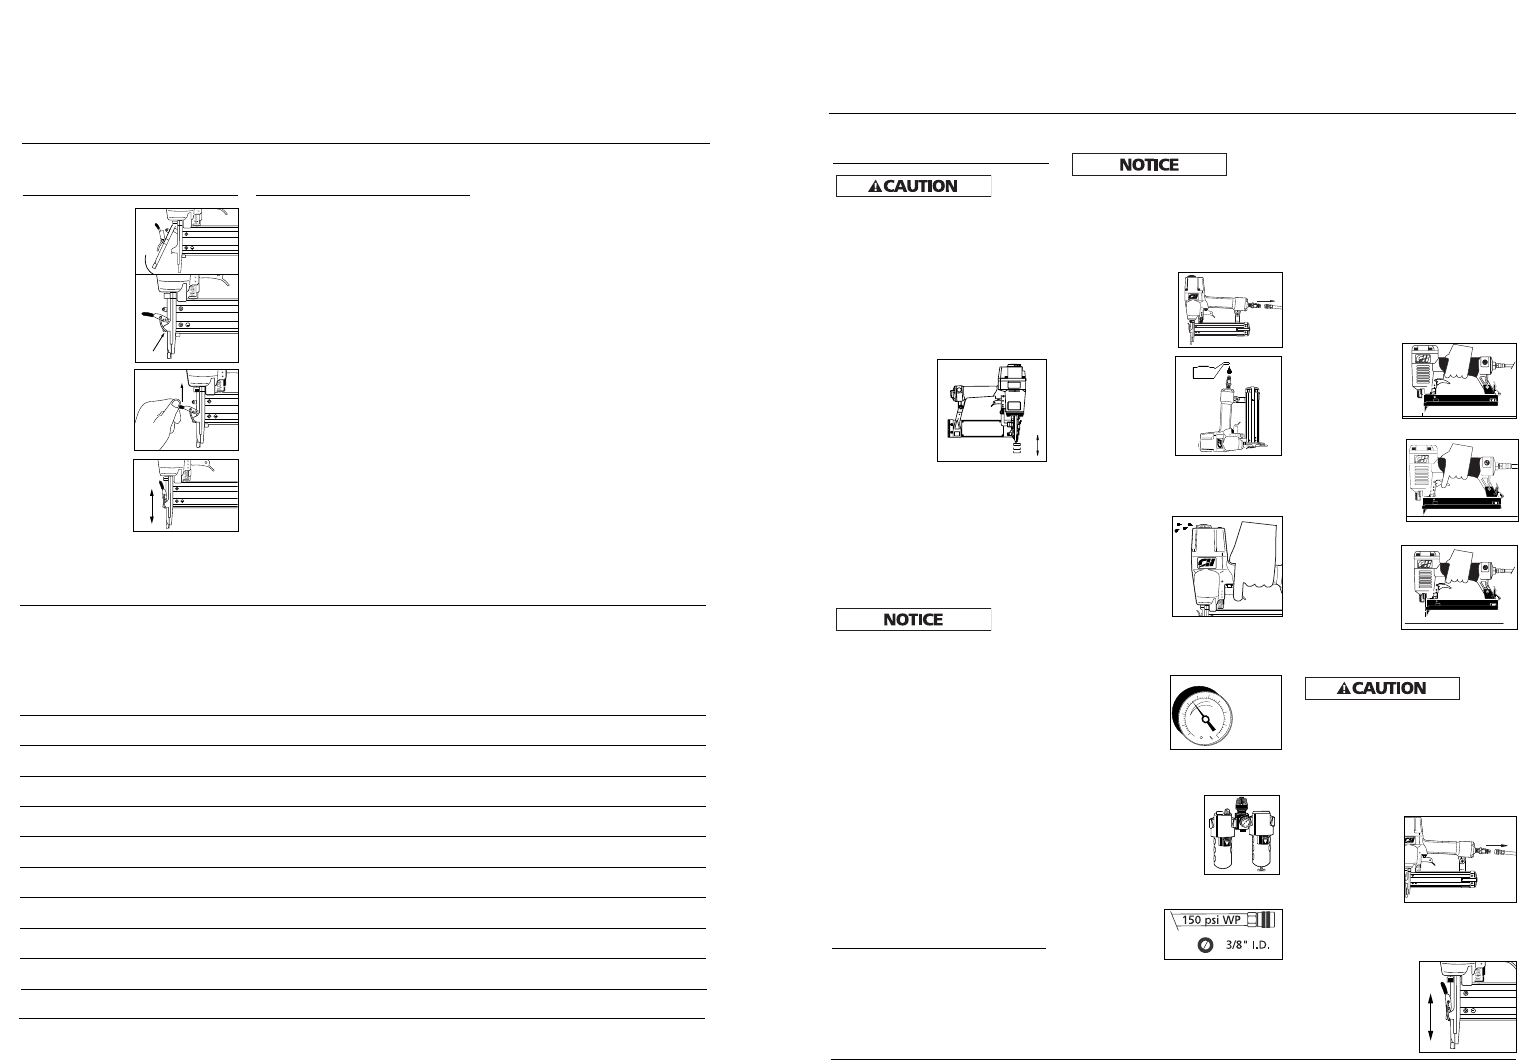
RECOMMENDED HOOKUP
Please refer to Airtool Setup
(IN170102AV) for system hookup
instructions.
1. The air com-
pressor must
be able to
maintain a
minimum of
70 psi when
the nailer is being used. An inade-
quate air supply can cause a loss of
power and inconsistent driving.
2. An oiler can be used
to provide oil circula-
tion through the
nailer. A filter can
be used to remove
liquid and solid
impurities which can
rust or “gum up” internal parts of
the nailer.
3. Use 3/8” air
hoses with a
minimum
working pres-
sure of 150
psi. Use 1/2” air hoses for 50’ run or
longer. For better performance,
install a 3/8” quick plug (1/4” NPT
threads) with an inside diameter of
.315" (8mm) on the nailer and a
3/8” quick coupler on the air hose.
Caution
indicates
a potentially hazardous situation
which, if not avoided, MAY result in
minor or moderate injury.
● Do not make any modifications to the
tool without first obtaining written
approval from Campbell Hausfeld. Do
not use the tool if any shields or
guards are removed or altered. Do
not use the tool as a hammer.
Personal injury or tool
damage may occur.
● Always check
that the Work
Contact
Element (WCE)
is operating
properly. A fas-
tener could
accidentally be
driven if the WCE is not working
properly. Personal injury may occur
(See "Checking the Work Contact
Element" Section).
● Disconnect air supply and release
tension from the pusher before
attempting to clear jams because
tools can be ejected from the front
of the tool. Personal injury may
occur.
Notice
indicates
important information, that if not fol-
lowed, MAY cause damage to equipment.
● Avoid using the tool when the mag-
azine is empty. Accelerated wear on
the tool may occur.
● Clean and check all air supply hoses
and fittings before connecting the
tool to an air supply. Replace any
damaged or worn hoses or fittings.
Tool performance or durability may
be reduced.
● Air compressors providing air to the
tool should follow the requirements
established by the American
National Standards Institute
Standard B19.3-1991; Safety
Standard for Compressors for
Process Industries. Contact your air
compressor manufacturer for
information.
Operating The Nailer
Read this manual and understand all
safety warnings and instructions before
operating the nailer.
LUBRICATION
This nailer requires lubrication before
using the nailer for the first time and
before each use. If an inline oiler is
3
OIL
70 psi
Min.
120 psi
Max.
Model NB004100
Operating Instructions
www.chpower.com
Modelo NB004100
Manual de Instrucciones
5 Sp
Servicio Técnico
Si desea hacer alguna pregunta refer-
ente a la reparación u operación de las
clavadoras, sírvase llamar a nuestro
número especial, 1-800-543-6400.
Clavos et Repuestos
Use solamente sujetadores Campbell
Hausfeld originales calibre 16 (o su
equivalente) - (vea la información sobre
intercambio de sujetadores). Use sola-
mente partes de repuesto Campbell
Hausfeld originales. Nunca substituya
las partes. No use partes modificadas o
partes que no den un rendimiento
equivalente al equipo original. El
rendimiento de las herramientas, la
seguridad y la duración pueden verse
reducidos. Cuando ordene partes de
repuesto o sujetadores, especifique el
número de la parte.
Para reparar la clavadora
Las reparaciones de la clavadora las
debe hacer SOLAMENTE un técnico cali-
ficado que tenga experiencia.
Para colocarle los sellos
Cada vez que repare una clavadora
deberá limpiarle y lubricarle las partes
internas. Le recomendamos que use
Parker O-lube o un lubricante equiva-
lente en todos los anillos en O. A cada
anillo en O se le debe dar un baño de
lubricante para anillos antes de insta-
larlos. Igualmente, deberá ponerle un
poco de aceite a todas las piezas que se
mueven y muñones. Finalmente,
después de haberla ensamblado y antes
de probar la herramienta deberá pon-
erle unas cuantas gotas de aceite sin
detergente 30W u otro aceite similar,
en las líneas de aire.
Notas
General Safety
Information (Continued)
Cómo Usar la
Clavadora (Continuación)
Mantenimiento