3
Operating The Nailer
Read this manual and understand
all safety warnings and instructions
before operating the nailer.
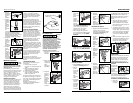
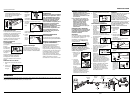
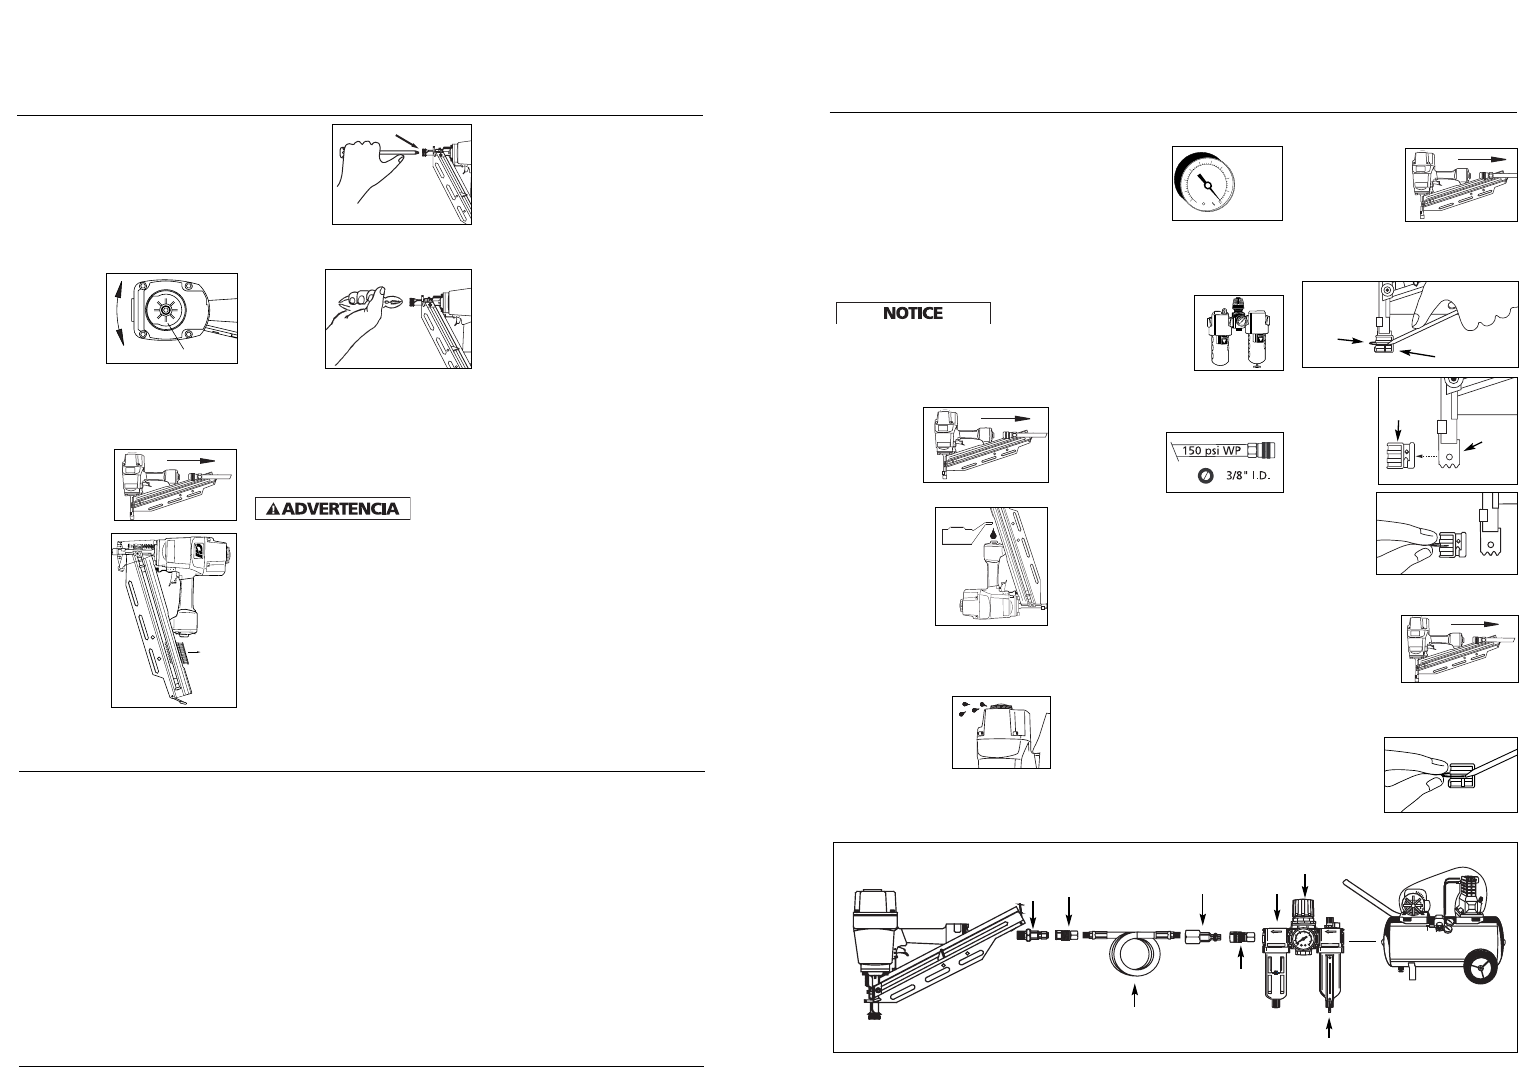
LUBRICATION
This nailer requires lubrication before
using the nailer for the first time and
before each use. If an inline oiler is
used, manual lubrication through the
air inlet is not required on a daily basis.
The work
surface
can become damaged by excessive
lubrication. Proper lubrication is the
owner’s responsibil- ity. Failure to
lubricate the nailer properly will
dramatically shorten the life of the nailer
and void your warranty.
1. Disconnect
the air
supply from
the nailer
to add
lubricant.
2. Turn the nailer
so the air inlet
is facing up.
Place 4-5 drops
of 30 W non-
detergent oil
into air inlet.
Do not use
detergent oils, oil additives, or air
tool oils. Air tool oils contain
solvents which will damage the
nailer’s internal components.
3. After adding oil,
run nailer briefly.
Wipe off any
excess oil from
the cap exhaust.
REMOVING NO-MAR DECKING TIP
1. Disconnect air
supply from
nailer.
2. Remove all fasteners from magazine
(See UNLOADING THE
NAILER).
3. Remove no-mar tip retaining ring.
4. Pry no-
mar tip
away
from the
work
contact
element.
5. Replace
retaining
ring onto
no-mar
tip, then
store tip
in safe
place for future use.
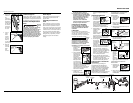
INSTALLING NO-MAR DECKING TIP
1. Disconnect air
supply from
nailer.
2. Remove all fasteners from magazine
(See UNLOADING THE NAILER).
3. Remove retaining ring from no-mar
tip.
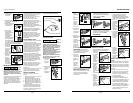
RECOMMENDED HOOKUP
1. The air
compressor
must be able
to maintain a
minimum of 70
psi when the nailer is being used.
An inadequate air supply can cause
a loss of power and inconsistent
driving.
2. An oiler can be
used to provide oil
circulation through
the nailer. A filter
can be used to
remove liquid and
solid impurities which can rust or
“gum up” internal parts of the
nailer.
3. Use 3/8” air
hoses with a
minimum
working
pressure of 150 psi. Use 1/2” air
hoses for 50’ run or longer. For
better performance, install a 3/8”
quick plug (1/4” NPT threads) with
an inside diameter of .315” (8mm)
on the nailer and a 3/8” quick
coupler on the air hose.
4. Use a pressure regulator on the
compressor, with an operating
pressure of 0 - 125 psi. A pressure
regulator is required to control the
operating pressure of the nailer
between 70 and 120 psi.
NO-MAR DECKING TIP
The no-mar decking tip is designed to
eliminate marks caused by the serrated
work contact element (WCE). The no-
mar tip may be removed if not
required (See REMOVING NO-MAR
DECKING TIP). Use tool in single cycle
mode (SEE OPERATIONAL MODES)
when no-mar tip is in place.
70 psi
Min.
OIL
120 psi
Max.
6-Sp
Manual de Instrucciones
Model NS319500
Retaining
Ring
No-Mar Tip
Work
Contact
Element
No-
Mar
Tip
Sujetadores
La herramienta NS319500 también coloca sujetadores diseñados para: Porter Cable FC 350A, Hitachi NR83AA2, Senco FramePro
701XP, 751XP , Ridgid R350CHA, DeWalt D51822, D51823 y Paslode F-3505.
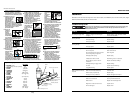
ANTI DISPARO SIN CARGA
Los herramientas
está equipada con una
característica de anti disparo sin carga. Esto
evita que se presione el WCE cuando sólo
queden pocos clavos. Simplemente cargue
nuevos clavos a continuación de los que
quedan, para continuar disparando.
CÓMO AJUSTAR LA DIRECCIÓN
DEL ESCAPE
Las clavadoras
vienen con un
deflector de
escape de
dirección
ajustable. Esto
está diseñado para que el usuario
pueda cambiar la dirección del escape.
Simplemente gire el deflector en
cualquier dirección deseada.
CÓMO DESATASCAR LA CLAVADORA
1. Desconecte
la clavadora
del abaste-
cimiento de
aire.
2. Retire todos
los clavos del
cargador
(ver Cómo
cargar o
Cómo
descargar).
Si se ignora
este paso,
los clavos
saldrán
disparados
por la parte frontal de la
herramienta.
3. Inserte un
desar-
mador en
la nariz de
la he-
rramienta.
Empuje la
cuchilla del accionador para soltar el
clavo atracado.
4. Sujete el
clavo
atracado
con unos
alicates,
y retírelo.
Servicio Técnico
Si desea hacer alguna pregunta
referente a la reparación u operación de
las clavadoras, sírvase llamar a nuestro
número especial, 1-800-543-6400.
Clavos et Repuestos
Use solamente sujetadores Campbell
Hausfeld originales (o su equivalente) -
(vea la información sobre intercambio
de sujetadores). Use solamente partes
de repuesto Campbell Hausfeld
originales. Nunca substituya las partes.
No use partes modificadas o partes
que no den un rendimiento
equivalente al equipo original. El
rendimiento de las herramientas, la
seguridad y la duración pueden verse
reducidos. Cuando ordene partes de
repuesto o sujetadores, especifique el
número de la parte.
Para reparar la clavadora
Las reparaciones de la clavadora las
debe hacer SOLAMENTE un técnico
calificado que tenga experiencia.
Para colocarle los sellos
Cada vez que repare una clavadora
deberá limpiarle y lubricarle las partes
internas. Le recomendamos que use
Parker O-lube o un lubricante
equivalente en todos los anillos en O. A
cada anillo en O se le debe dar un baño
de lubricante para anillos antes de
instalarlos. Igualmente, deberá ponerle
un poco de aceite a todas las piezas
que se mueven y muñones. Finalmente,
después de haberla ensamblado y antes
de probar la herramienta deberá
ponerle unas cuantas gotas de aceite
sin detergente 30W u otro aceite
similar, en las líneas de aire.
Recommended Hookup
Quick
Coupler
Air
Hose
Quick Plug
(Optional)
Quick
Coupler
(Optional)
Oiler
Regulator
Filter
Quick
Plug
Rotate
Gire
www.chpower.com


