


10
Operating Instructions and Parts Manual
www.chpower.com
Assembly and Preoperation
ASSEMBLY AND PREOPERATION
Always make sure that
the garden hose is
turned on before turning on the pressure
washer. Running the pressure washer
without water will damage the pumps seals.
Do not disassemble
the lance or gun on this
pressure washer. Replacement parts are not
available for the gun or lance.
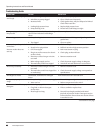
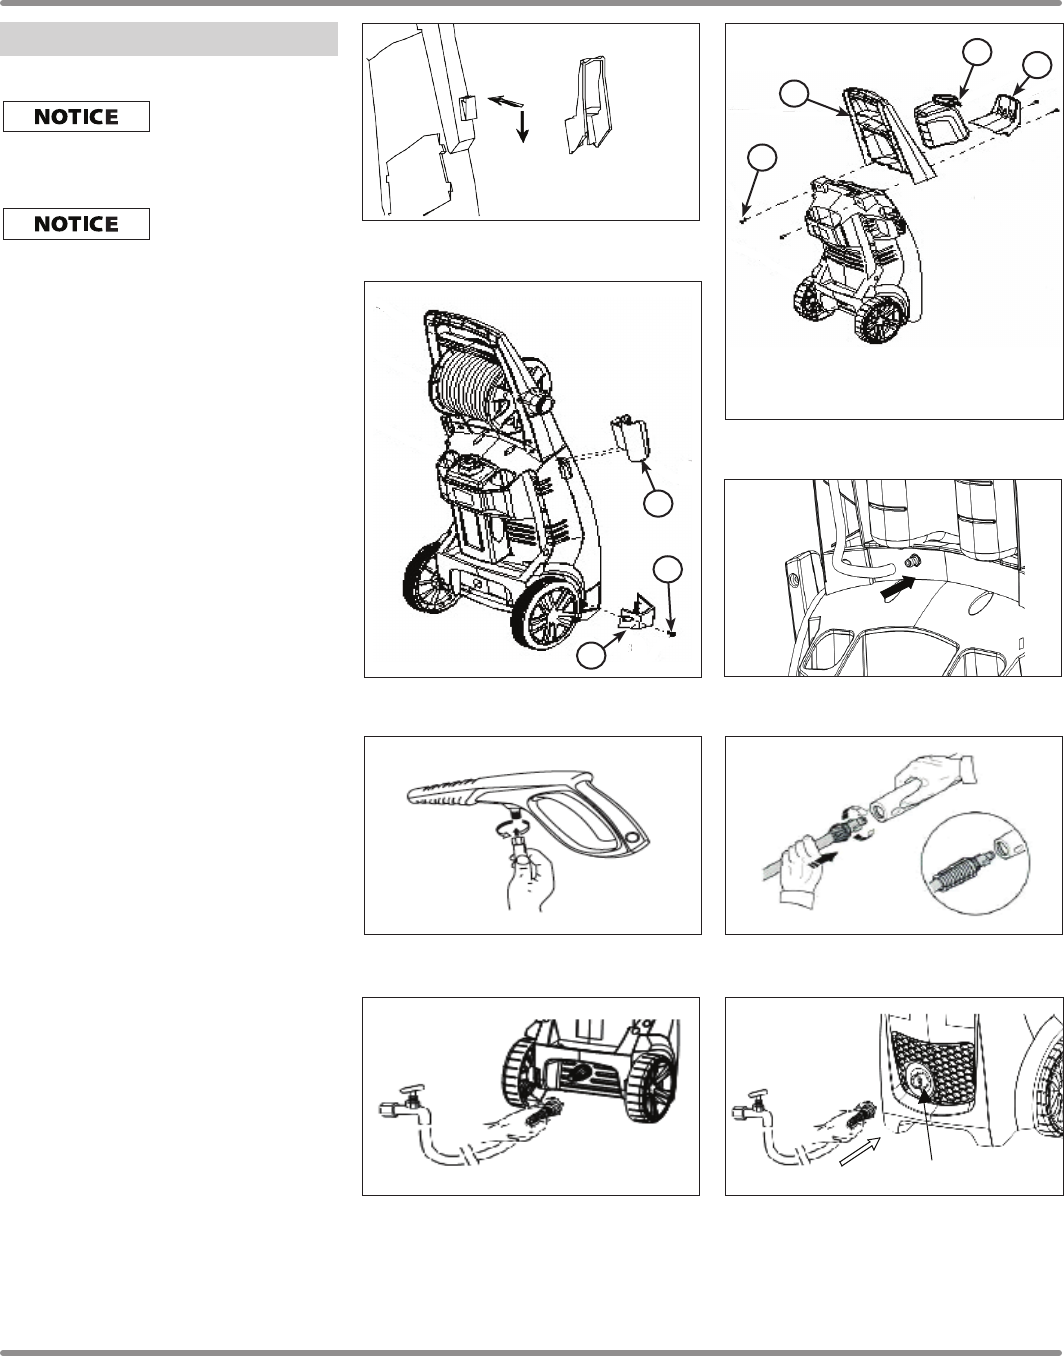
PW1625:
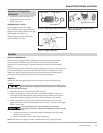
1. Attach cord holder (see Figure 7).
2. Attach high pressure hose to gun (see
Figure 11).
3. Attach lance to gun (see Figure 12).
4. Attach garden hose to unit (see Figure
13 and 15).
5. Attach high pressure hose to high
pressure outlet (see Figure 16).
PW1825:
1. Slide handle (1) onto unit (see Figure
8).
2. Attach with 2 phillips screws.
3. Slide hose hook (6) onto front of
pressure washer.
4. Attach with 2 phillips screws.
5. Slide soap tank (5) into handle.
6. Attach soap tube to unit (see Figure
10).
7. Attach high pressure hose to gun (see
Figure 11).
8. Attach lance to gun (see Figure 12).
9. Attach garden hose to unit (see Figure
13 and 15).
10. Attach high pressure hose to high
pressure outlet (see Figure 16).
PW1835:
1. Slide upper gun hook (9) onto unit
(see Figure 9).
2. Rotate lower hook (7) into slot in unit.
3. Attach lower hook (7) with phillips
screw (8).
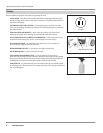
4. Attach soap tube to unit (see Figure
10).
5. Attach high pressure hose to gun (see
Figure 11).
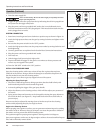
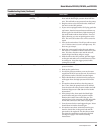
Figure 10 - Attach soap tube to unit (models
PW1825 and PW1835 only)
Figure 11 - Attach high pressure hose to
gun (all models)
Figure 12 - Attach lance to gun.
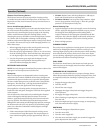
Figure 13 - Attach garden hose to unit
(models PW1625 and PW1825)
Water inlet
Figure 14 - Attach garden hose to unit
(model PW1835 only)
Water inlet
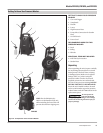
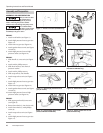
Figure 8 - PW1825 only
1
2
6
5
Figure 7 - Attach cord holder (PW1625 only)
Figure 9 - PW1835 only
7
8
9