SKU 99780-81 For technical questions, please call 1-800-444-3353. Page 9
Allow the Air Compressor to build up 7.
pressure until it cycles off.
Adjust the air compressor’s Output 8.
Regulator so that the air output is
enough to properly power the tool,
but the output will not exceed the
tool’s maximum air pressure at any
time. Turn the knob clockwise to
increase pressure and counter-clock-
wise to decrease pressure. Adjust
the pressure gradually, while check-
ing the air output gauge to set the
right pressure range.
The Air Compressor will cycle up to 9.
155 PSI before shutting off. It will
start to build pressure again when the
PSI of the Compressor drops to 125
PSI.
If the Compressor becomes too hot 10.
the circuit breaker will trip and it will
shut off. If this happens;
move the Power Switch to the OFF a.
position;
wait until the Compressor cools b.
down;
push the Circuit Breaker button;c.
turn Power Switch back to the ON d.
position and resume operation.
After the job is complete, move the 11.
Power Switch to the OFF position.
Pull up on the Safety Valve to release 12.
pressure in the tank. Squeeze the
Trigger of the air tool to release pres-
sure from the line
Turn the Drain Valve at the bottom 13.
of the Tank two turns to release any
built-up moisture. Close the valve
after moisture has drained out. Do
not remove the Drain Valve.
Drain Valve
14. Disconnect the air hose and tool.
To prevent accidents, disconnect its 15.
power supply after use. Clean, then
store the tool indoors out of children’s
reach.
REV 10a
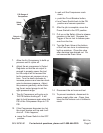
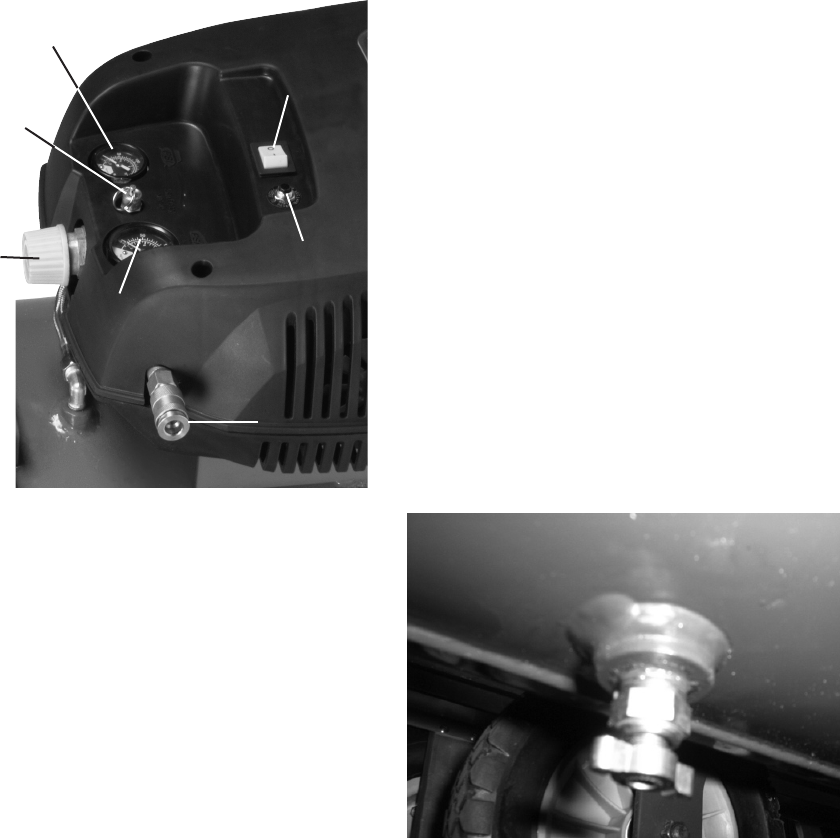
PSI Gauge of
Compressor
Safety
Valve
Power
Switch
Circuit
Breaker
Output
Regulator
PSI Gauge
for Tool
Air
Outlet
Connection


