


Operating Instructions
DMX-250C User Manual 9 Revision: 5/17/2005 10:49 PM
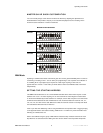
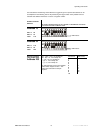
MASTER/SLAVE SHOW CUSTOMIZATION
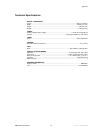
You can manually assign a slave device number to the fixtures by adjusting the dip-switches as
illustrated below. This provides a way for you to customize the playback such as creating unison
movement across selections or counter movements.
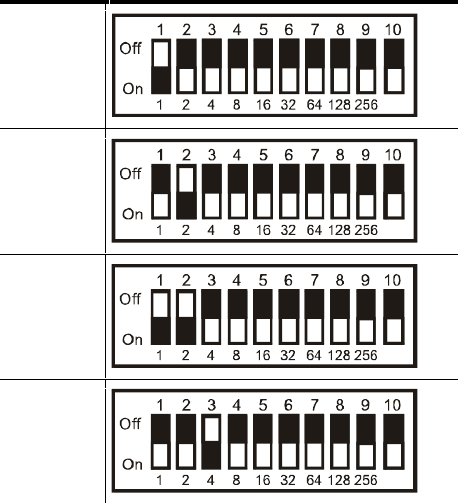
MANUAL SLAVE SETTINGS
FIXTURE 1
FIXTURE 2
FIXTURE 3
FIXTURE 4
DMX Mode
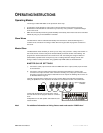
Operating in a DMX Control mode environment gives the user the greatest flexibility when it comes to
customizing or creating a show. You can tailor your programming to suit a specific event. Whether it
is a wedding where a spot light may be required or a lead singer requiring a color solo, the
opportunities are end less. In this mode you will be able to control each individual trait of the fixture
independently.
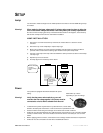
SETTING THE STARTING ADDRESS
This DMX mode enables the use of a universal DMX controller device. Each fixture requires a "start
address" from 1 to 511. A fixture requiring one or more channels for control begins to read the data
on the channel indicated by the start address. For example, a fixture that occupies or uses 6 channels
of DMX and was addressed to start on DMX channel 100, would read data from channels: 100, 101,
102, 103, 104, and 105. Choose start addresses so that the channels used do not overlap and notate
the start address selected for future reference.
If this is your first time addressing a fixture using the DMX-512 control protocol then I suggest jumping
to the Appendix Section and read the heading “DMX Primer”. It contains very useful information that
will help you understand its use.
Set the start address using the group of DIP switches located usually on bottom of the fixture. Each
dip switch has an associated value. Adding the value of each switch in the ON position will provide