


Page 8 For technical questions, please call 1-800-444-3353. SKU 08897
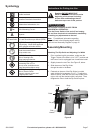
Attaching The Side Handle
1. To attach the Side Handle, simply screw the Side
Handle into the threaded mounting hole located
in the upper/left Body of the Saw.Attaching
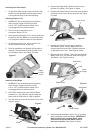
Adjusting Depth of Cut
1. WARNING! Prior to performing this procedure,
make sure the Trigger Switch of the Saw
is in its “OFF” position and the Power Cord
is unplugged from its electrical outlet.
2. The Saw may be adjusted to cut to
a maximum depth of 2-1/4”.
3. When adjusting the depth of cut, always make sure
the teeth of the Saw Blade cut (or protrude) about
1/4” through the bottom surface of the workpiece.
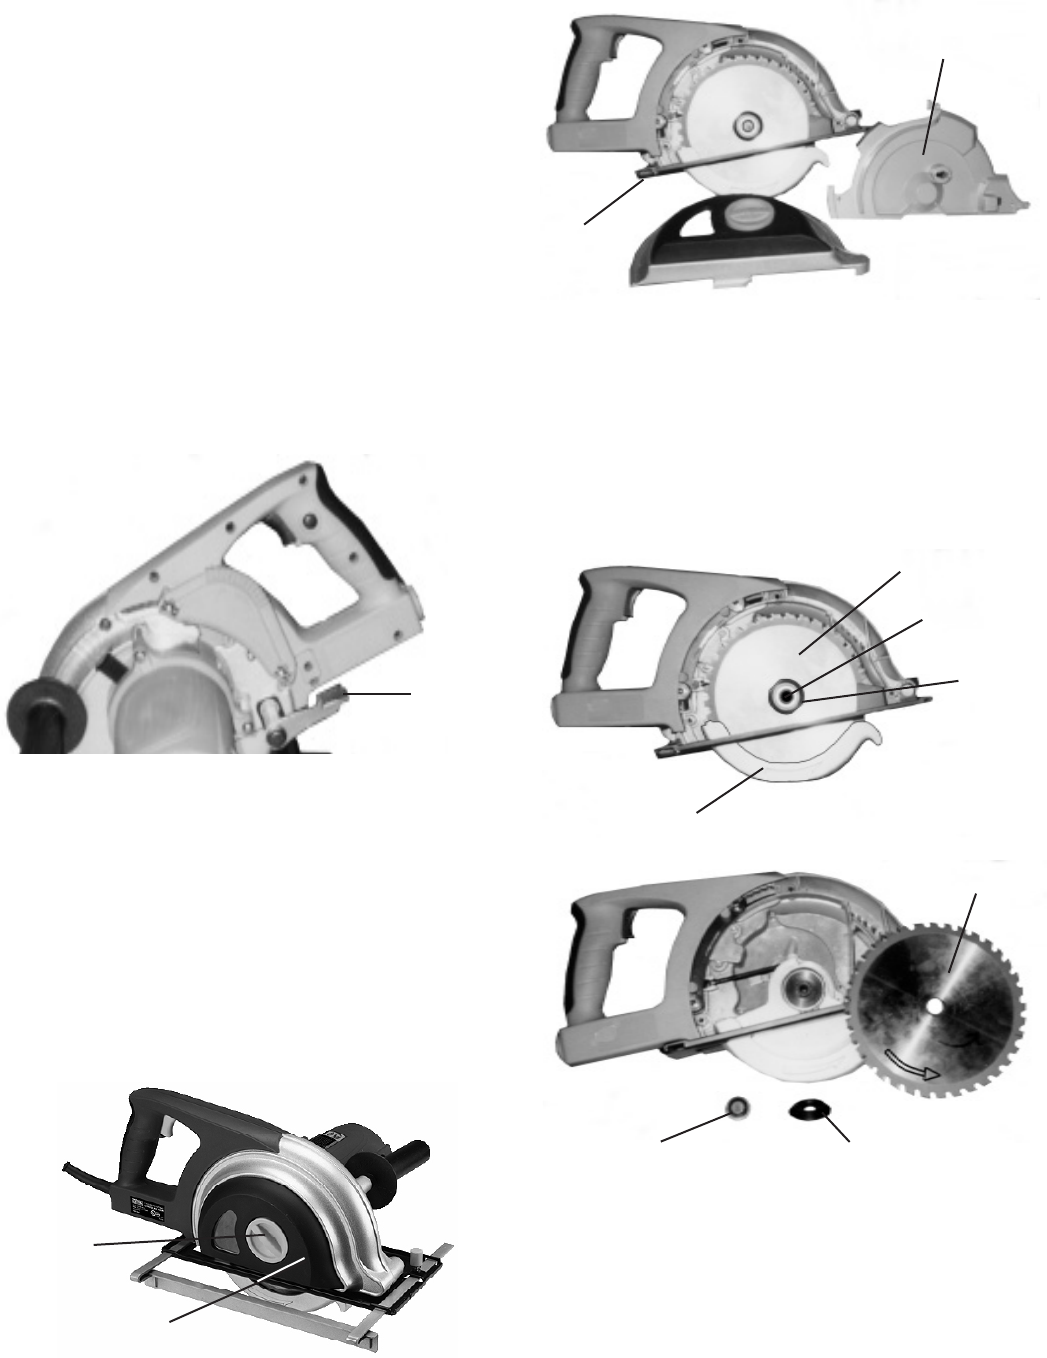
4. Toadjustthedepthofcut,pullupontheLock
LeverlocatedattherearoftheSaw.
5. Raise or lowerBase until desired cutting depth is
acquired.ThenpushdownDepthControlLever
to lock Base in place. See Figure E, below.
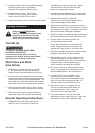
Installing a Saw Blade
1. WARNING! Prior to performing this procedure,
make sure the Trigger Switch of the Saw
is in its “OFF” position and the Power Cord
is unplugged from its electrical outlet.
2. CAUTION! Always make sure the Saw Blade
installed is a 7-1/4” diameter, metal cutting saw
blade, with an RPM rating of 5,800 or greater.
3. Turn the Knob and remove the Plastic Cover. See
Figure F, below.
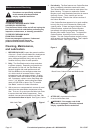
4. Remove the three phillips Screws located on the
left side of the Body. See Figure G, below.
5. DepresstheDepthControlLeverandlowertheBase
so that the Inner Cover can be removed. See Figure
G, below.
6. DepresstheDepthControlLevertoholdthe
Saw Blade in place. Use the Blade Wrench to
unscrew and remove the Bolt. Release pressure
ontheBladeLockLever.SeeFigureH,below.
7. Remove the Outer Flange. Then raise and hold the
Blade Cover in its “up” position while removing the
Saw Blade. See Figure H, below.
8. Raise and hold the Blade Cover in its “up” position
while installing the new Saw Blade. IMPORTANT:
When installing the new Saw Blade, make
sure the arrow on the Saw Blade points to
the front of the Saw. See Figure H, above.
Depth
Control
Lever
Knob
Figure E
Cover
Figure F
Base
Inner Cover
Figure G
Figure H
Saw Blade
Bolt
Outer
Flange
Outer Flange
Bolt
Saw Blade
Blade Cover