Page 12SKU 97717 For technical questions, please call 1-800-444-3353.
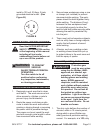
Switch (13) to its “OFF” position and
wait about 10 minutes. Then restart
the Welder. (See Assy. Diagram.)
When the weld is complete, lift the 11.
electrode clearly away from any
grounded object. Set the Welding
Shield down, and turn the power
Switch (13) to its “OFF” position.
(See Assy. Diagram.)
Unplug the Power Cord (8) from the 12.
electrical outlet.
(See Assy. Diagram.)
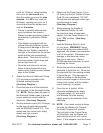
Remove the clamped Ground Cable 13.
from the object it is clamped onto.
Then remove the electrode from the
Electrode Holder (9).
(See Assy. Diagram.)
Clean and store the Arc Welder 14.
indoors out of reach of children and
other unauthorized people.
IMPORTANT: 15. Please read
the included “Weld Diagnosis
Pamphlet” for tips and suggestions
concerning welding and proper
usage.
MAINTENANCE AND
SERVICING
Procedures not specically
explained in this manual
must be performed only by a
qualied technician.
TO PREVENT
SERIOUS INJURY
FROM ACCIDENTAL
OPERATION:
Turn the Power Switch of the
tool to its “OFF” position and
unplug the tool from its
electrical outlet before
performing any inspection,
maintenance, cleaning, or
storage procedures.
BEFORE EACH USE,1. inspect the
general condition of the Arc Welder.
Check for cracked or missing
insulators, damaged electrical wiring,
and any other condition that may
affect its safe operation. If abnormal
noise or vibration occurs, have the
problem corrected before further use.
Do not use damaged equipment.
AFTER USE,2. clean external surfaces
of the Arc Welder with a clean cloth.
Use compressed air to blow all
dust and debris from the ventilation
openings. Do not hold the air nozzle
too close to the ventilation openings.
AFTER USE, 3. store the Arc Welder
in a clean, dry, safe location out of
reach of children and unauthorized
people.
4. WARNING! If the supply cord
of this Arc Welder is damaged,
it must be replaced only by a
qualied service technician.
WARNING


