SKU 99857 For technical questions, please call 1-800-444-3353. Page 9
sure that there are no wires, hoses
or other components behind the wall
that will be damaged by drilling. Use
Brackets A and B to grip the Battery
Charger. Attach to the compartment
wall using two Self Tapping Screws
(12).
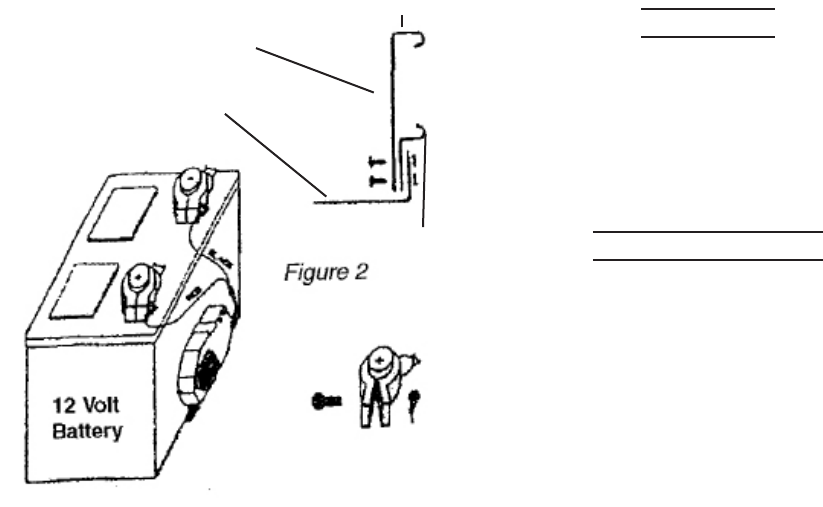
For mounting under the battery, as-5.
semble Brackets A, B and C (9, 6 and
5) as shown in Figure 2 below.
Slide Bracket C (5) under the battery 6.
to hold the Charger in place.
Be sure the Battery Charger is rmly 7.
attached and will not come loose
during normal vehicle use or during a
sudden stop. Periodically check the
Charger to be sure it is still rmly at-
tached. A loose Battery Charger can
become damaged, or damage vehicle
components.
Be sure the vehicle ignition switch is 8.
in the OFF position. Using the vehicle
battery clamp bolts, attach the round
connectors of the Output Wires (12)
to the battery. Be sure the Red Out-
put Wire is attached to the Positive
(+) terminal and the Black Output
wire is attached to the Negative (-)
terminal. Be sure all connections are
tight.
Keep Output Wires (12) and Power 9.
Cable (8) clear of fan, fan belt, pul-
leys and any other moving parts of
the engine.
Functions
When plugged in, this Battery Char-1.
ger will charge a 12 VDC battery, and
maintain the charge. You can see the
state of charge by observing the LED
lights on the Charger.
3 Stage Charging
This charger automatically works in 1.
three stages, depending on the con-
dition of your battery.
Side View of Brackets
Assembly
Slide Bracket C (5)
under Battery
Attach Output Wires
to Battery Terminals.
Bracket B (6)
Bracket A (9)


