


OPERATION
INSTALLING BITS ---- ....
1 Lock switch trigger on your ddtt by placing the
direction of rotation selector in center position.
2 Close chuck jaws to a point where the opening is
slightly larger than the bit size you intend to use,
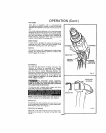
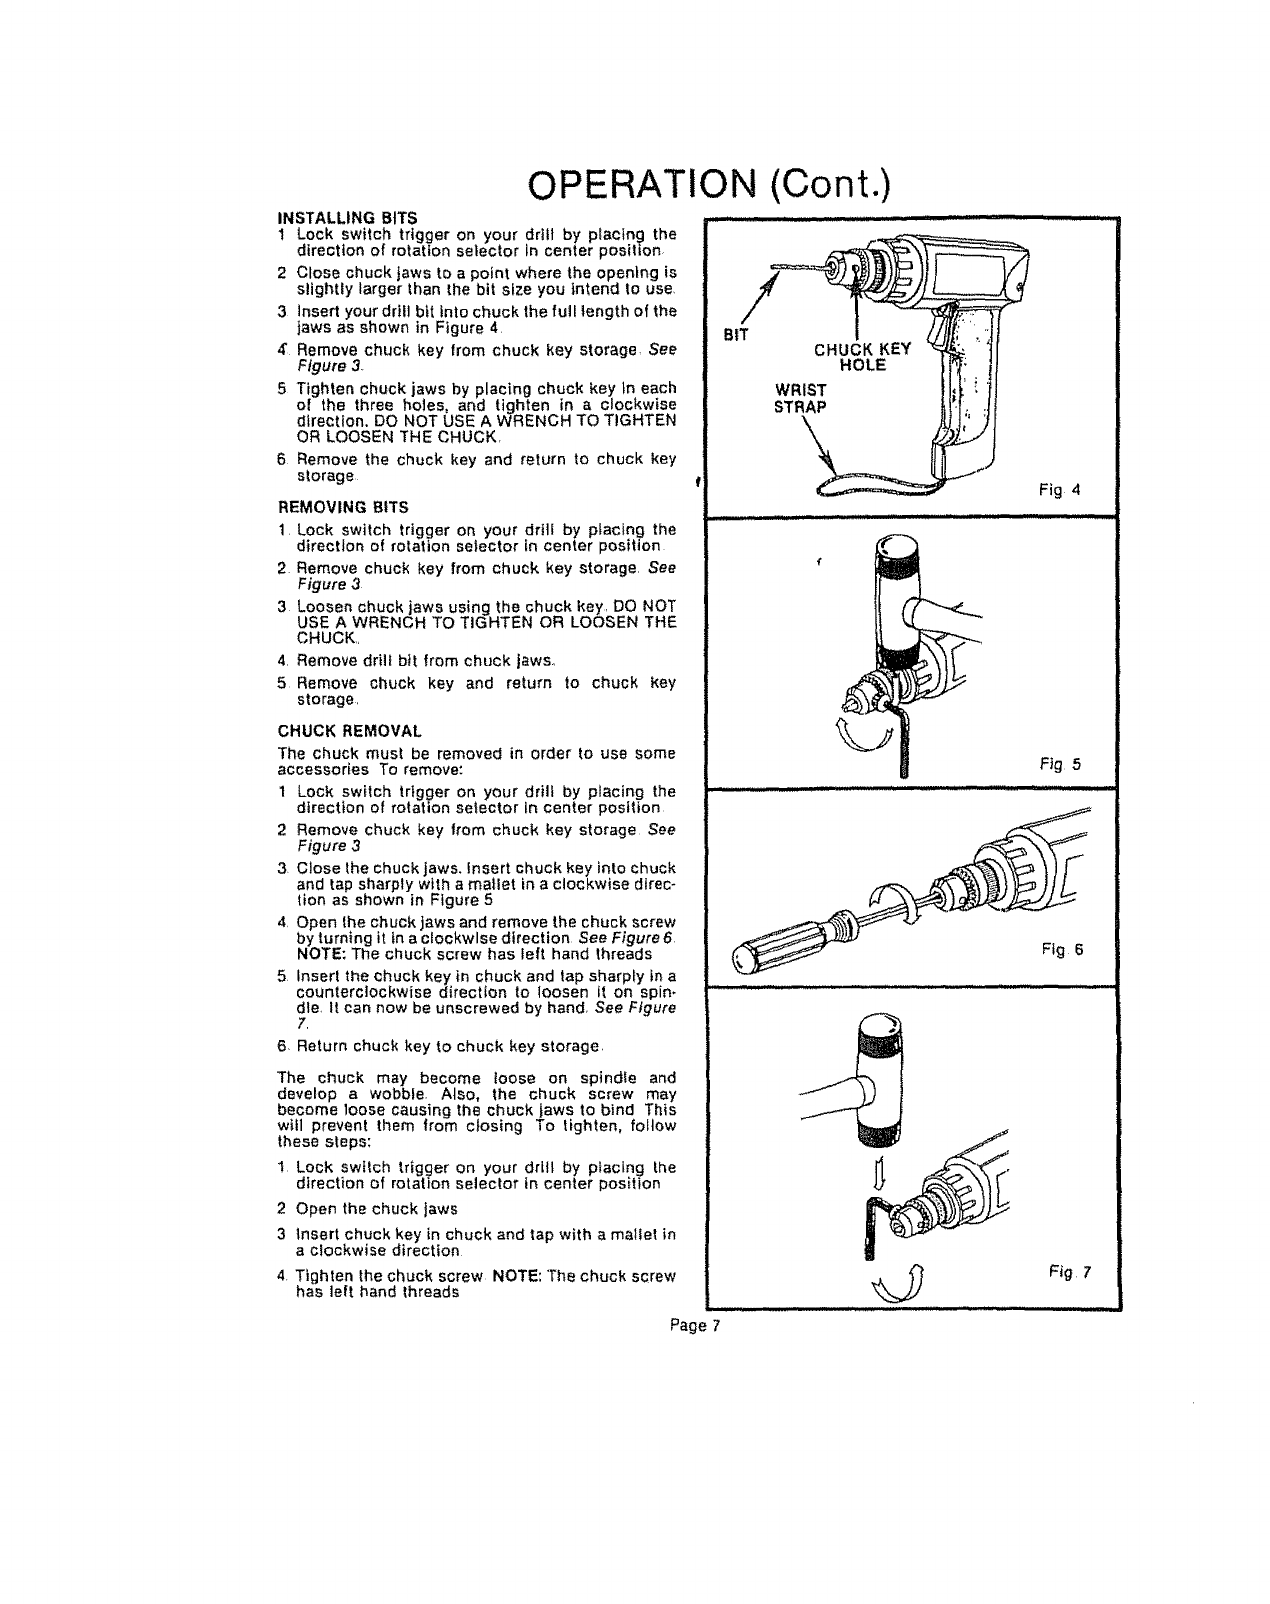
3 insert your drilJ bit into chuck the full length of the
jaws as shown in Figure 4, BIT
4" Remove chuck key from chuck key storage See
Figure 3
5 Tighten chuck jaws by placing chuck key tn each
o! the three holes, and tighten in a clockwise
direction. DO NOT USE A WRENCH TO TIGHTEN
OR LOOSEN THE CHUCK,
6. Remove the chuck key and return to chuck key
storage
REMOVING BITS
t. Lock switch trigger on your dri]! by placing the
direction of rotation selector In center position
2 Remove chuck key from chuck key storage, See
Figure 3
3 Loosen chuck jaws using the chuck key, DO NOT
USE A WRENCH TO TIGHTEN OR LOOSEN THE
CHUCK,,
4. Remove drill bit from chuck jaws.,
5 Remove chuck key and return to chuck key
storage,
CHUCK REMOVAL
The chuck must be removed in order to use some
accessories To remove:
1 LOck switch trigger on your drill by placing the
direction of rotation selector in center position
2 Remove chuck key from chuck key storage See
Figure 3
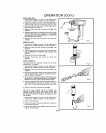
3. Close the chuck jaws. Insert chuck key into chuck
and tap sharply with a mallet in a clockwise direc-
tion as shown in Figure 5
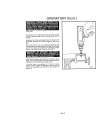
4, Open the chuck jaws and remove the chuck screw
by turning it in a clockwise direction See Figure 6
NOTE: The chuck screw has left hand threads
5. Inserl the chuck key in chuck and tap sharply in a
counterclockwise direction to loosen it on spin.
die, I1 can now be unscrewed by hand, See Figure
7,
6 Return chuck key to chuck key storage,
The chuck may become loose on spindle and
develop a wobble. Also, the chuck screw may
become loose causing the chuck jaws to bind This
will prevent them from closing To tighten, follow
these steps:
1, Lock swflch trigger on your drill by placing the
direction of rotation selector in center position
2 Open the chuck jaws
3 Insert chuck key in chuck and tap with a mallet in
a clockwise direction
4. Tighten the chuck screw NOTE; "The chuck screw
has left hand threads
Page 7
(Cont.)
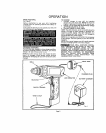
CHUCK KEY
HOLE
WRIST
STRAP
.t
Fig 4
Ftg 5
Fig 6