


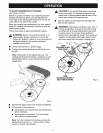
,_ WARNING: Always wear safety goggles or safety
glasses with side shields when operating this tool.
Failure to do so could result in dust, shavings,
chips, or loose particles being thrown in your eyes
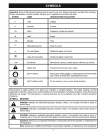
resulting in possible serious injury. If the operation
is dusty, also wear a face or dust mask.
SELECTING SANDING BELTS
Selecting the correct size and type of sanding belt is an
important step in achieving a high quality sanded finish.
Aluminum oxide, silicon carbide, and other synthetic
abrasives are best for power sanding.
In general, when sanding, coarse grit removes the most
material and fine grit produces the best finish. The
condition of the surface to be sanded determines which
grit will do the best job. If the surface is rough, start with
a coarse grit and sand until the surface is uniform. Then
use medium grit to remove scratches left by the coarser
grit. Finally, use finer grit for finishing the surface.
Always continue sanding with each grit until the surface
is uniform.
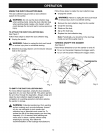
USING SANDING BELTS
TO INSTALL/CHANGE SANDING BELTS
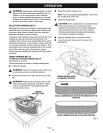
See Figures 2, 3, and 4.
Follow these steps to install or change sanding belts.
• Unplug the sander.
,_ WARNING: Failure to unplug the tool could result
in serious injury due to accidental starting.
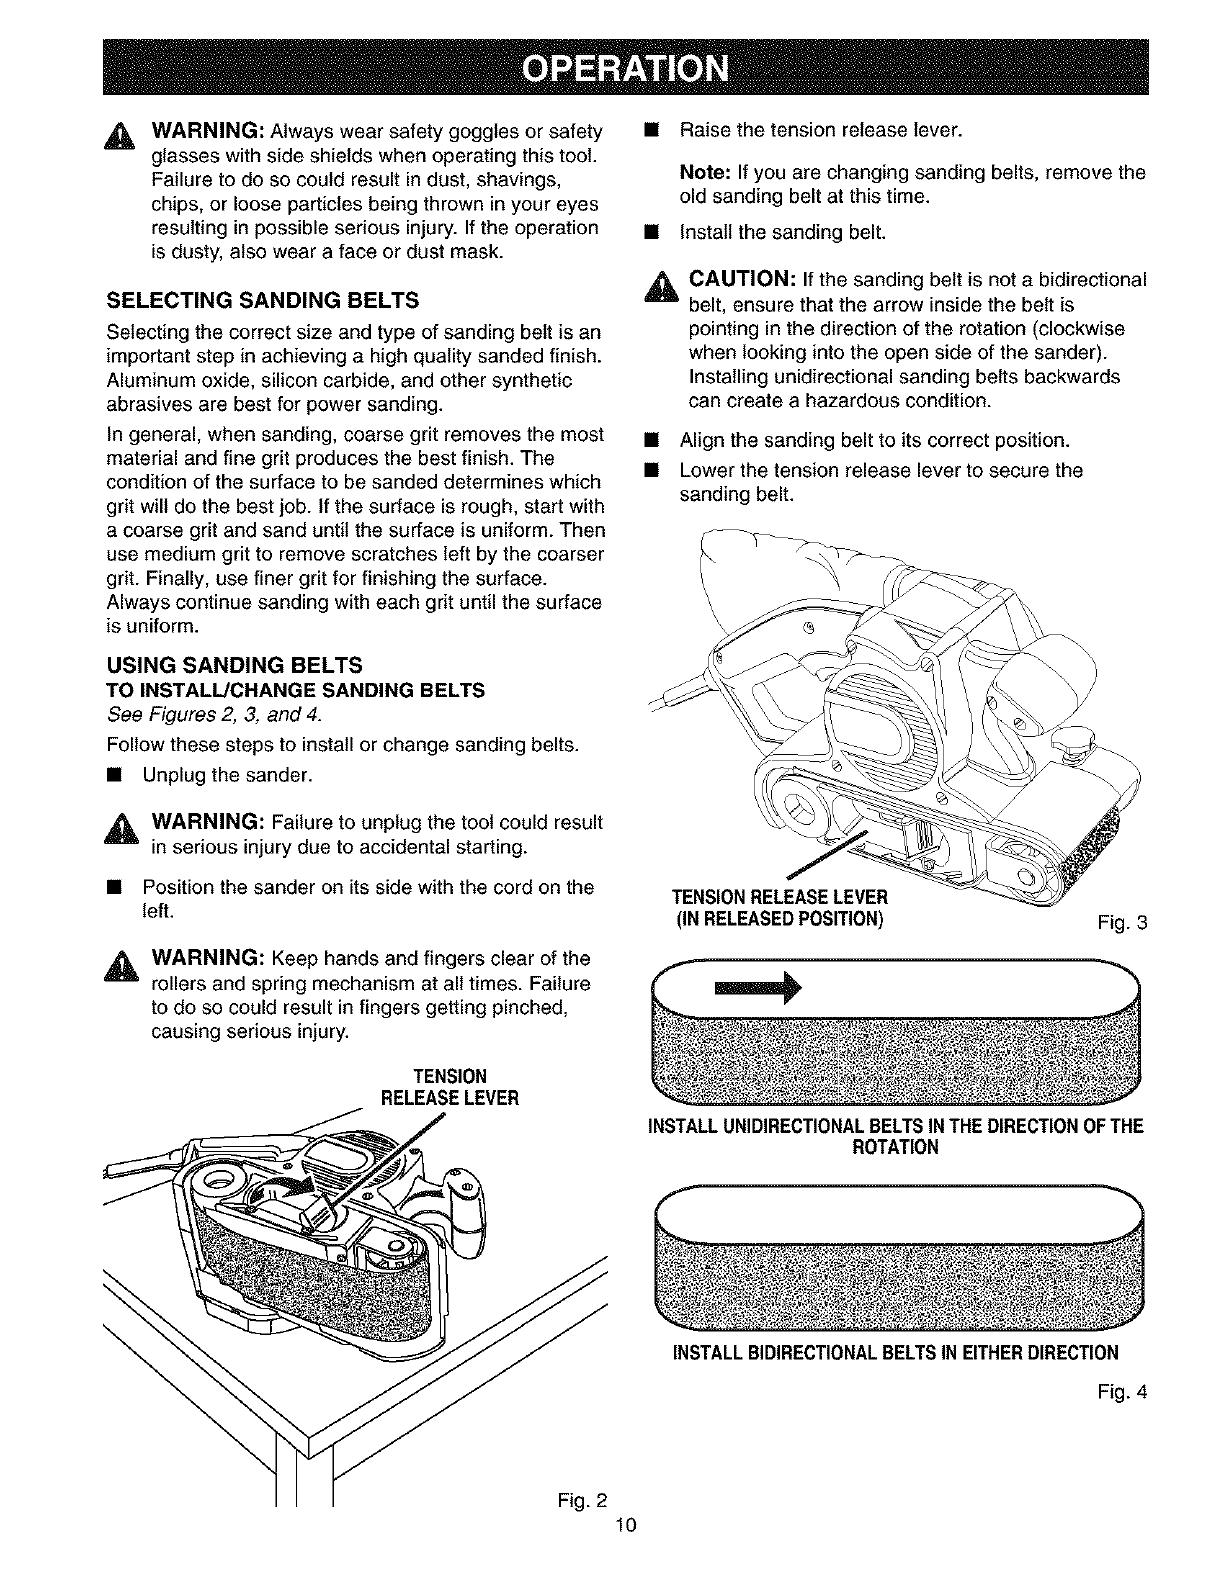
• Position the sander on its side with the cord on the
left.
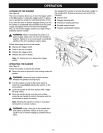
,_,1= WARNING: Keep hands and fingers clear of the
rollers and spring mechanism at all times. Failure
to do so could result in fingers getting pinched,
causing serious injury.
TENSION
RELEASELEVER
• Raise the tension release lever.
\
Fig. 2
10
A
Note: If you are changing sanding belts, remove the
old sanding belt at this time.
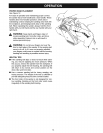
Install the sanding belt.
CAUTION: If the sanding belt is not a bidirectional
belt, ensure that the arrow inside the belt is
pointing in the direction of the rotation (clockwise
when looking into the open side of the sander).
Installing unidirectional sanding belts backwards
can create a hazardous condition.
• Align the sanding belt to its correct position.
• Lower the tension release lever to secure the
sanding belt.
\
\
\
TENSIONRELEASELEVER
(IN RELEASEDPOSITION)
Fig. 3
INSTALLUNIDIRECTIONALBELTSINTHEDIRECTIONOFTHE
ROTATION
INSTALLBIDIRECTIONALBELTSIN EITHERDIRECTION
Fig. 4