


16- ENG
A08597
SERVICE AND ADJUSTMENTS
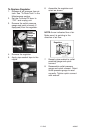
5. Unscrew the check valve (turn
counterclockwise) using a 7/8"
open end wrench.
Note the
orientation for reassembly.
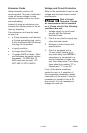
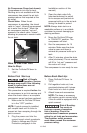
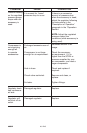
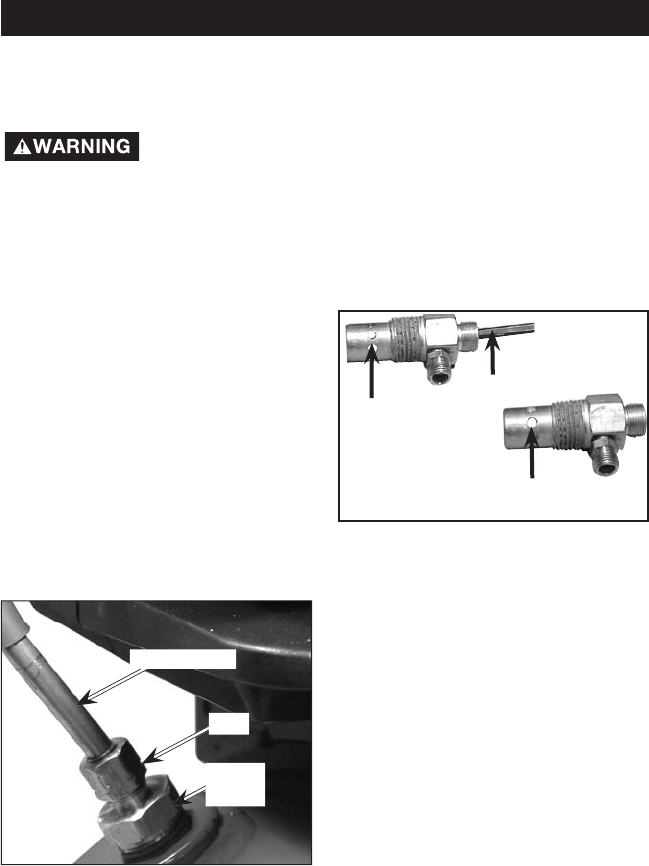
6. Using a screwdriver, carefully
push the valve disc up and
down. NOTE: The valve disc
should move freely up and down
on a spring which holds the valve
disc in the closed position; if
not the check valve needs to be
cleaned or replaced.
7. Clean or replace the check
valve. A solvent, such as paint or
varnish remover can be used to
clean the check valve.
8. Apply sealant to the check valve
threads. Reinstall the check valve
(turn clockwise).
9. Replace the pressure release
tube. Tighten nuts.
10. Replace the outlet tube and
tighten nuts.
11. Perform the Break-in Procedure.
See "Break-in Procedure" in the
Operation section.
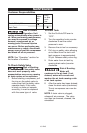
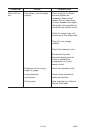
To Replace or Clean Check
Valve
1. Release all air pressure from air
tank. See "To Drain Tank" in the
Maintenance section.
2. Set the On/Auto/Off lever to
"OFF" and unplug unit.
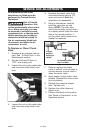
3. Loosen the nut on the outlet tube
and move the outlet tube to the
side.
4. Loosen the nut on the outlet tube
and move the outlet tube to the
side.
In closed position
disc is visible.
In open
position
nothing is
visible.
Screwdriver
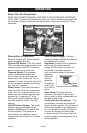
Risk of Unsafe
Operation. Unit
cycles automatically when power
is on. When servicing, you may
be exposed to voltage sources,
compressed air, or moving parts.
Before servicing unit unplug or
disconnect electrical supply to
the air compressor, bleed tank
of pressure, and allow the air
compressor to cool.
All maintenance and repair
operations not listed must be
performed by Trained Service
Technician.
Check
Valve
Nut
Outlet Tube