NOTE
W'_TER WILL CONDENSE IN THE A_RTANK.
mFNOT DRAtNED_ WATER W_LL CORRODE
AND WEAKEN THE AR TANK; CAUSING A
R_SK OF AIR TANK RUPTUREo
1!. With tank pressure at approximately 20 psi., open
the drain cock (key 43, pg. 14) and atlow moisture to
drain. Turn drain T-handle counterclockwise to open.
The drain cock is located under the outfit near the
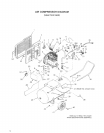
teg without the wheefs. (See pg. 6.)
If the drain cock valve is plugged, release all air
pressure. The valve can then be removed,
Scleaned, and reinstalled.
12. After the water has been drained, close the drain
cock (turn clockwise). The air compressor can now
be stored.
MAINTENANCE
UNF CYCLES AUTOMATtCALE#f WHEN POWER _SON. WHEN DOING MA_NTENANCE_ YOU MAY
BE EXPOSED TO VOLTAGE SOURCES, COMPRESSED A_R OR MOVING PAR'TS. PERSONAL
_NJURtES CAN OCCUR. BEFORE PERFORMING MAINTENANCE OR REPAIR UNPLUG THE UNiT
AND BLEED OFF ALL A_R TANK PRESSBREo NEVER OPERATE THE UNiT WITH THE BELT
GUARD REMOVED°
Air Compressor
A clean air compressor runs cooler and provides longer
service. Clean or blow off fins and any other parts of the
air compressor that collect dust or dirt. Do not place
rags, containers or other material on or against the venti-
lation openings in the belt guard. Adequate ventilation is
necessary to maintain proper air compressor operating
temperature.
Air Filter - _nspection and Repmacement
NOTE
Keep the air filter clean at afl times. Do not oper-
ate the compressor with the air filter removed.
A dirty air filter will not allow the compressor to operate
at full capacity. Before you use the compressor, check
the air filter to be sure it is clean.
If it is dirty, repIace it with a new filter. The filter may be
removed by using a pair of needle nosed pliers or a
screwdriver. Pull or pry out the old filter. Push in the new
air filter.
OH - Checking and Changing
Overfilling with oim win cause premature
compressor failure. Do not overfill.
Check oil tevel in the crankcase daily. Remove the oil fill
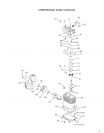
plug (Key no. 81, pg. 15). The oil level should be even
with the top of the fill hole and must not be allowed to be
lower than %" from the top (6 threads) at any time. It is
recommended that the oil be changed after every 100
hours of operation. Todrain the oiI, remove the oil drain
ptug and collect the oil in a suitable container. Be sure to
replace the ptug securely before adding new oil. Use a
special compressor oil such as Sears 9q6426 or SAE
20-20W SF motor oil. (Crankcase oil capacity is 16 fluid
ounces.) Under extreme winter conditions use SAE
10W. Multi-viscosity oil (10W30) will leave carbon
deposits on critical components which wil! reduce per-
formance and compressor life.
Check Valve - Replacement
1. Release air pressure from the air tank.
2. Loosen the top and bottom tube nuts and remove the
outlet tube.
3. Unscrew the check valve (turn counter-clockwise)
using socket wrench.
4. Check that the valve disc moves freely and that the
spring holds the disc in the upper, closed position.
The check valve may be cleaned with a solvent such
as paint thinner or carburetor cleaner.
5. Apply sealant to the check valve threads. Reinstall the
check valve (turn clockwise). Do not over tighten.
6. Replace the outlet tube and tighten top and bottom
tube nuts.
Safety Valve - _nspection
[
_F THE SAFETY VALVE DOES NOT WORK
PROPERLY OVERoPRESSUR_ZAT_ON MAY
OCCUR, CAUSING A_R TANK RUPTURE OR
EXPLOSION. OCCASIONALLY PULL TNE
R_NG ON THE SAFETY VALVE TO MAKE
SURE THAT TNE SAFETY VALVE OPEN°
ATES FREELY. _FTHE VALVE _SSTUCK OR
DOES NOT OPERATE SMOOTHLY, IT MUST
BE REPLACED W_TN A VALVE HAVING THE
SAME PRESBURE R_[_NG_
Motor
The motor has a manual thermal overload protector. If
the motor overheats for any reason, the overload protec-
tor will shut off the motor. The motor must be altowed to
cool down before restarting. _Jrn the unit off. To restart,
depress the red reset button located on the end of the
motor and turn the unit on.
0


