


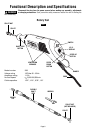
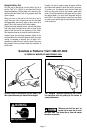

#560
Drywall Cutting Bit
For use in drywall.
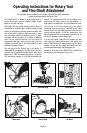
• When inserting the #560 bit into your MultiPro tool,
make sure that the bit has been inserted as far as
possible.
• When making freehand cuts in drywall, example
repairing a hole in drywall, use the Multipurpose bit
#561,cutting in a clockwise direction. When using a
template (outlet box) behind the drywall, use the
drywall bit #560, cutting in a counter-clockwise
direction.
#561
Multipurpose Cutting Bit
For use in wood, plastics, drywall, fiberglass, vinyl
or aluminum siding, acoustical tile and laminates.
• When inserting the #561 bit into your MultiPro tool,
make sure that the bit has been inserted as far as
possible.
• When making freehand cuts in Drywall, example
repairing a hole in drywall, use the Multipurpose bit
#561, cutting in a clockwise direction. When using a
template (outlet box) behind the drywall, use the
drywall bit #560, cutting in a counter-clockwise
direction.
• When using #561, Multipurpose Cutting Bit, and
#562, Tile Cutting Bit, start the bit into the material at
a 45 degree angle and then slowly bring it to a 90
degree angle to begin the cut.
#562
Tile Cutting Bit
For use on wall tile, cement board and plaster
• When inserting the #562 bit into your MultiPro tool,
it is very important that 1/16”-1/8” of smooth shank
remains visible above the collet.
• When using #56
1
, Multipurpose Cutting Bit, and
#562, Tile Cutting Bit, start the bit into the material at
a 45 degree angle and then slowly bring it to a 90
degree angle to begin the cut.
• NOT FOR USE ON FLOOR TILE
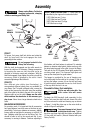
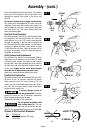
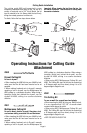
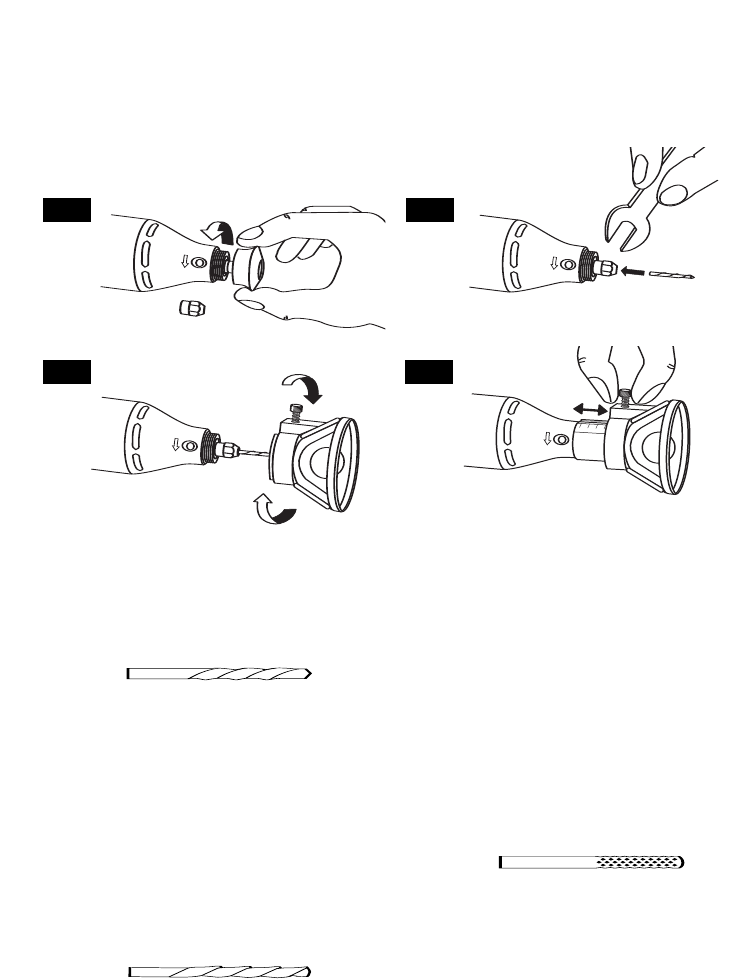
The cutting guide 565 (sold separately) comes
completely assembled and ready to use. For use in a
variety of materials up to 3/4” thick. Match the bit
type to material to be cut. Always hold the tool firmly,
using slow steady pressure to make cuts.
To attach, follow the four steps shown below.
Important: When viewing the tool from the top, the
bit rotates clockwise. Feed direction of cutting must
be counter-clockwise.
Page 9
3
/4
1
/2
1
/4
0
FIG. 1 FIG. 2
FIG. 3
FIG. 4
Cutting Guide Installation
Operating Instructions for Cutting Guide
Attachment