


5
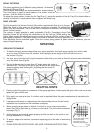
HELPFUL HINTS
1. Evenly control the speed of movement of the spray applicator. A fast speed will give a thin coat and a slow
speed will give a thick coat.
2. Only apply one coat at a time. If a further coat is required follow the paint manufacturer’s instructions for
drying times.
3. If spraying small areas or objects keep the output setting low as this will avoid
excessive use of paints and will minimise overspray.
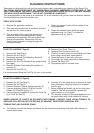
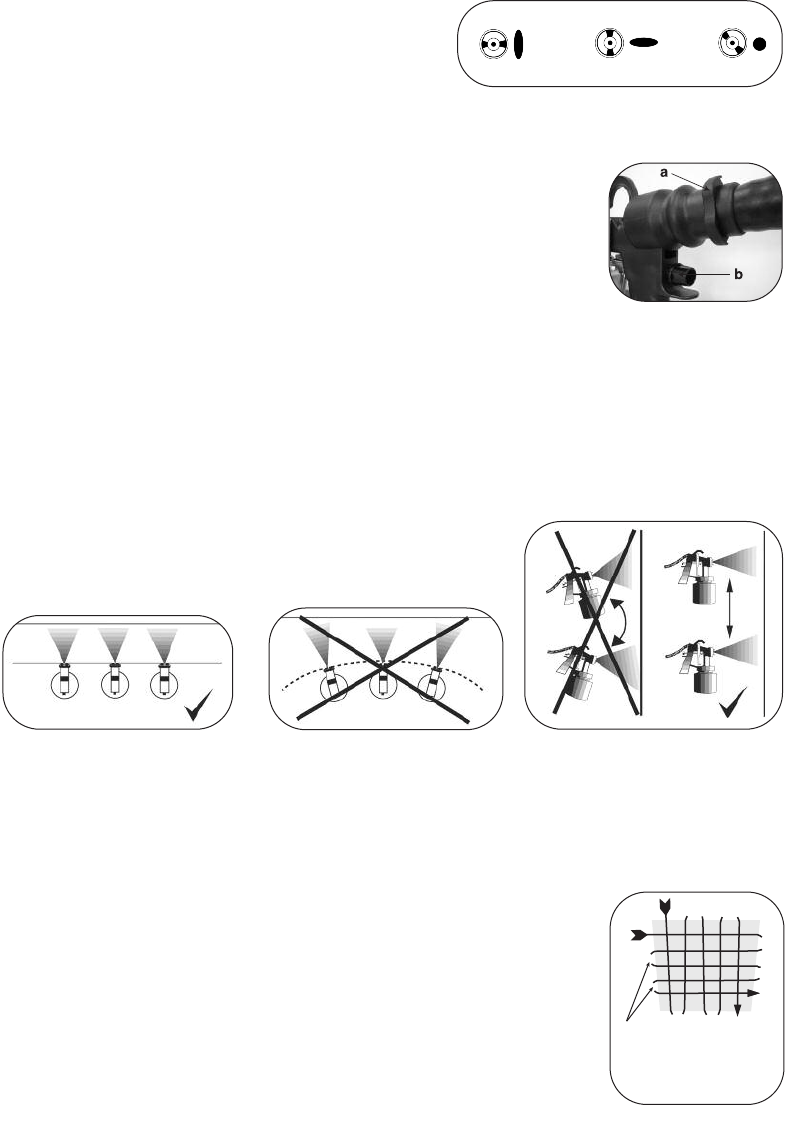
4. When spraying large areas or objects, it is best to use a criss-cross pattern,
either from left to right then up or down or vice-versa. This will ensure maximum
coverage (Fig.7).
5. Avoid stopping and starting when spraying as this can lead to too much or not
enough material on a surface.
6. To ensure edges are covered, commence spraying just to the side of area being
sprayed.
7. CLEAN SPRAYER AFTER EVERY USE (SEE CLEANING INSTRUCTIONS)
Let go of the trigger at the
end of each spray
movement to avoid
excessive paint and drips
Fig.7
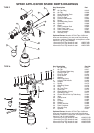
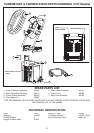
SPRAY PATTERNS
The spray applicator has 3 different spray patterns – Horizontal,
Vertical and Round (Fig.4)
The horizontal and vertical are recommended for large surfaces.
The round spray is used for small objects or for areas - such as
corners – that are difficult to reach.
To adjust the spray pattern, loosen the Air Cap Ring (1), adjust the position of the Air Cap (2) to obtain either a
vertical, horizontal or round pattern then re-tighten the aircap ring.
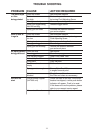
PAINT VOLUME
Fig.5(a) shows the Air Volume Control Valve which regulates the flow of air to the gun.
When the Valve is fully open you will achieve maximum coverage. To achieve this
rotate ‘fully’ anti-clockwise. This is to be used in conjunction with the Fluid Adjusting
Screw for best results.
The volume of paint sprayed is easily adjustable (Fig.5b). Completely close Fluid
Adjusting Screw (B) by turning this clockwise as far as it will go. Whilst pulling the
trigger, begin turning the adjustment screw counter-clockwise until the volume of paint
you require is obtained. If the paint spray is too wide or contains too much paint turn the
Fluid Adjusting Screw clockwise again. Once the correct spray pattern & paint volume is obtained, you are
ready to begin spraying.
Fig.4
Vertical Jet Round JetHorizontal Jet
F
ig.5
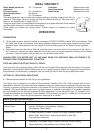
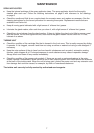
SPRAYING
SPRAYING TECHNIQUE
1. To obtain the best results always keep your spray applicator level and spray equally from side to side
or up or down 25-30cm from the surface. Avoid spraying at an angle as this will lead to runs on
the surface (Fig.6a).
2. Let your arm control the left to right movement rather than your wrist as this will aid even paint distribution
over the whole area (Fig.6b).
3. Do not tip the sprayer to more than 45
o
angle when the motor is
switched OFF. You can tip the spray gun at more of an angle when
spraying celings and decking etc, providing that the motor is
switched ON.
Fig.6a
Fig.6b
Fig.6c